Set Up Your Data Collection
Use the following scenario as an example to quickly get started with the automatic data collection workflow:
-
When a newly generated
.mcapfile on the device contains the topic/error_status, and thedatafield of that topic includes event codes1001 ~ 1005, data from 5 minutes before to 1 minute after the timestamp will be automatically collected and saved to a record. Example message:
Prerequisites
-
Prepare a Linux device.
-
Create a project named
auto-upload. -
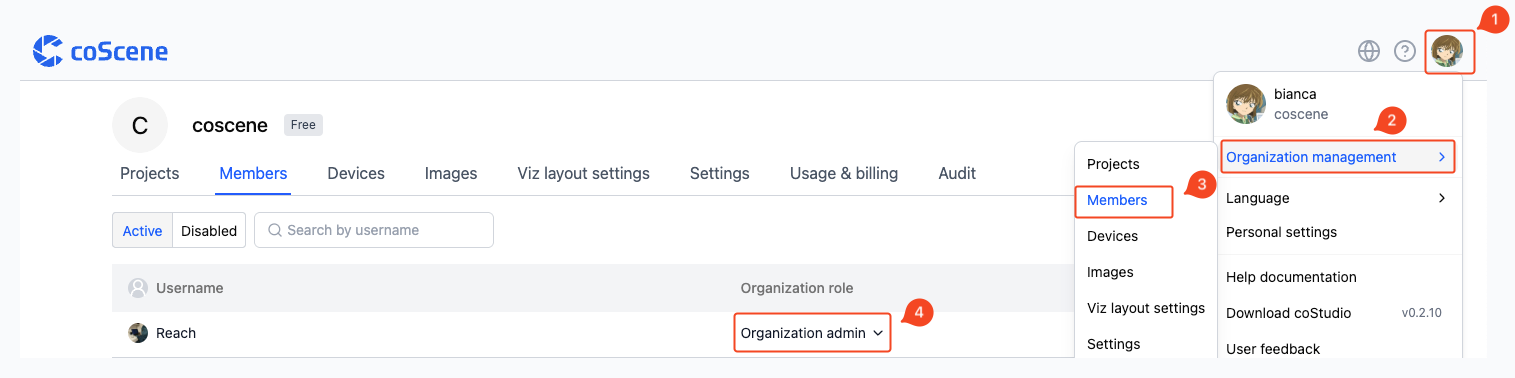
Make sure your role is “Organization Admin”. If not, contact your organization admin to update your role.
Device Configuration
-
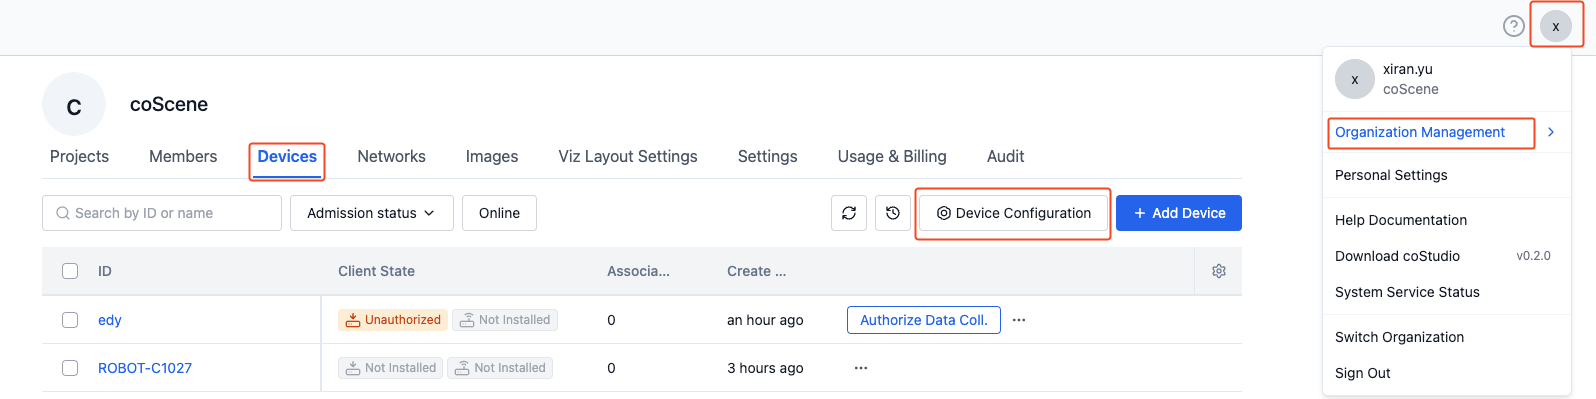
Go to the Organization Management > Devices > Device Configuration page and configure global rule-based data collection settings.
-
Assuming the bag file directory on the device is
/home/bagand the topic to monitor is/error_status, configure it as follows:mod:# mod name, default is 'default'name: 'default'conf:# Enable status, default is trueenabled: true# (For rule-based collection) Directory to listen to on the devicelisten_dirs:- /home/bag/# (For manual and rule-based collection) Directory to collect fromcollect_dirs:- /home/bag/# (For rule-based collection) Topics available for trigger matchingtopics:- /error_statusFor more configuration options, see Device Configuration Format.
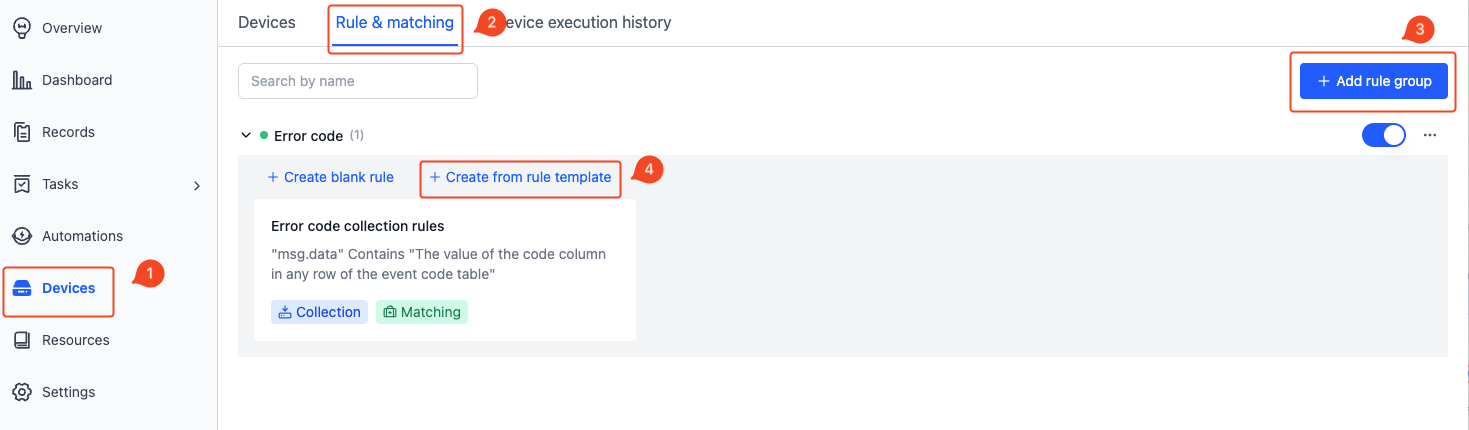
Create Rule
-
Enter the auto-upload project
-
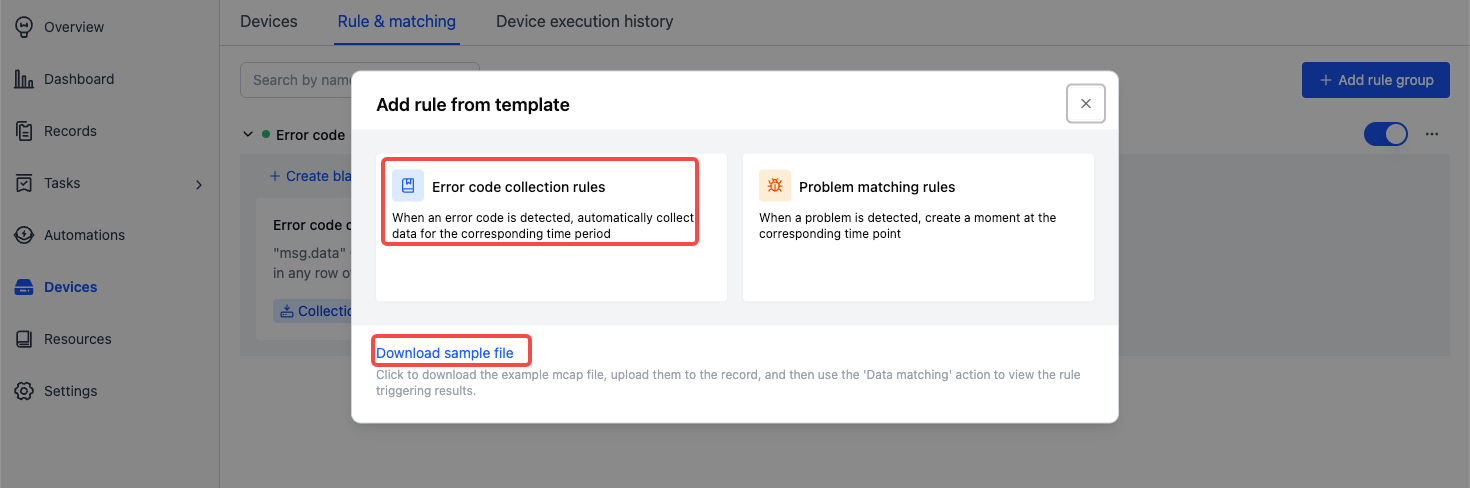
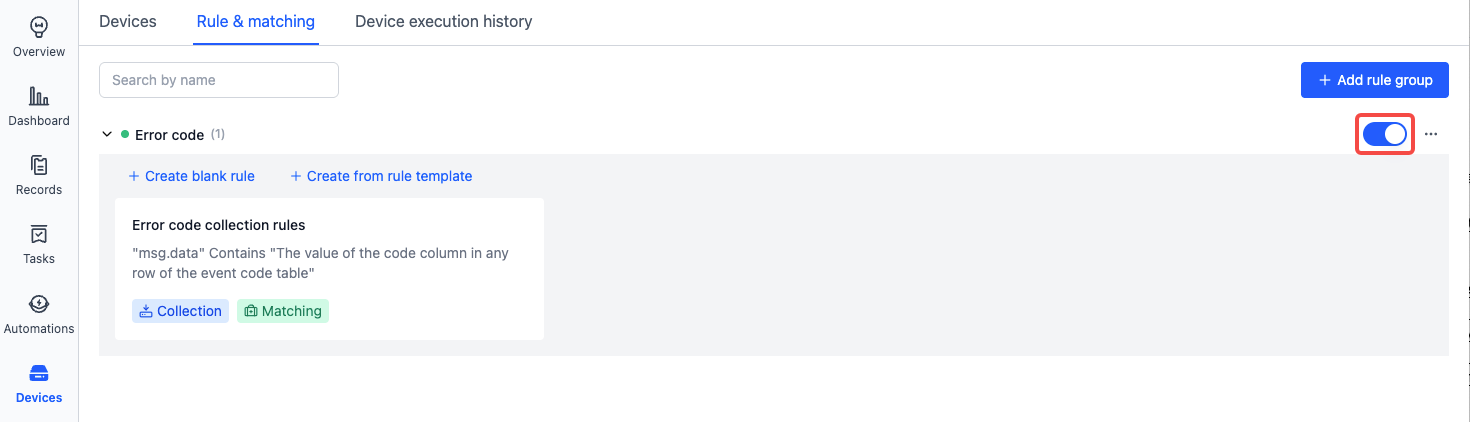
Go to Devices > Rules & matching page and create a rule from a template.
-
Choose the error code collection rule and download the sample .mcap file.
-
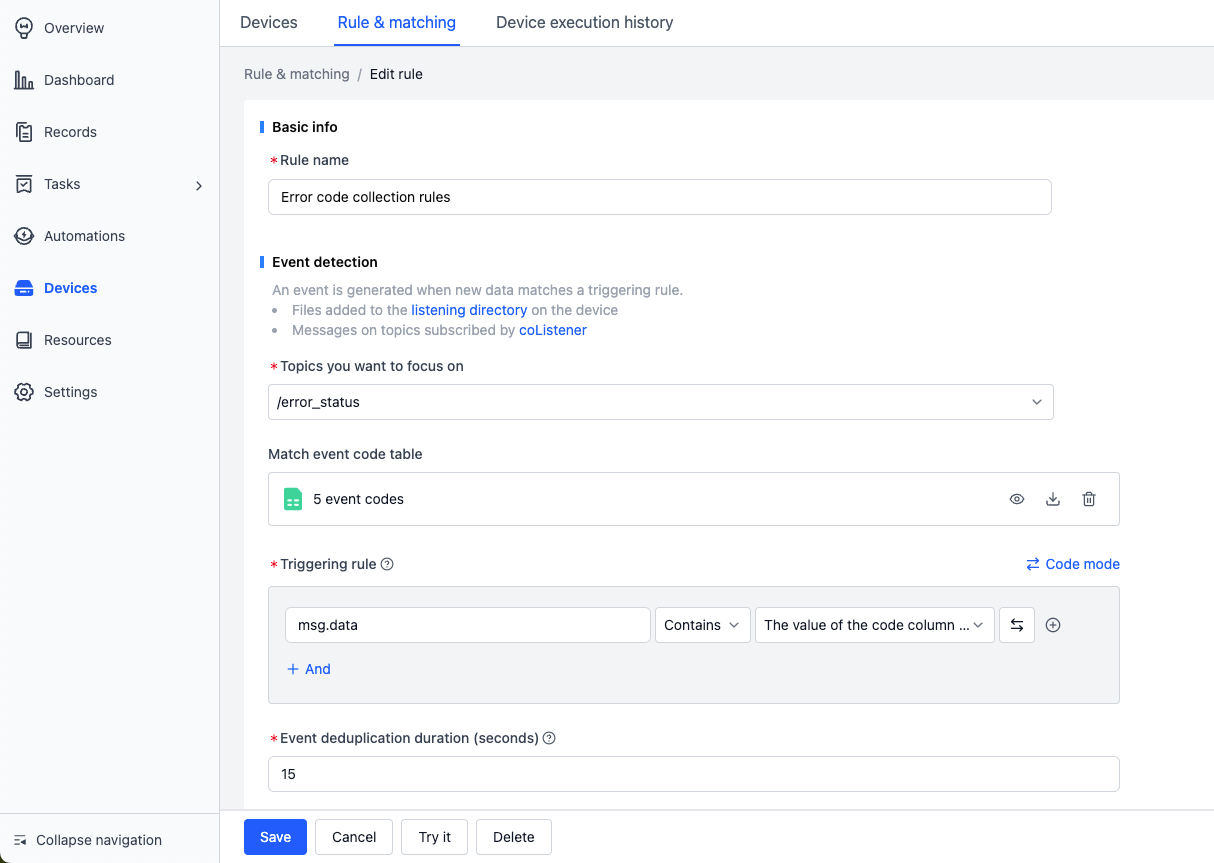
View and save the rule:
-
Event detection
-
Topic to monitor: /error_status
-
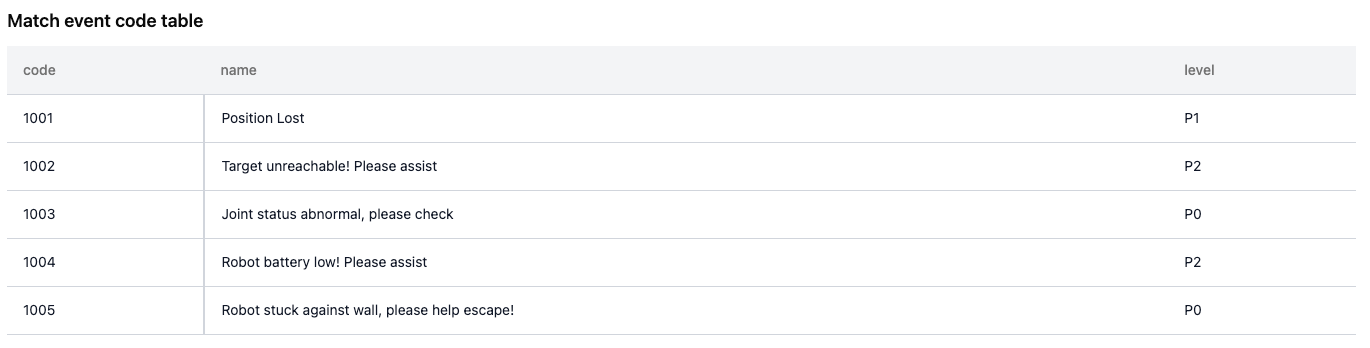
Error code list: Upload a CSV/JSON file formatted with a code column, like:
-
Trigger condition: mag.data contains any value from the code column
This means: monitor topic /error_status, and check whether the data field contains keywords 1001 ~ 1005
-
-
Data collection
- Time Range:
- Collect files from
collect_dirs5 minutes before and 1 minute after the trigger timestamp - Time is determined based on file content
- Collect files from
- Record: Used to identify where the data from each collection will be saved.
- Example:
code: {scope.code}-name: {scope.name}. If event code1002is triggered, the record will be named:code:1002-name: Target unreachable! Please assist
- Example:
- Time Range:
-
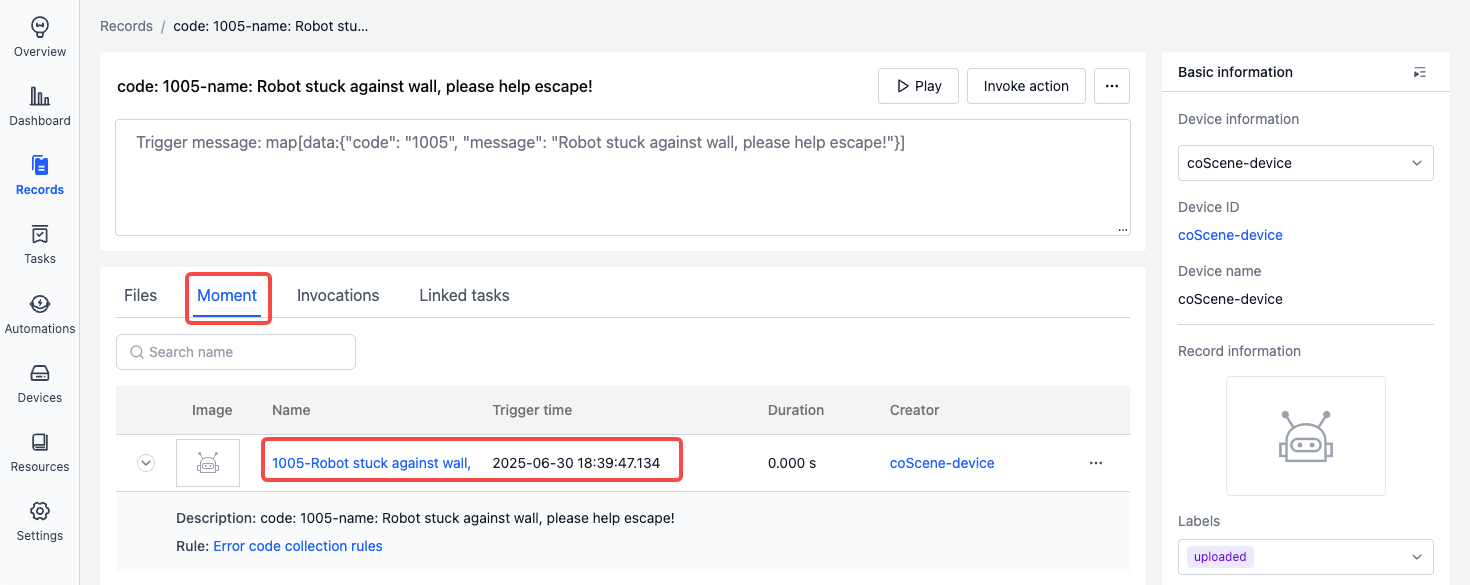
Key moment identification
- After data is uploaded to the record, a "Moment" will be created at the trigger time for later analysis.
-
-
Enable the rule Only after enabling the rule will devices in the project begin monitoring based on the rule.
*See more rule condition examples in Rules
Add Device to Project
-
Create the monitoring and collection directory
/home/bagon the device:cd /homemkdir bag -
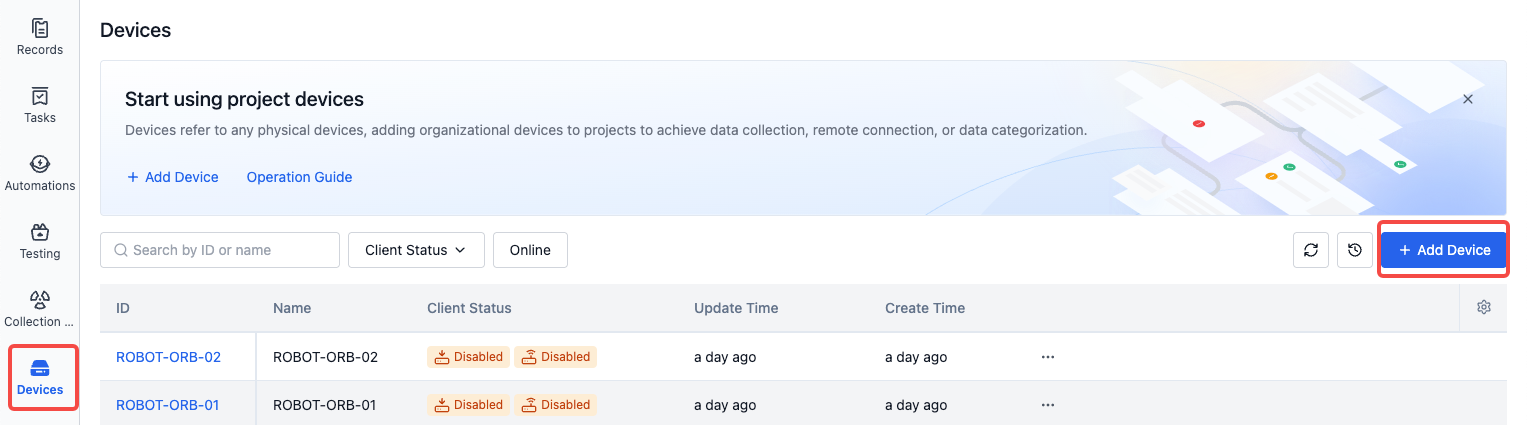
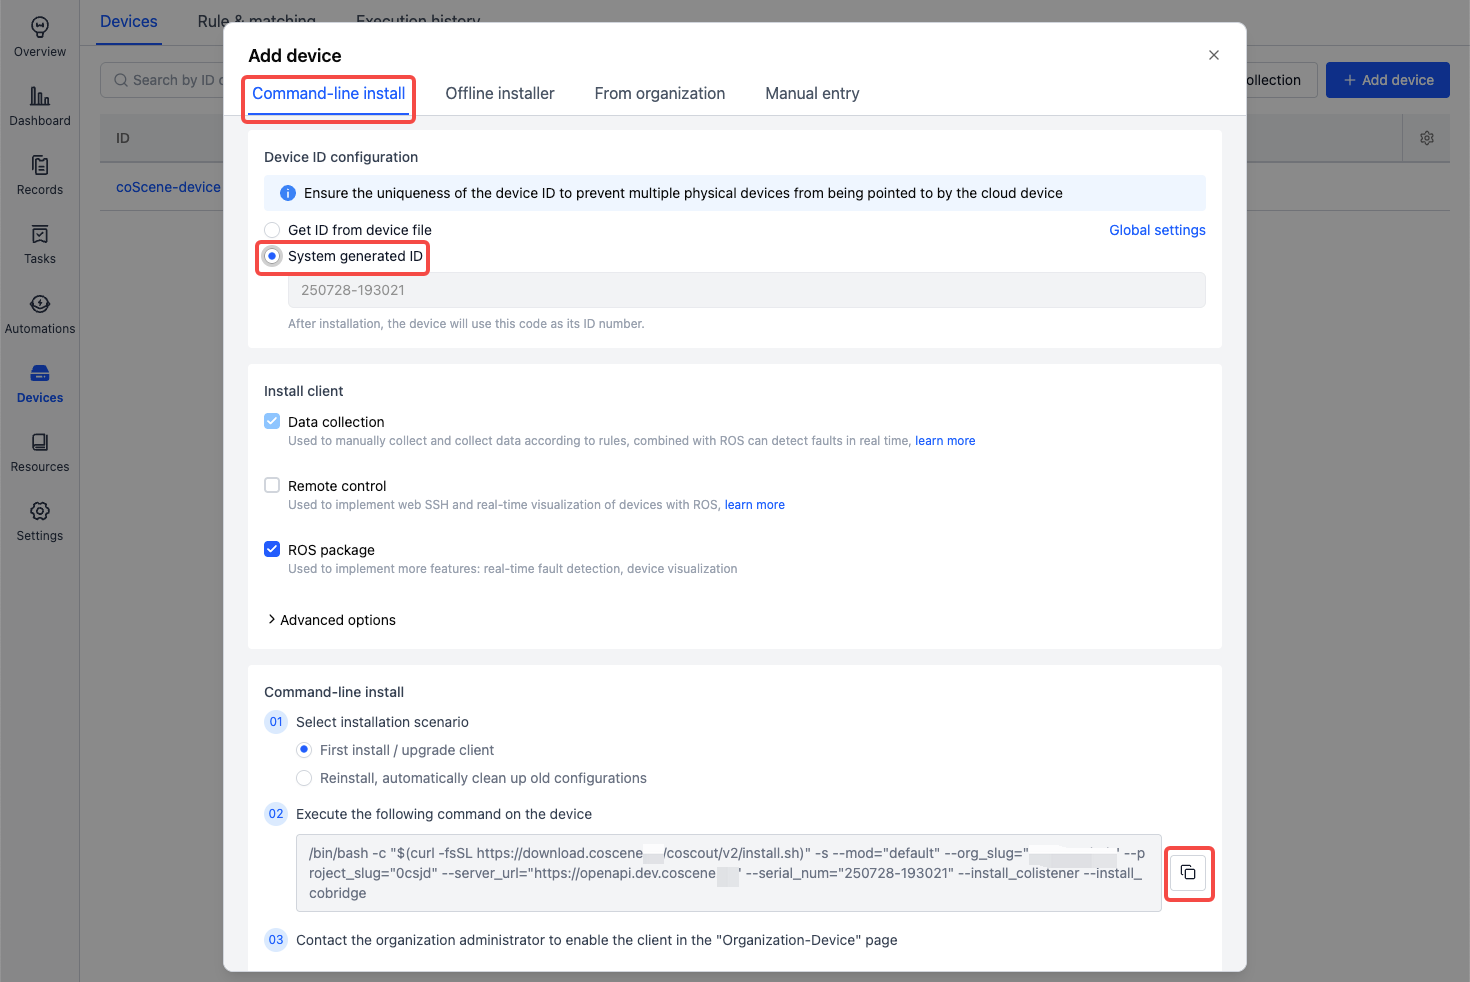
Go to Project > Devices page to get the device installation command.
-
Run the installation command on the device:
-
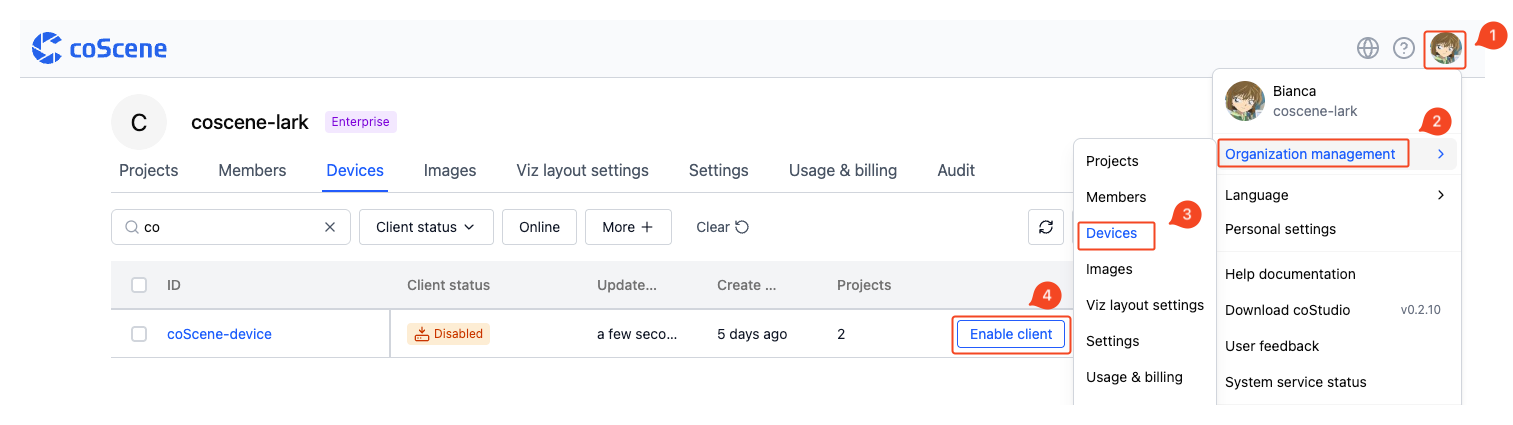
After installation, the device will be automatically added to the project. Go to Organization Management > Devices to enable the device, and it will start collecting data automatically based on the rule.
Write File on the Device
-
Confirm the device has received the rule
-
View logs on the device using the following command:
tail -f ~/.local/state/cos/logs/cos.log -
If you see
received rulesin the logs, the rule was received successfully.
-
-
Copy the .mcap file from step 3 of Create Rule to the device directory
/home/bag/. -
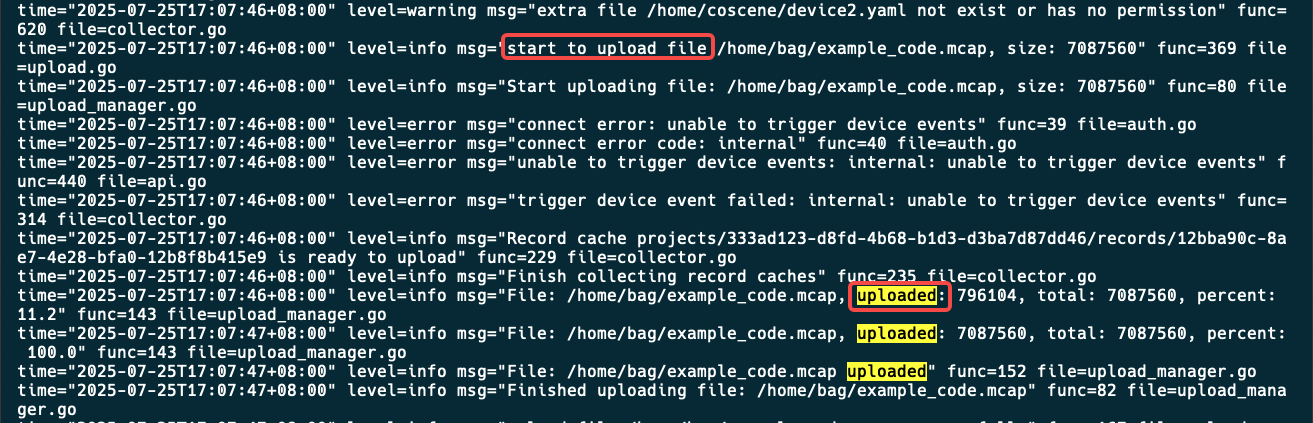
Automatic .mcap upload:
-
If the logs show the following, it means a rule was triggered:
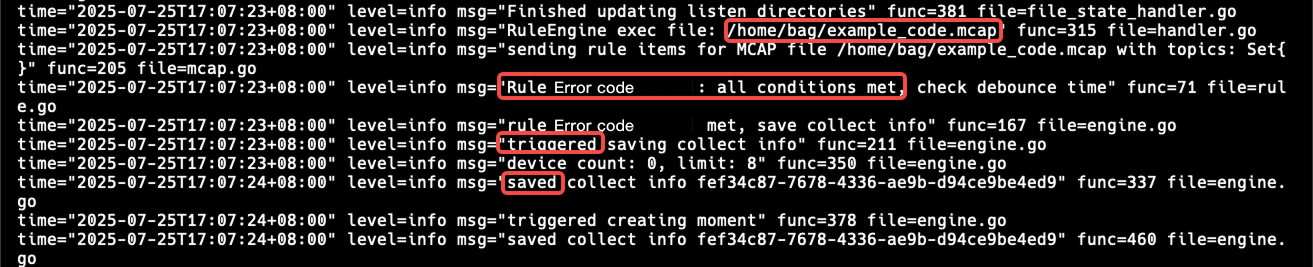
-
If the logs show uploaded, the .mcap file was successfully uploaded.
-
View Created Records
-
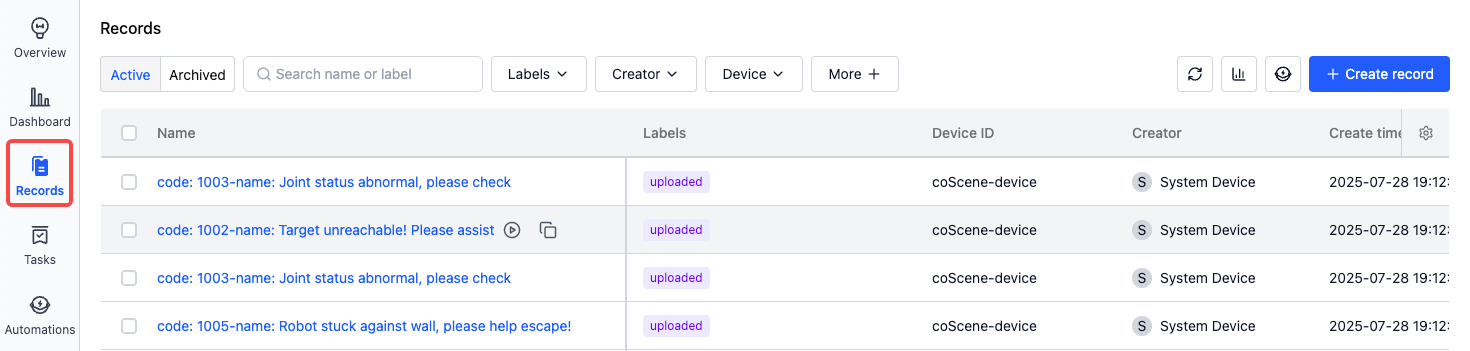
Enter the project and view the automatically created records:
-
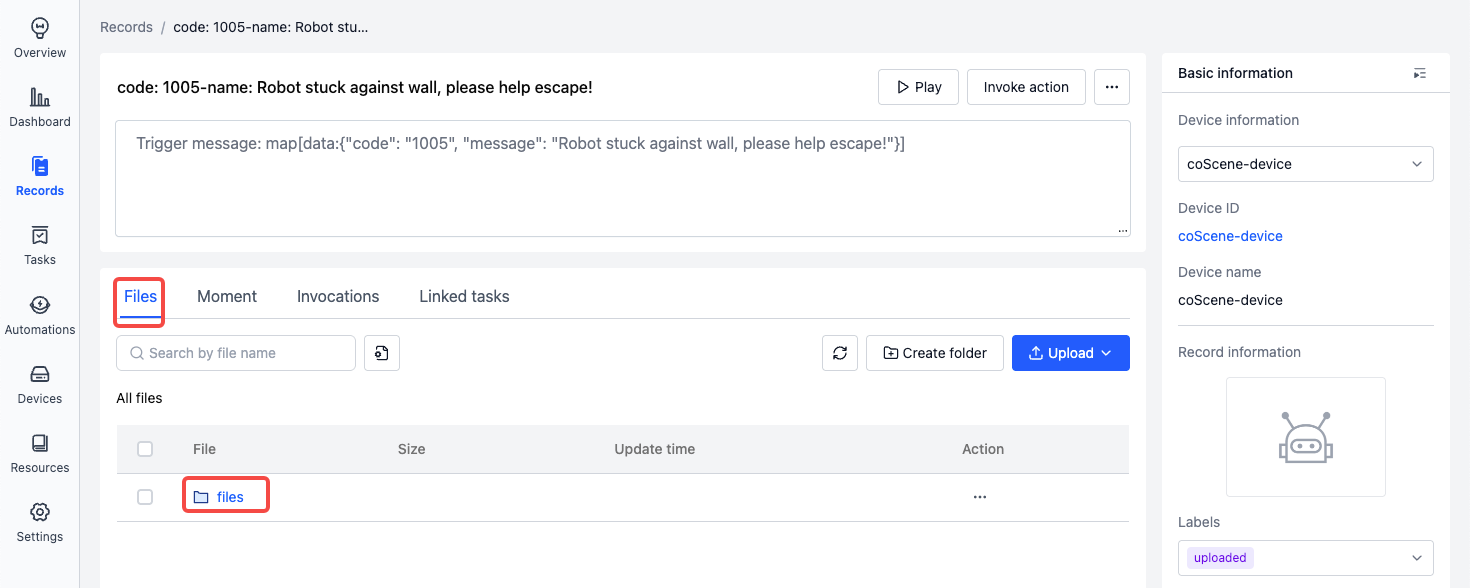
View the data uploaded to the record:
-
View the Moment created at the trigger time: