推送与管理镜像
了解如何使用 coScene 的镜像仓库存储和管理用户自己构建的 Docker 镜像。
前置条件
本机已经安装并启动 Docker
1. 认证和登录刻行的镜像仓库
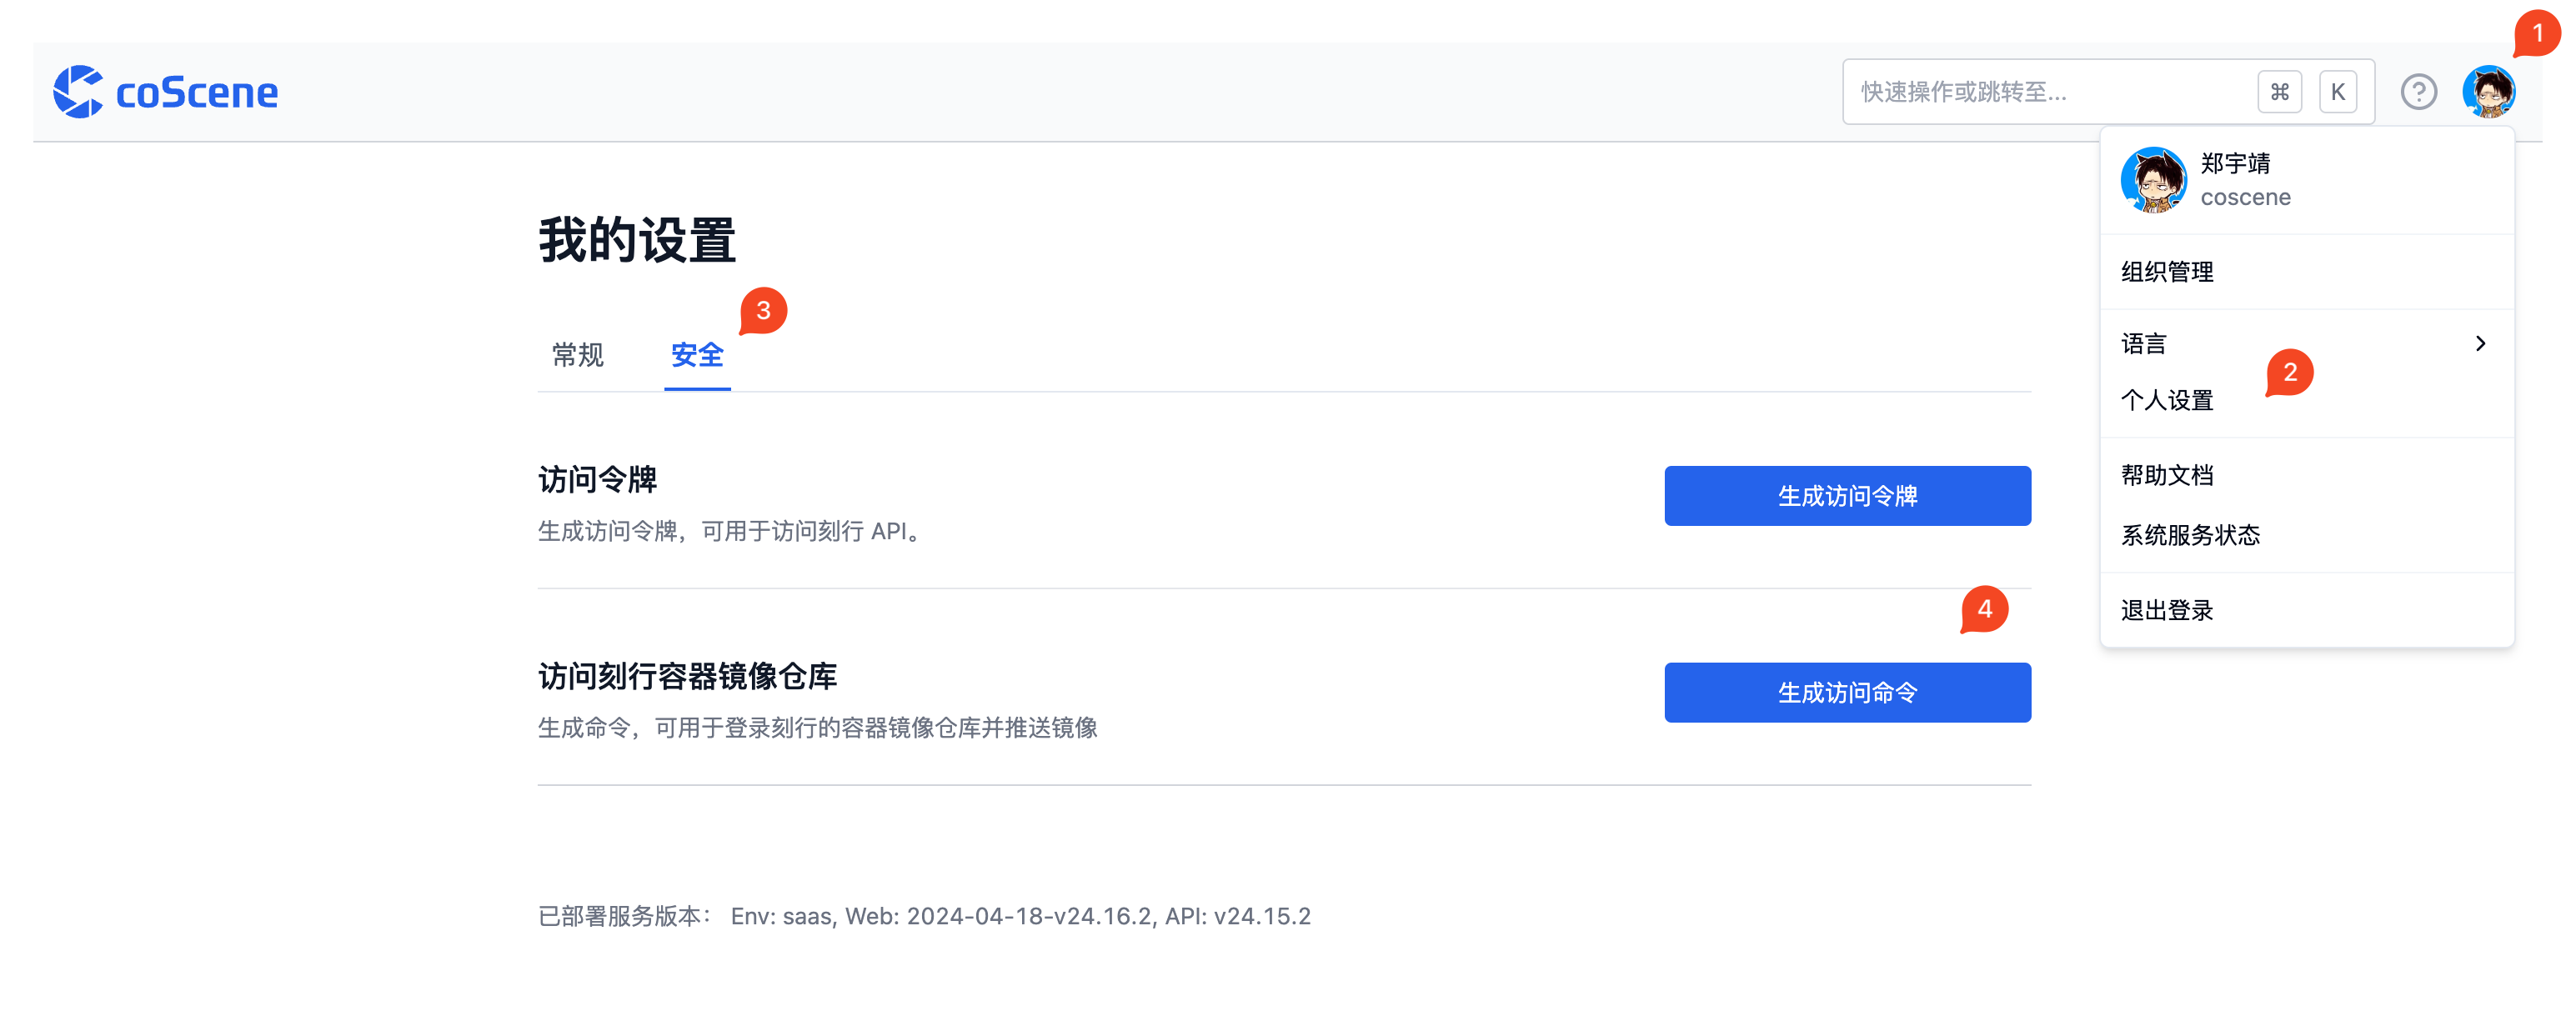
登录刻行时空平台,在右上角用户设置下拉面板中,访问【个人设置】,在【个人设置】页面中,访问【安全】页面。
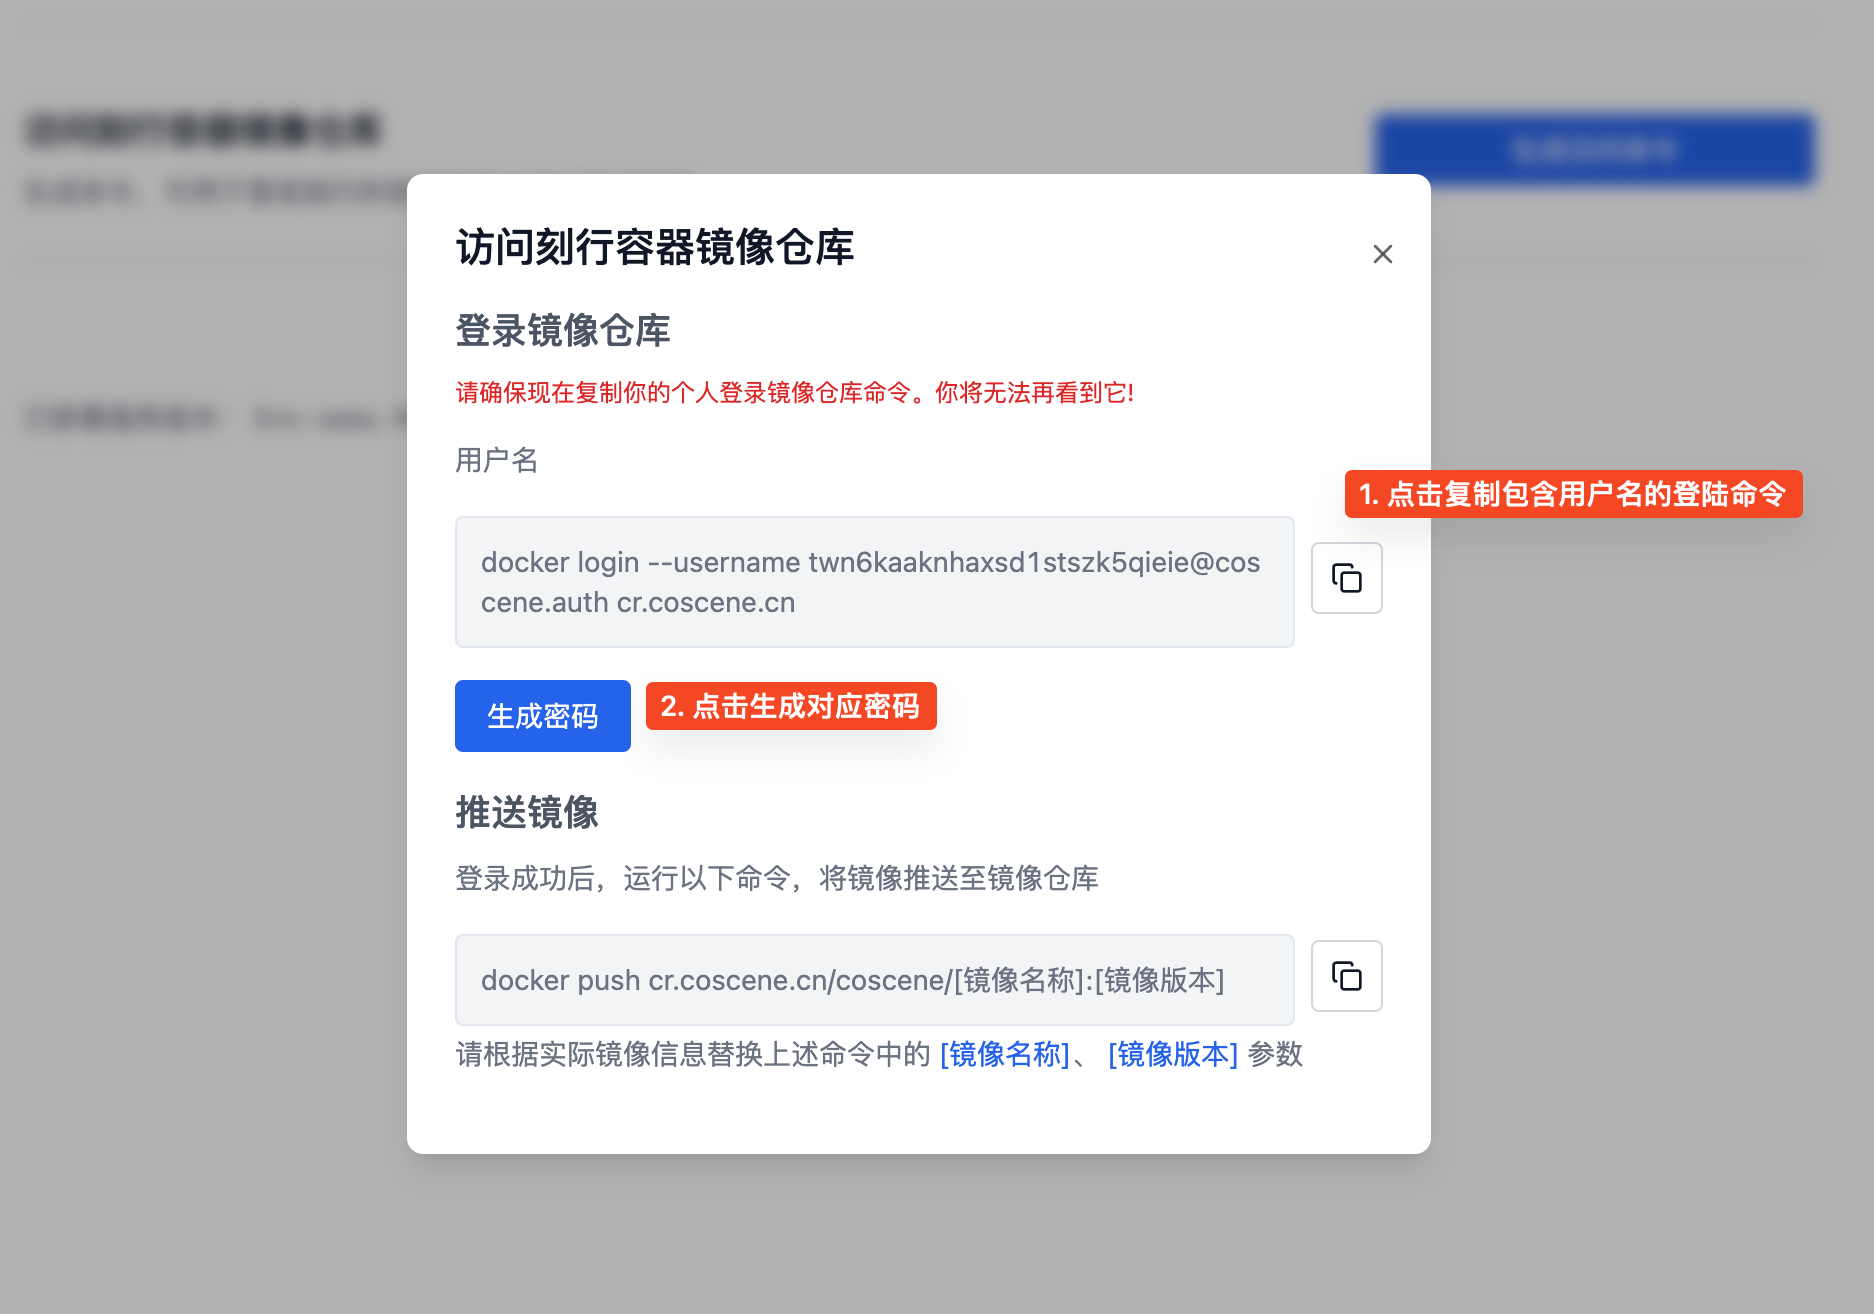
点击生成访问命令,获取登录平台镜像仓库的命令和密码


在命令行中输入包含用户名的登录,使用之前获得的认证凭证进行认证

2. 准备镜像文件
2.1 运行 Docker
2.2 配置镜像
新建一个文件夹,其中包含 dockerfile 和相关测试代码
-
示例 dockerfile
FROM ubuntu:latest

RUN apt update -y
RUN apt upgrade -y
RUN apt install -y python3 unzip python-is-python3
RUN apt install -y python3-pip
RUN pip install pytest
copy tests.py /tests.py -
示例测试代码
import os
import subprocess
import tempfile

BUNDLE_DIR = '/cos/bundles'
DATA_DIR = '/cos/files'
ARTEFACT_DIR = '/cos/artifacts'

def __count(word):
    with tempfile.TemporaryDirectory() as d:
        print(d)
        os.system('unzip %s/*.zip -d %s' % (BUNDLE_DIR, d))

        cmd = [d + '/count', word , DATA_DIR, ARTEFACT_DIR]
        print('RUNNING TEST COMMAND')
        print(cmd)
        proc = subprocess.run(cmd, text=True, capture_output=True)
        print('COMMAND RETURN CODE IS: ' + str(proc.returncode))
        output = proc.stdout
        print('COMMAND OUTPUT IS: ' + output)
        return int(output)

def test_romeo():
assert __count('romeo') > 0- 若需要在最终的测试结果中输出图型测试报告,请参见 输出测试结果 章节。
2.3 build 镜像
镜像文件准备完成后,打开终端,进入对应文件夹后执行命令 build 镜像:
注意
请根据您在刻行的组织名称,替换镜像地址
docker build -f dockerfile -t cr.coscene.cn/coscene/image:latest .

# 如果在不同的系统中进行交叉构建
docker build -f dockerfile -t cr.coscene.cn/coscene-lark/image:latest --platform linux/amd64 .
完成构建之后,就可以使用 docker push 将镜像推送到平台的镜像仓库了。
3. 查看组织镜像列表
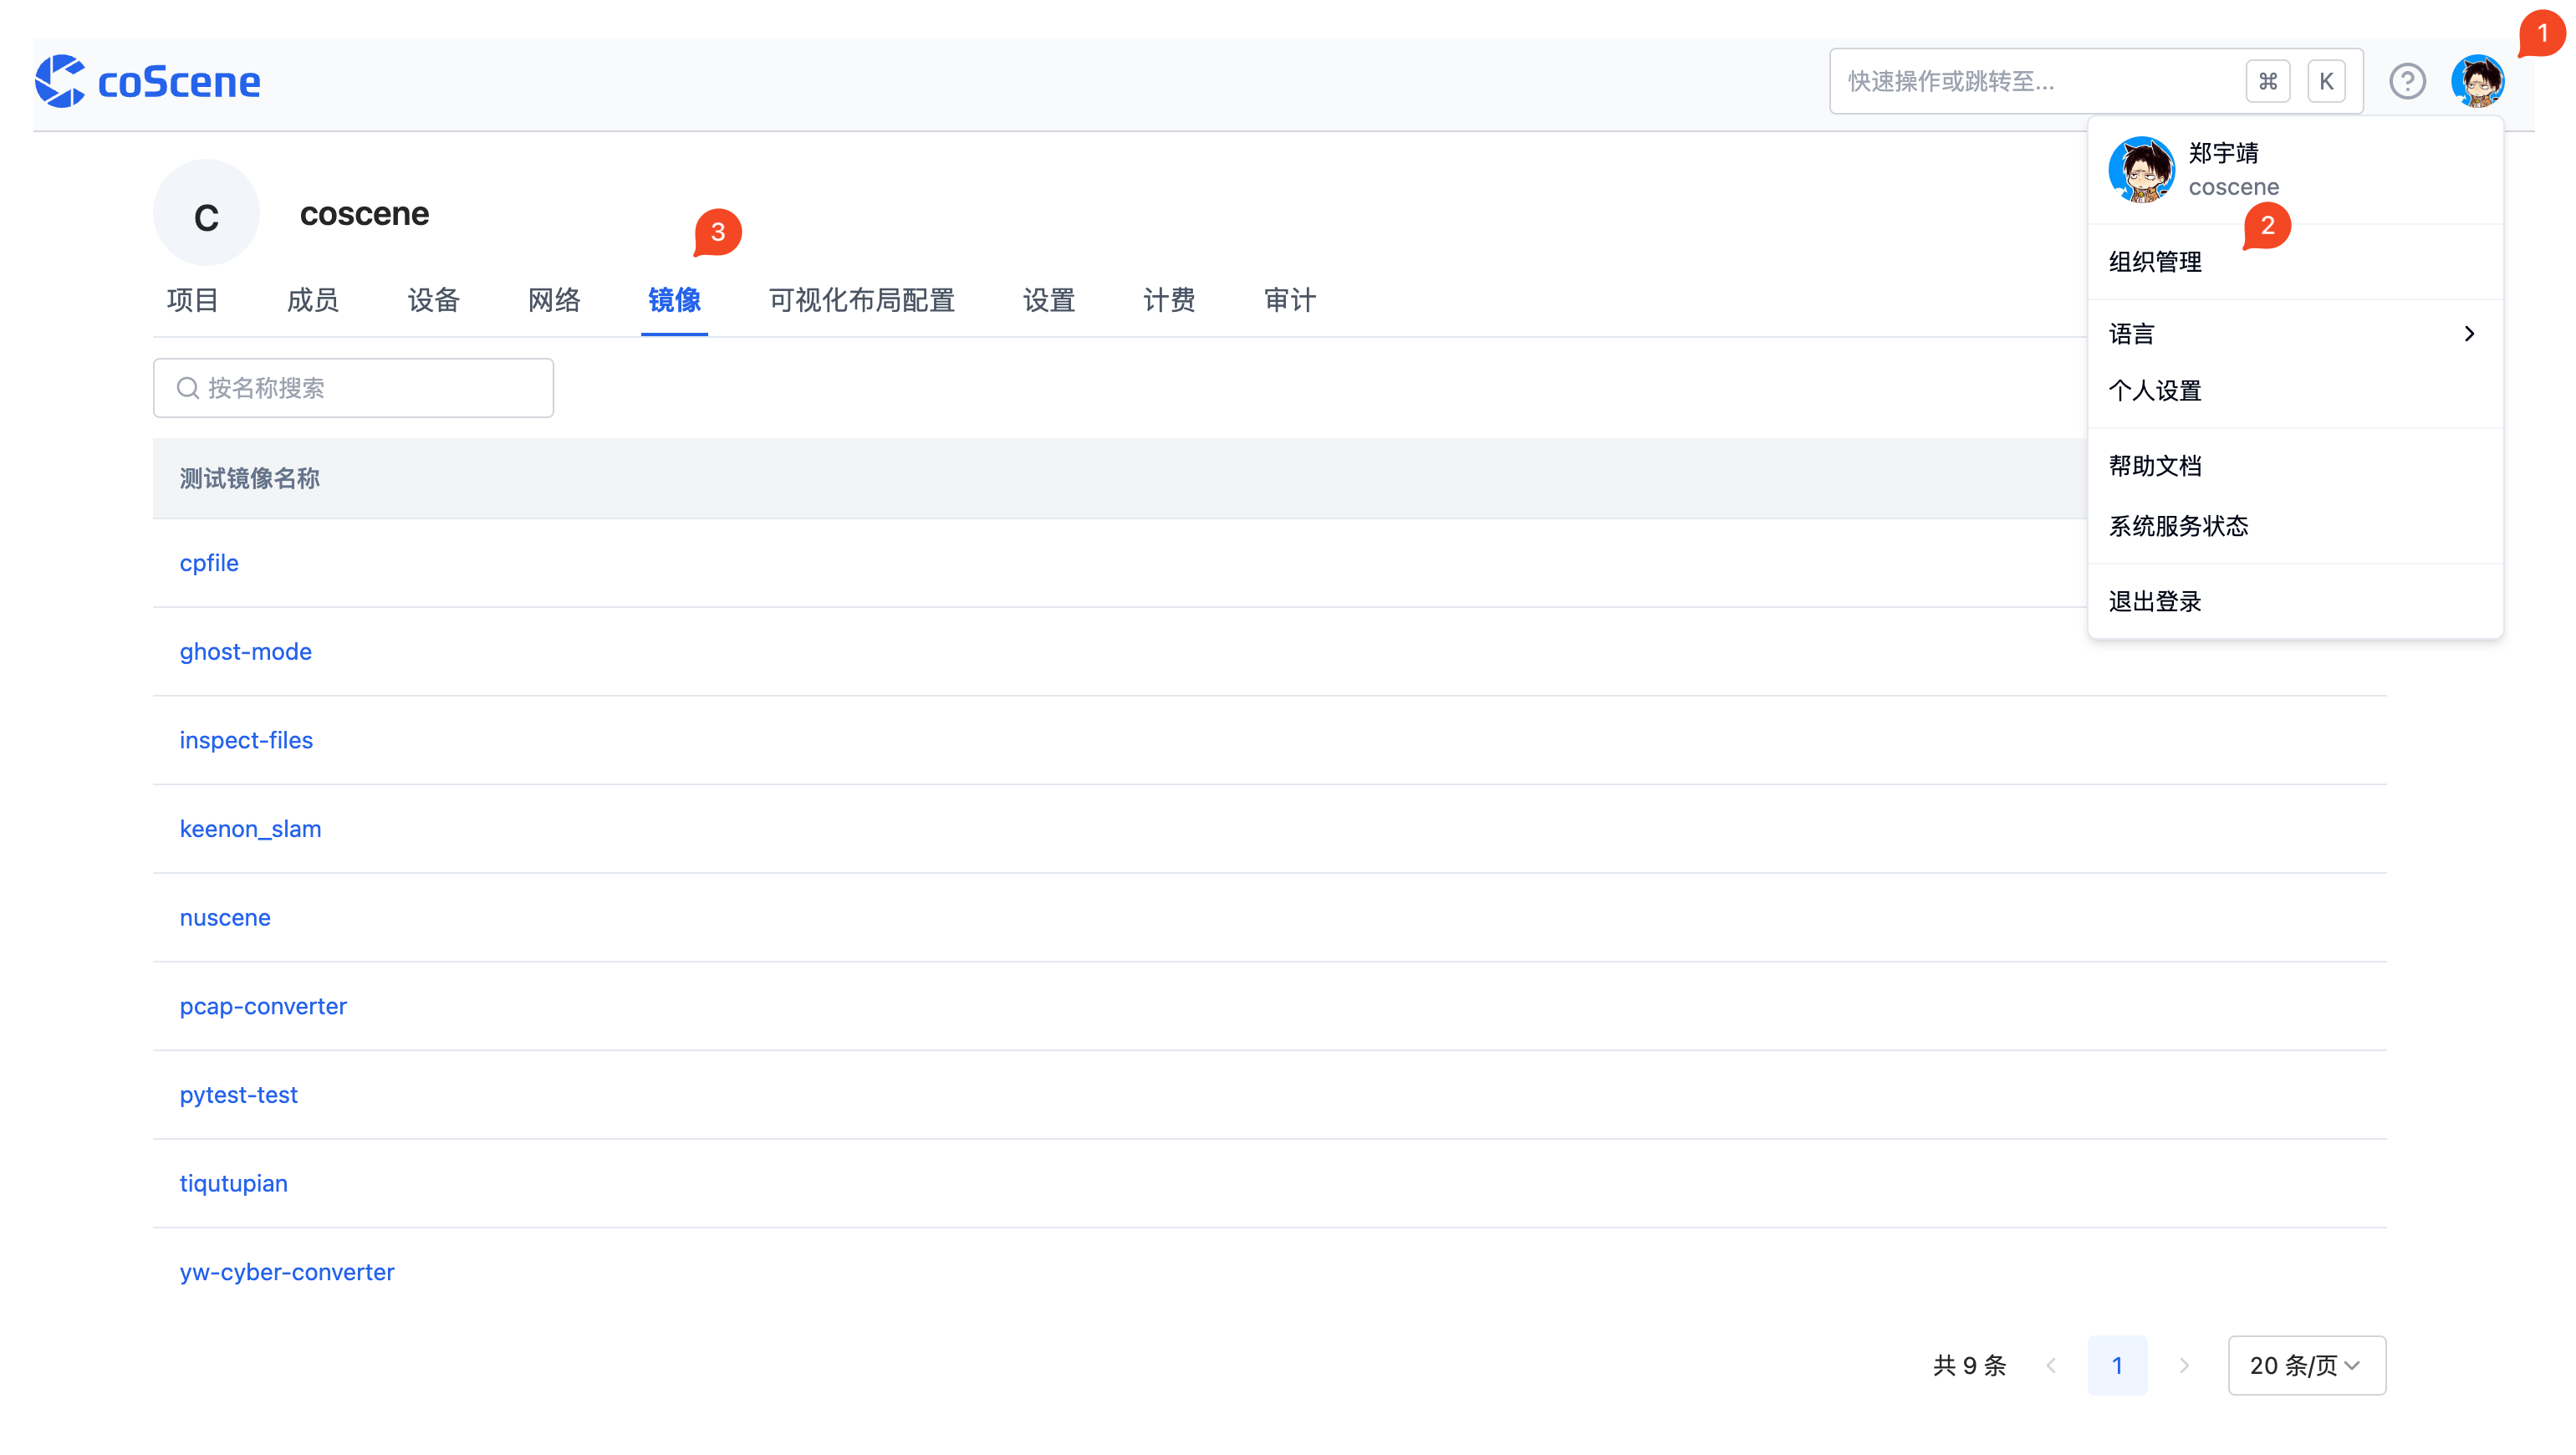
在「我的 - 组织管理 - 镜像」页面中,可以查看当前组织内的镜像列表:

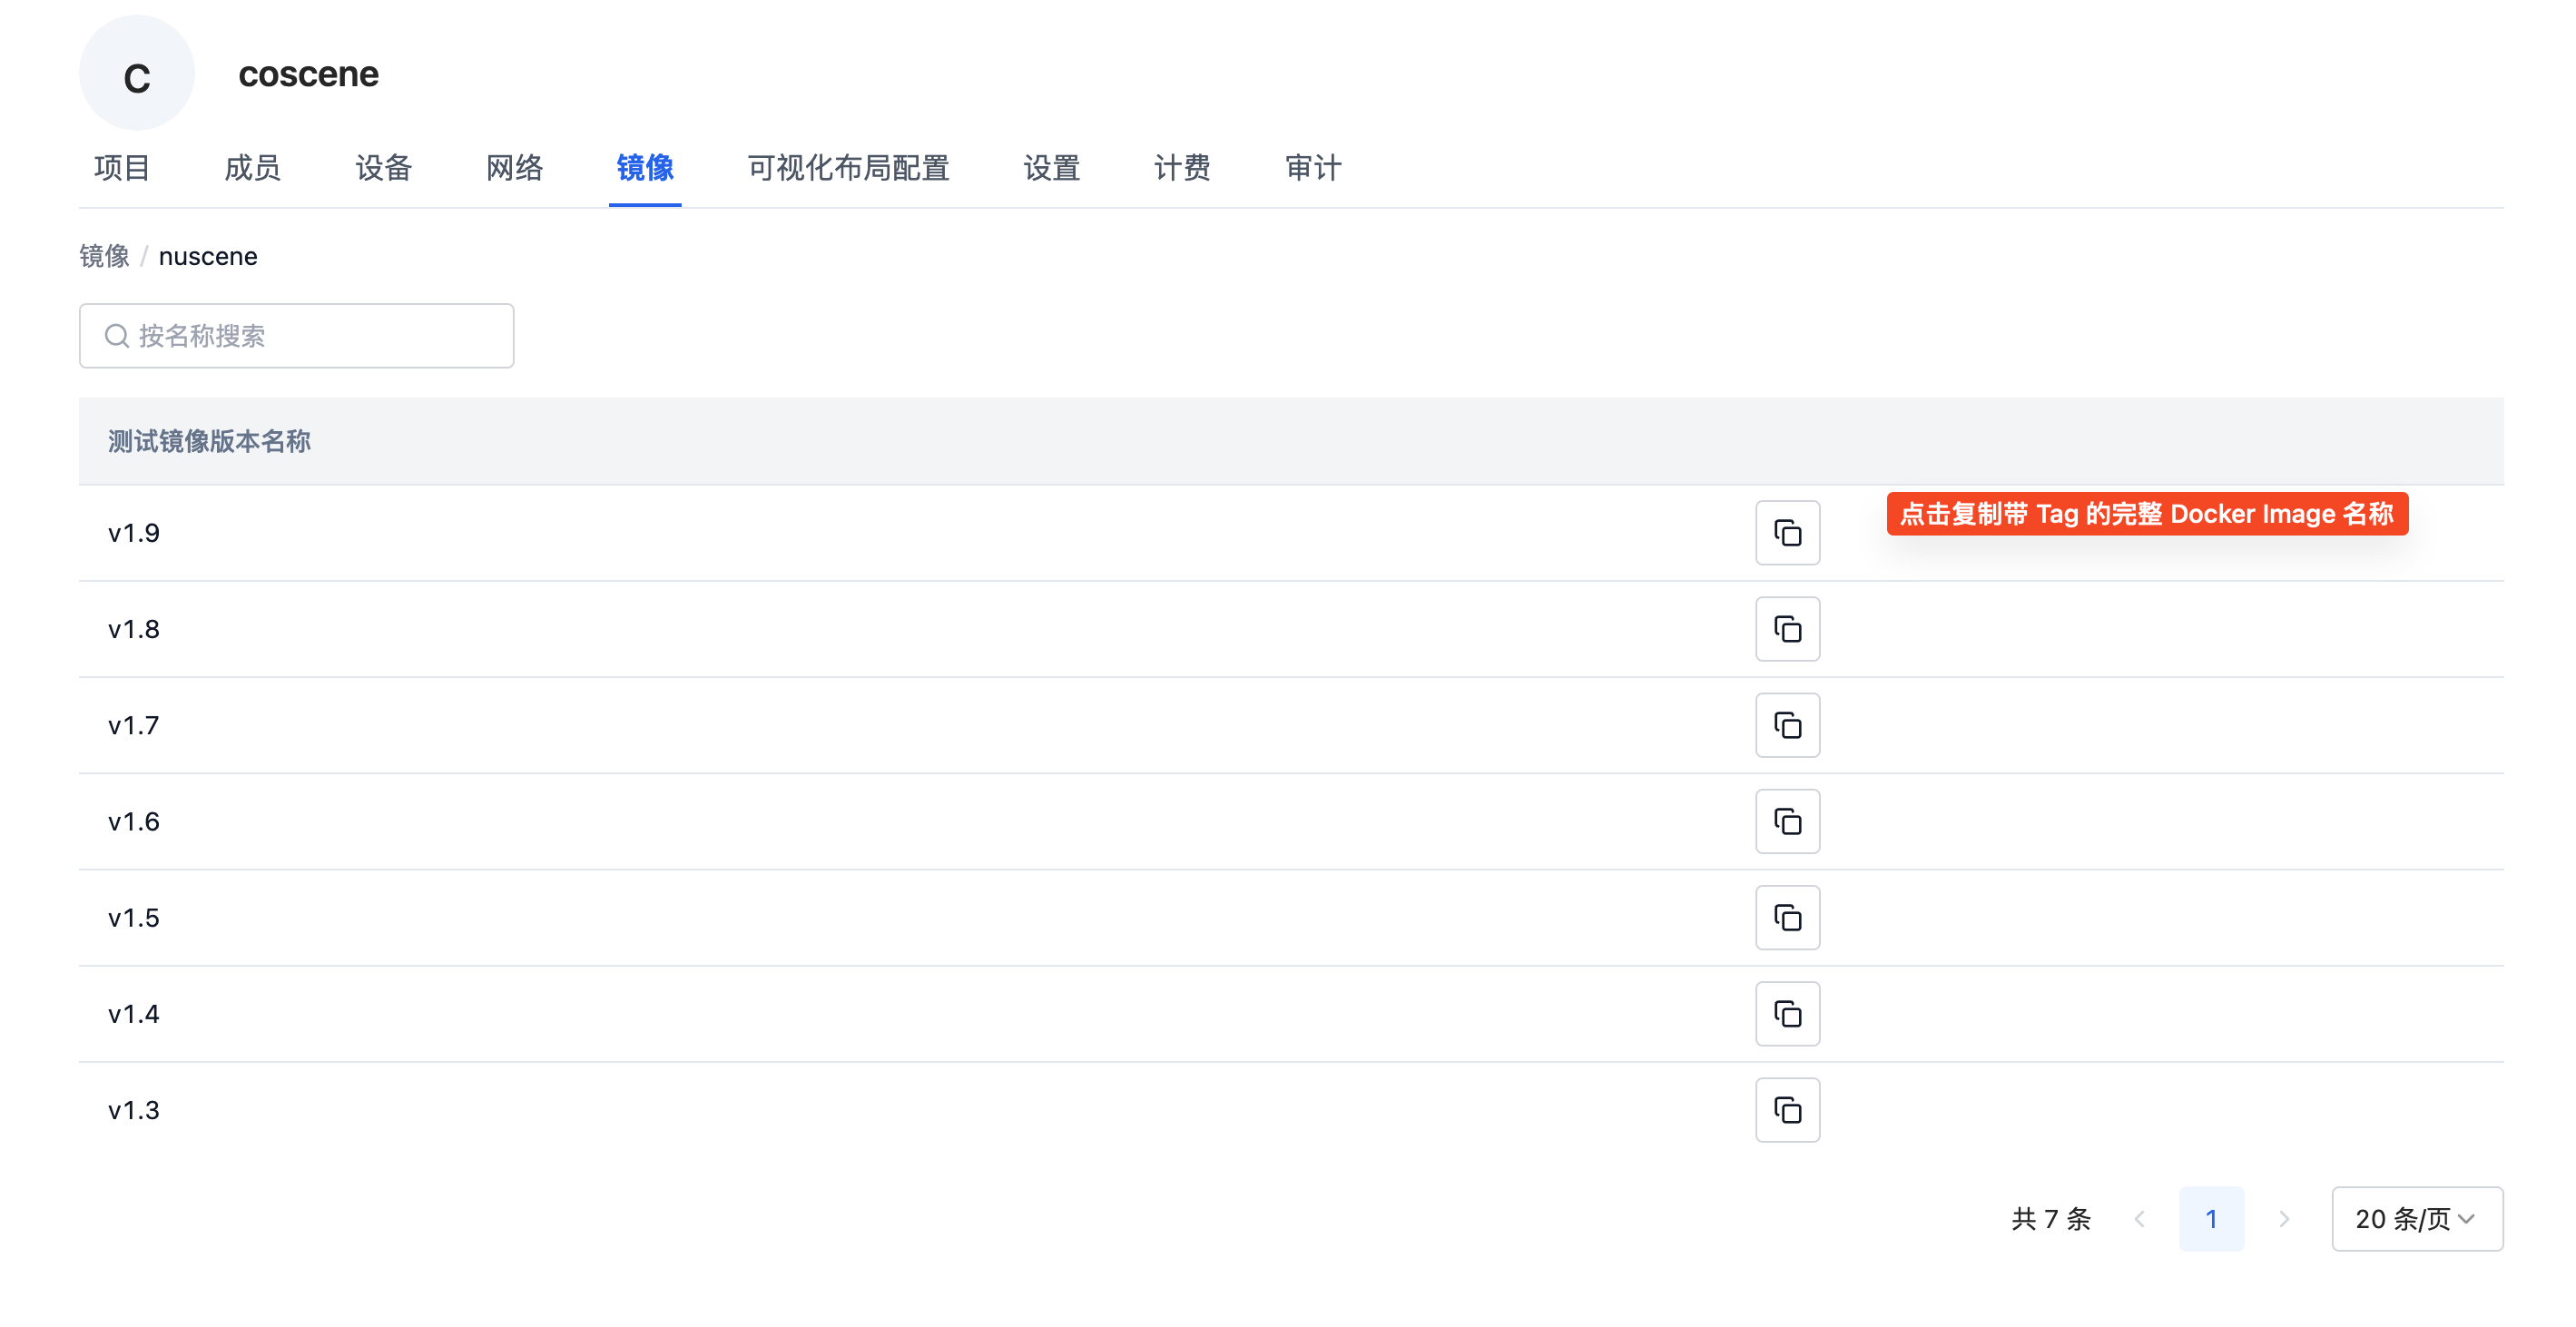
点击镜像名称,展示该镜像所有版本,可以点击「复制」按钮复制完整的镜像地址:
