Install and Init
Installation
Run the following command in the terminal to install the latest version of the coScene CLI tool:
curl -fL https://download.coscene.cn/cocli/install.sh | sh
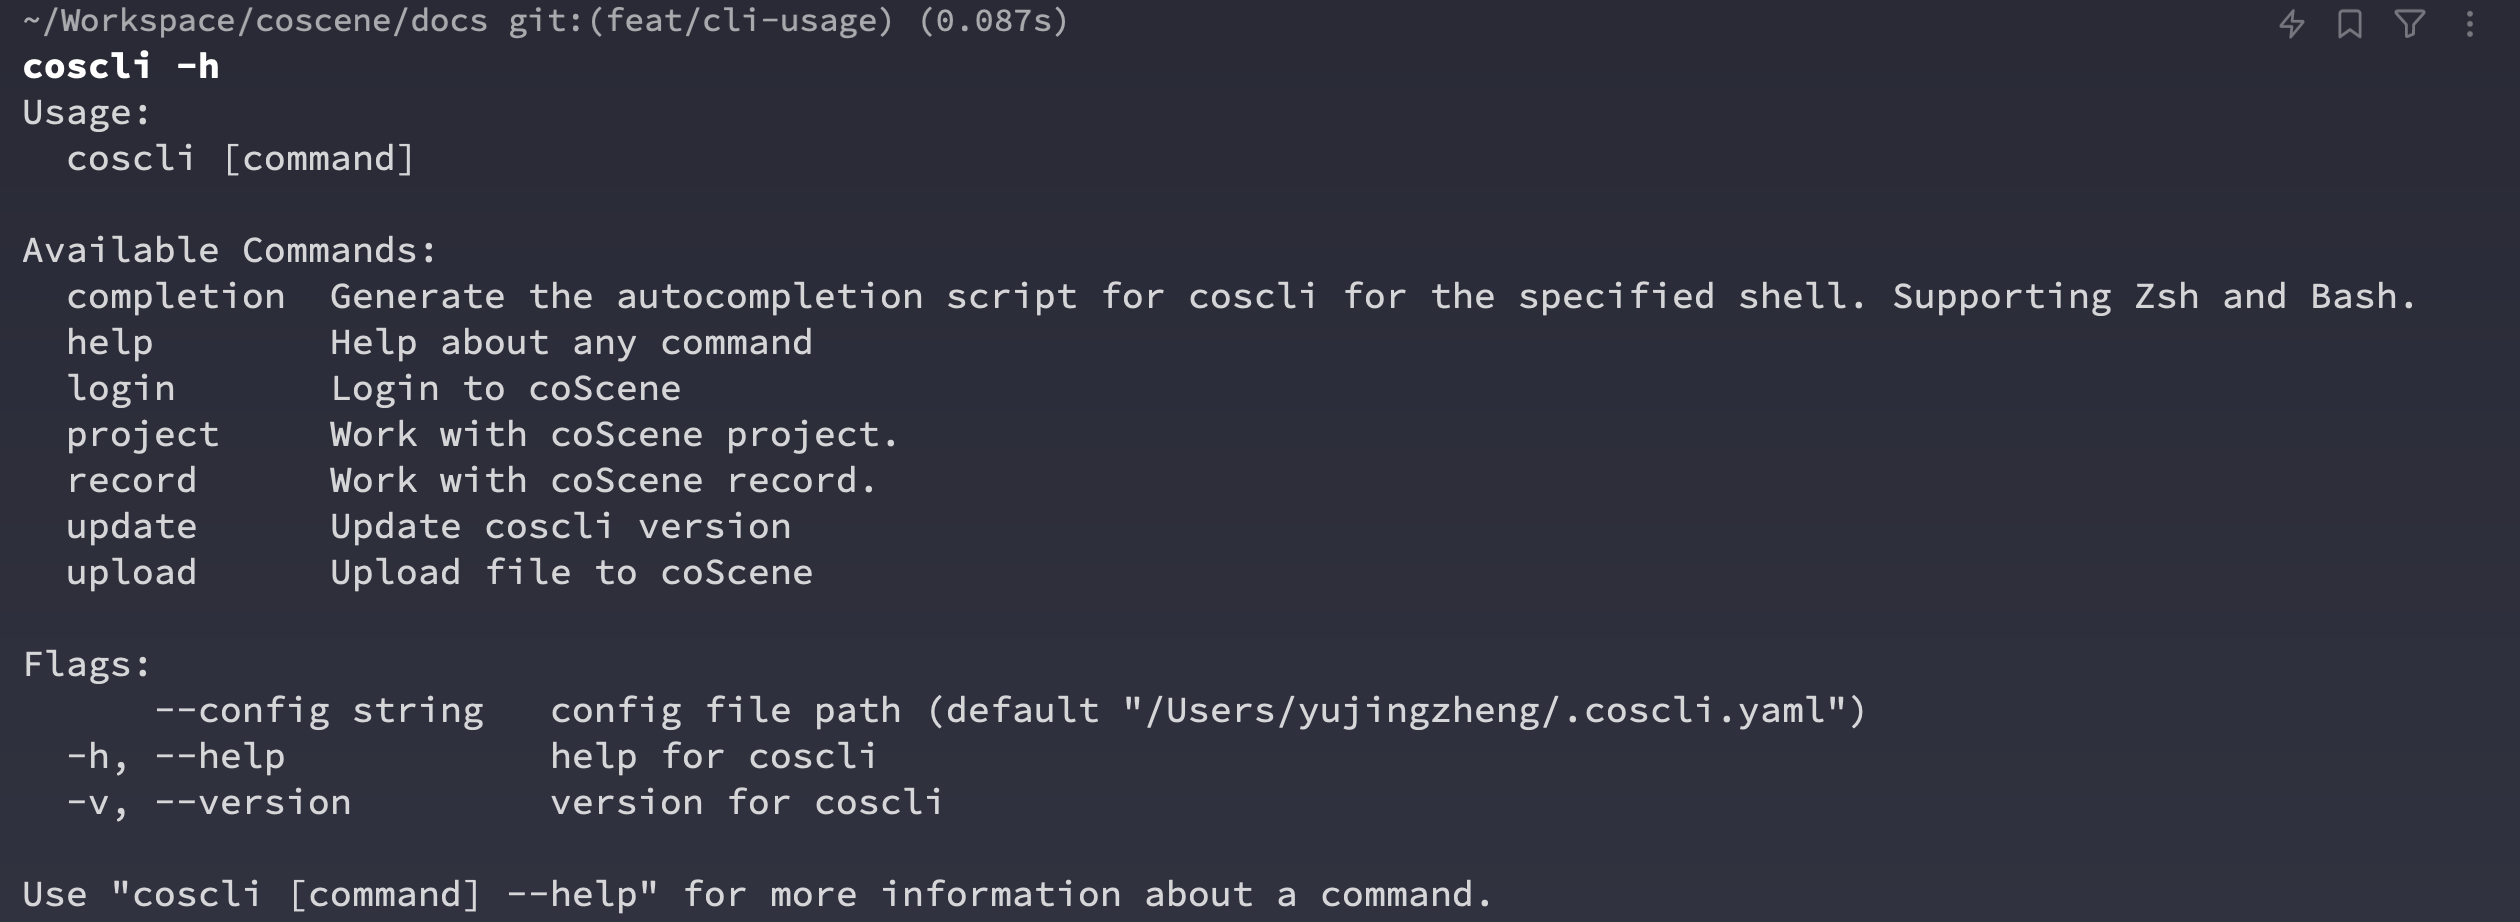
You can use cocli -h in the terminal to confirm that the CLI tool has been successfully installed and to see the basic usage of the tool.
Update to the Latest Version
cocli update
Login and initialize coCLI needs the following info:
- A personal access token(Token):
- A default working project's slug(Slug):
Login
You can generate your access token on the coScene - My Settings page.
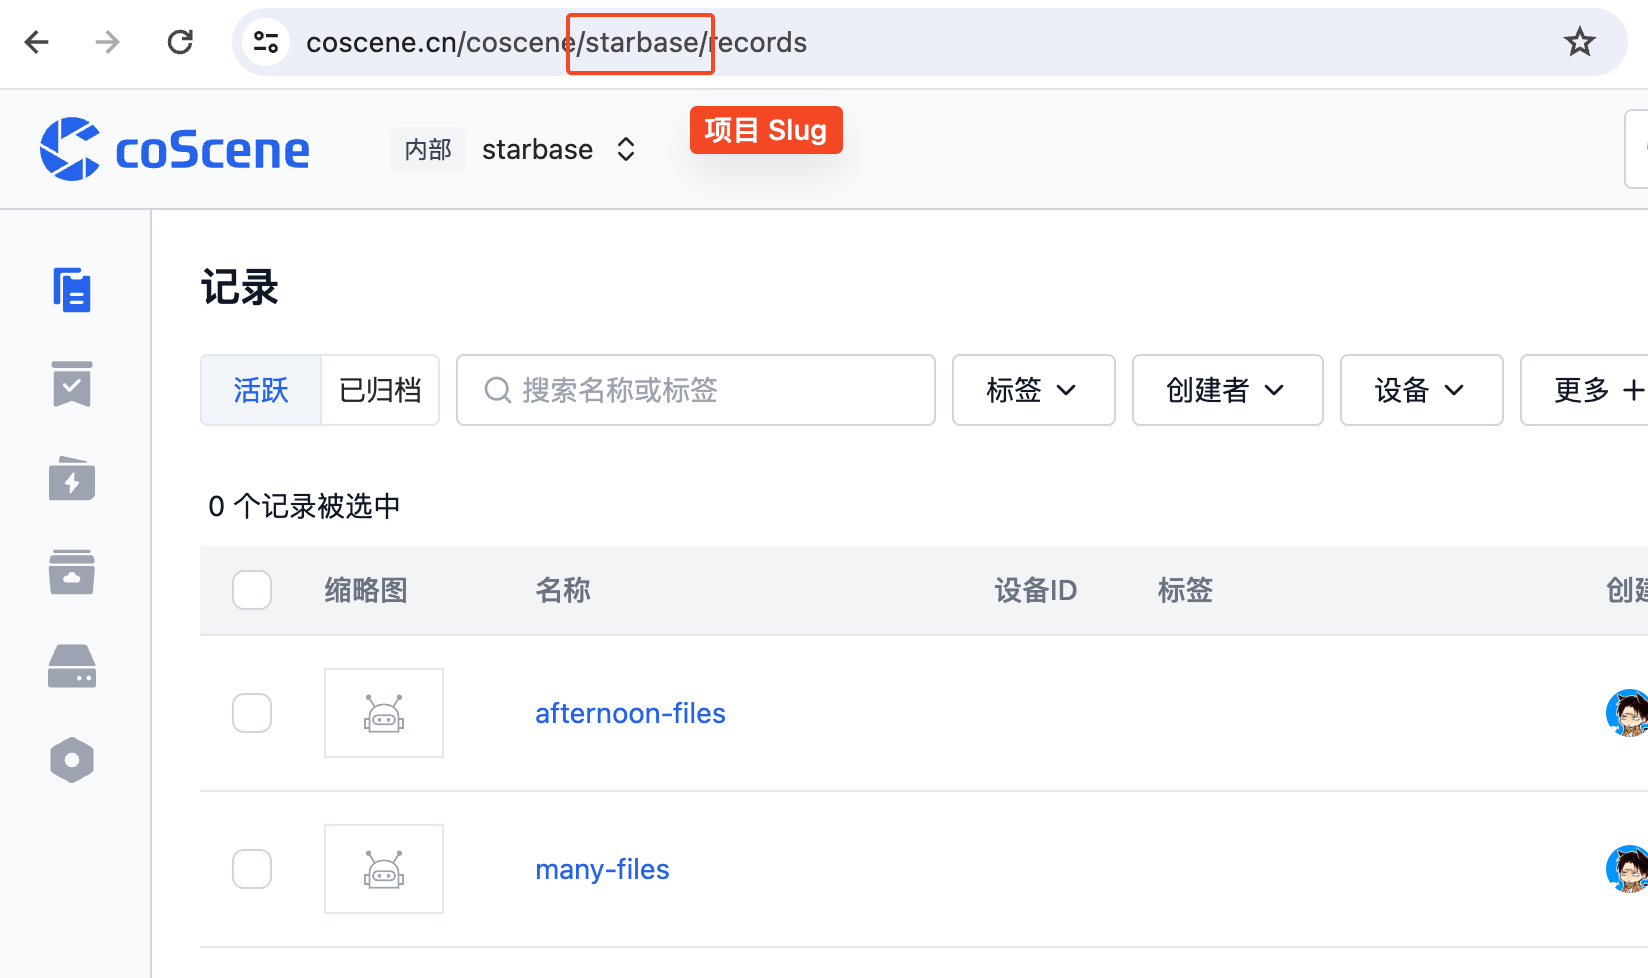
The CLI tool also requires you to specify a default project as the default environment for all operations. Please select the project you want to work on and get the project slug from the URL.
Configure CLI Permissions
# Replace <project slug> after -p
# Replace <personal access token> after -t
cocli login set -p <PROJECT_SLUG> -t <TOKEN>
If your are an Enterprise user with an on-premise instance, you will have to specify your instance's endpoint
eg. https://server2.coscene.cn -> https://openapi.server2.coscene.cn
cocli login set -p <PROJECT_SLUG> -t <TOKEN> -e <ENDPOINT>
Switch Default Project
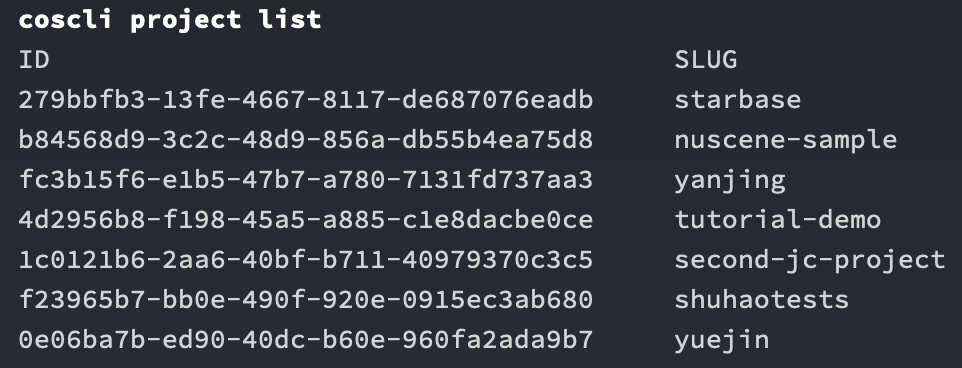
After successfully authenticating the CLI, you can use the command line to switch the default working project. First, we can list all the projects in the organization that the user has access to, along with their corresponding project slugs:
cocli project list
After finding the target project, use cocli login set to update the default working project. If needed, you can use cocli login current to confirm.
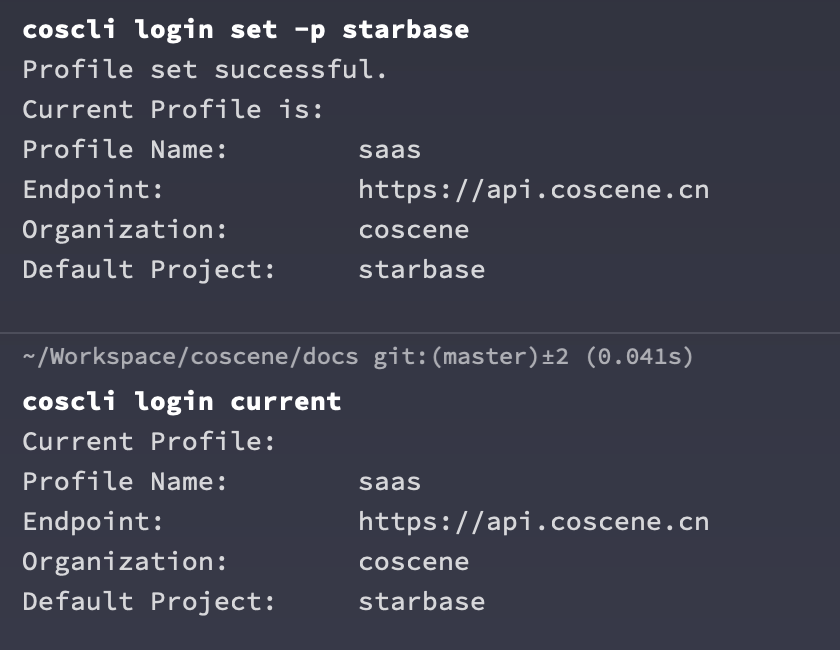
cocli login set -p starbase
cocli login current