Jira
Integrate with Jira to synchronize tasks as issues in Jira.
Initial Configuration
Each project is configured independently, and only the project administrator can edit the config.
In the project, go to the "Manage Project - Service Integration" page and click "Add Config".
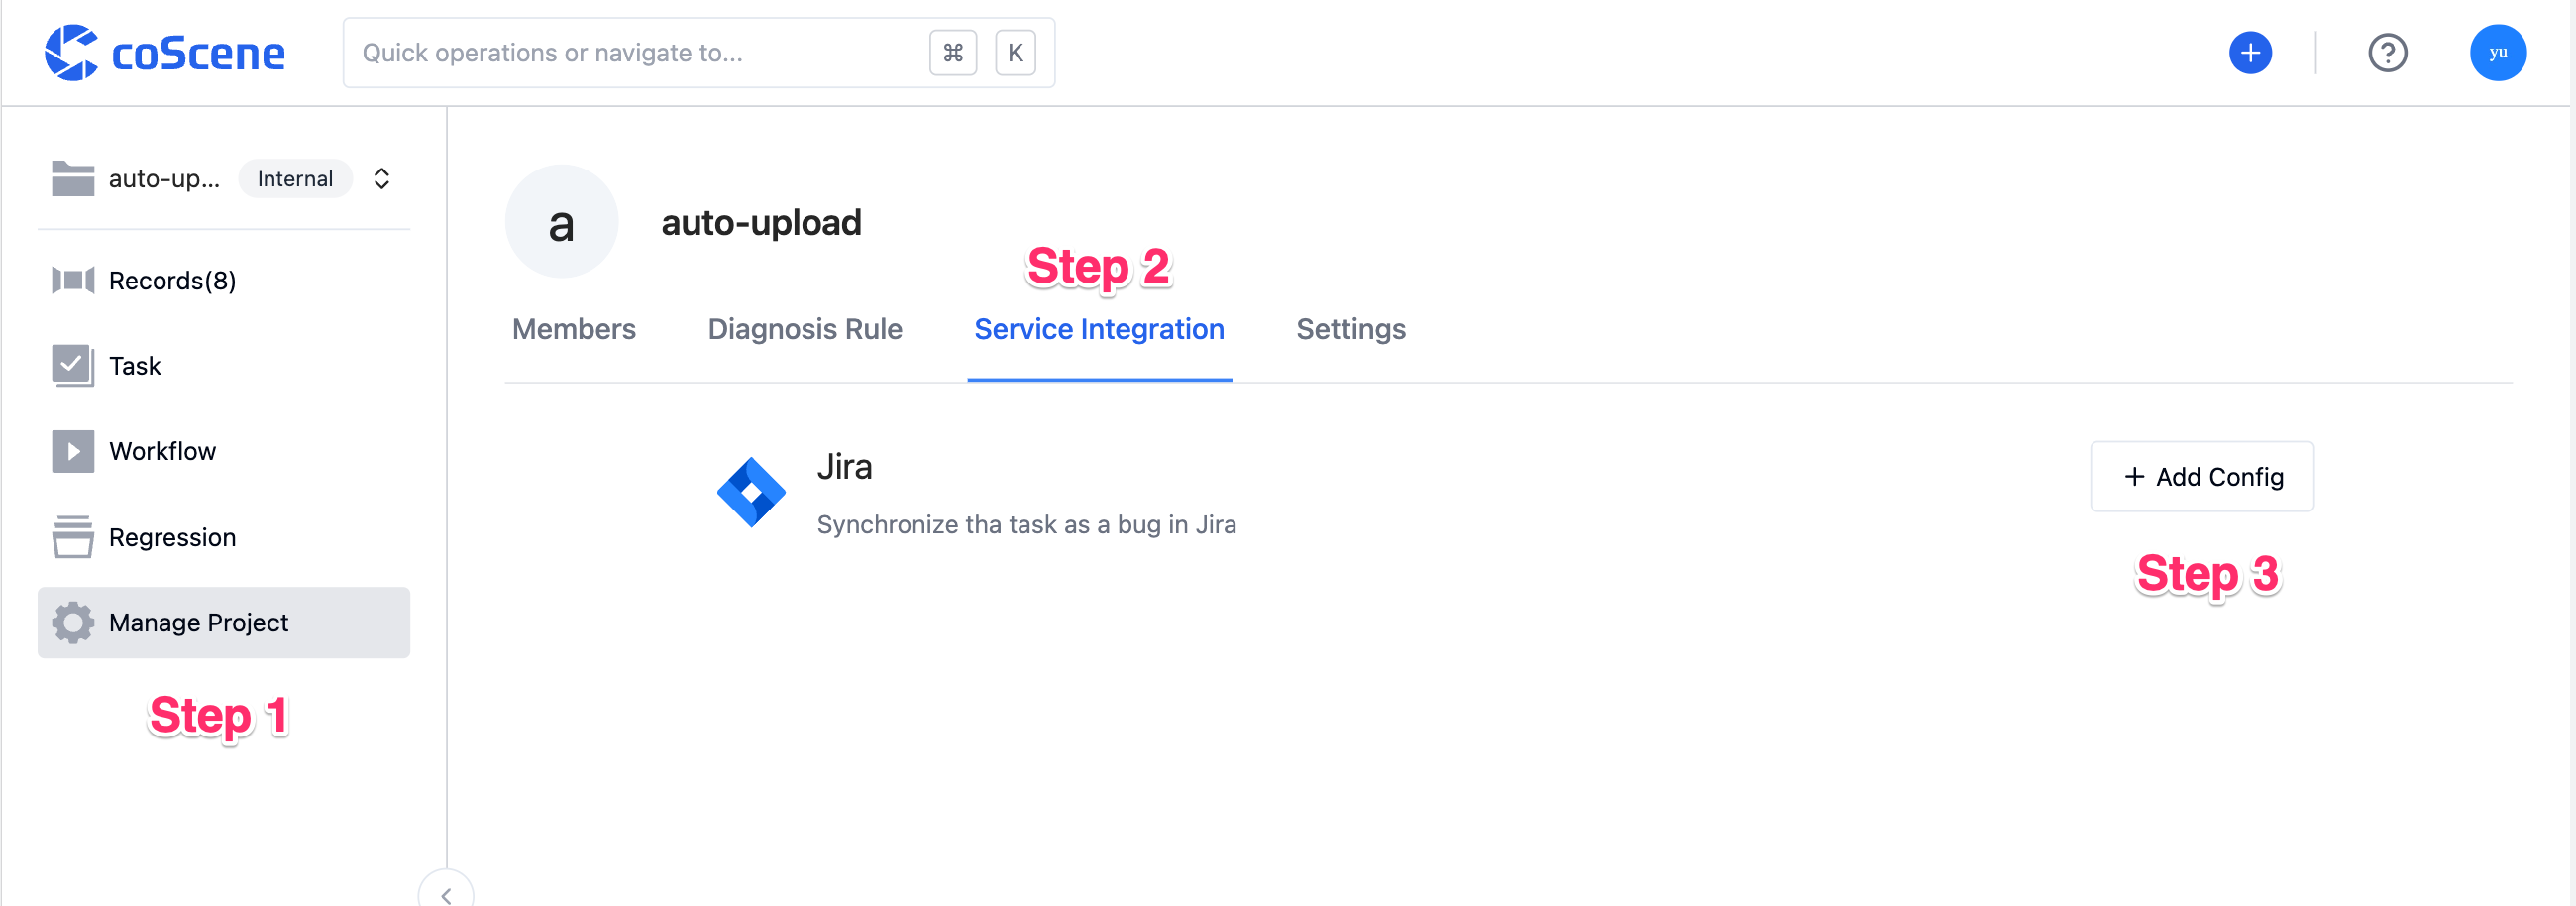
Edit the configuration as needed. Once done, click "Save".
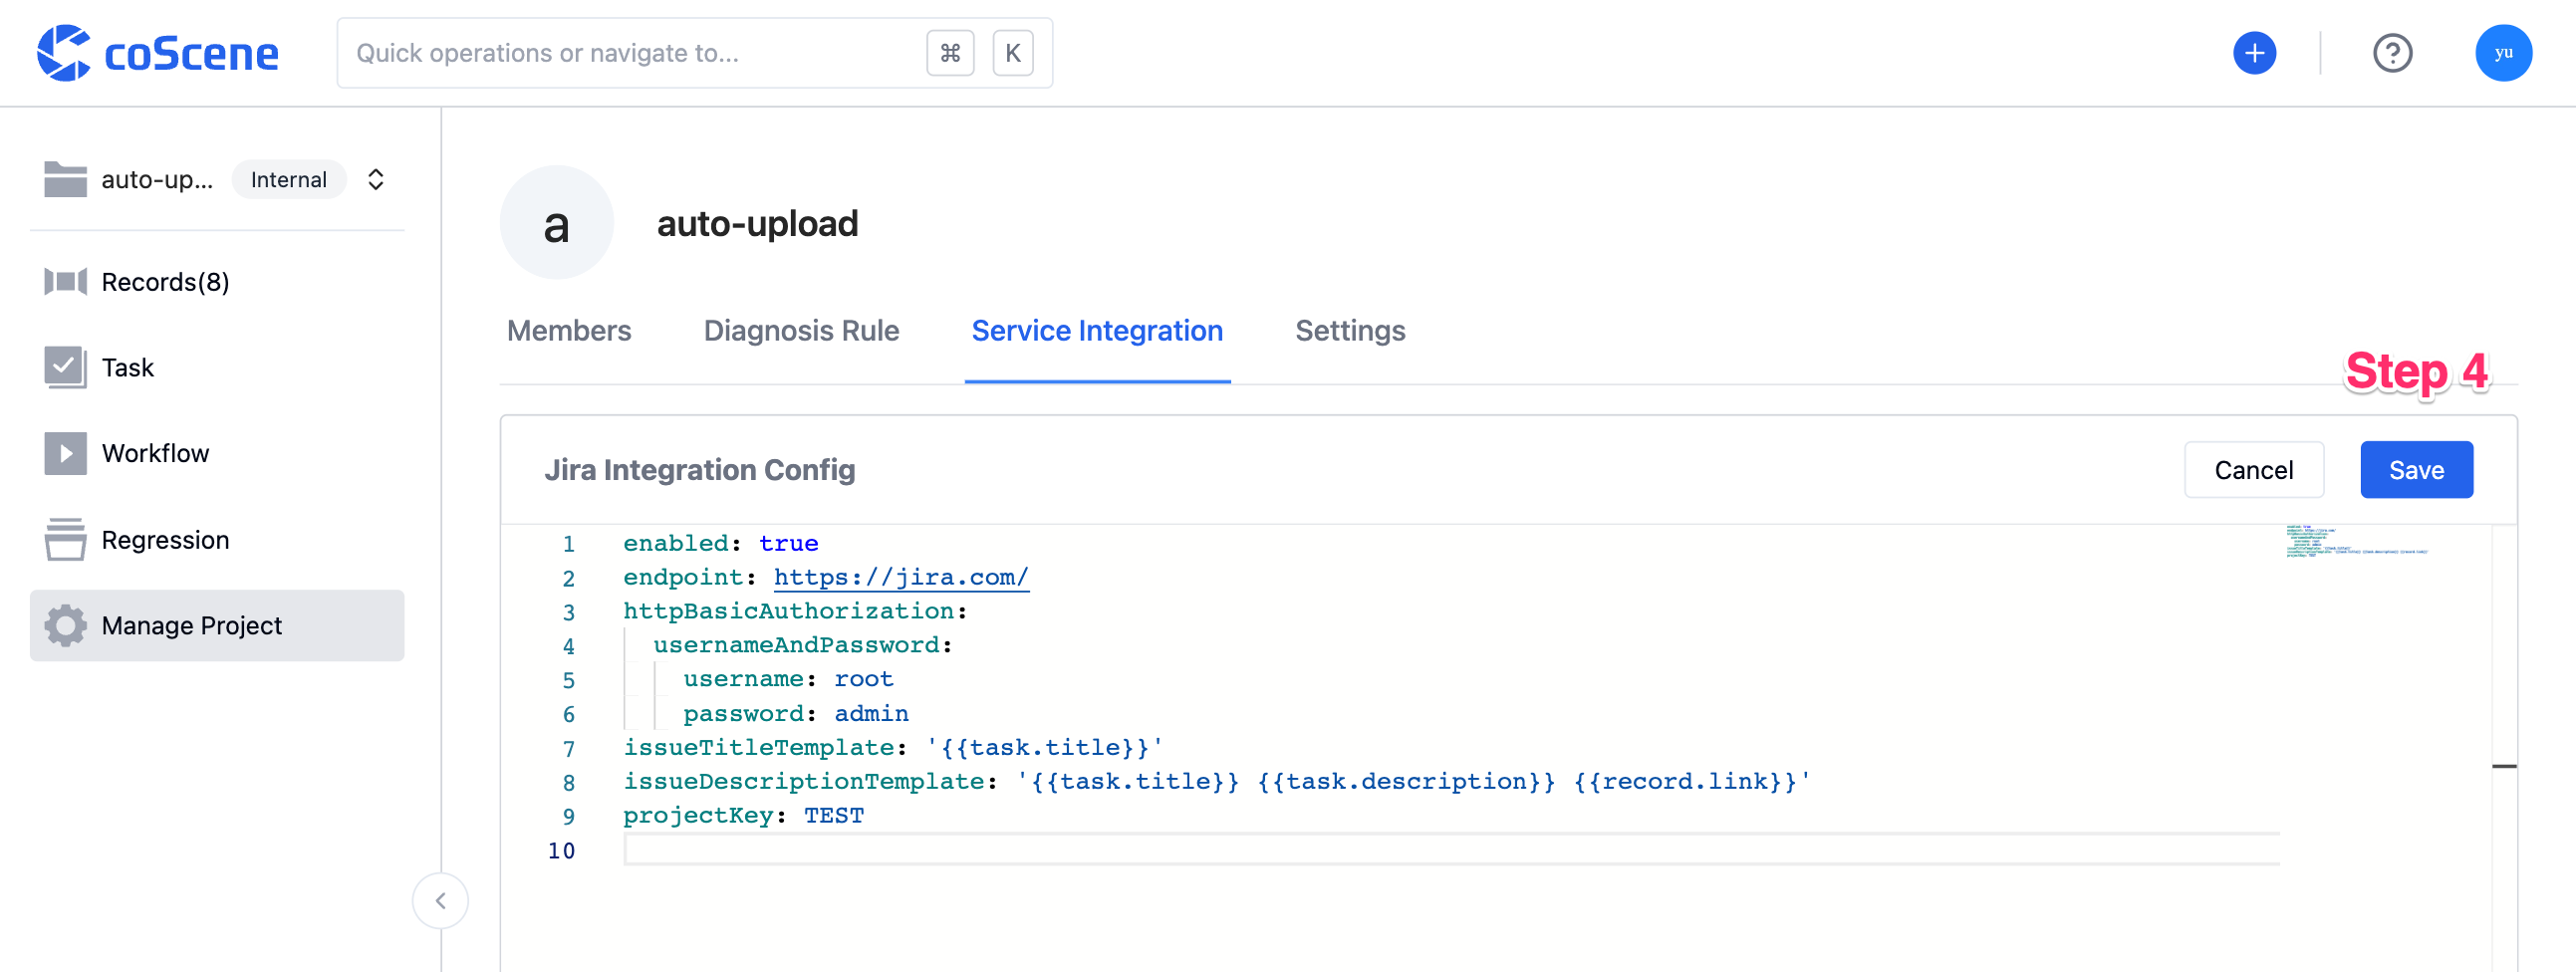
The configuration will take effect immediately.

Integration Configuration Format
Here is an example configuration:
enabled: true # Enable configuration

endpoint: https://jira.com/ # Jira URL
httpBasicAuthorization:
  usernameAndPassword:
    username: root # Jira username
    password: admin # Jira password

projectKey: TEST # Jira project Key

issueTitleTemplate: '{{task.title}}' # Jira title is the task name
issueDescriptionTemplate: '{{task.title}} {{task.description}} {{record.link}}' # Jira description consists of task name, task description, and record link
issueType: 'Bug' # Jira type

customFields: # Custom fields
  customfield_1:
    id: '88888' # Field 1 (dropdown style), select the option with id 88888
  customfield_2: TEST # Field 2 (text box style), enter the content as TEST
-
Jira Project Key
You need to look up the project's Key on the Jira platform:

-
Jira Type
Supports standard fields, such as: Bug, Task, Story.
-
Custom Fields
If there are custom fields, please contact coScene.
Synchronize Tasks to Jira
After the Jira integration configuration is complete, the tasks in the project can be synchronized to Jira.
Enter the project's record page:
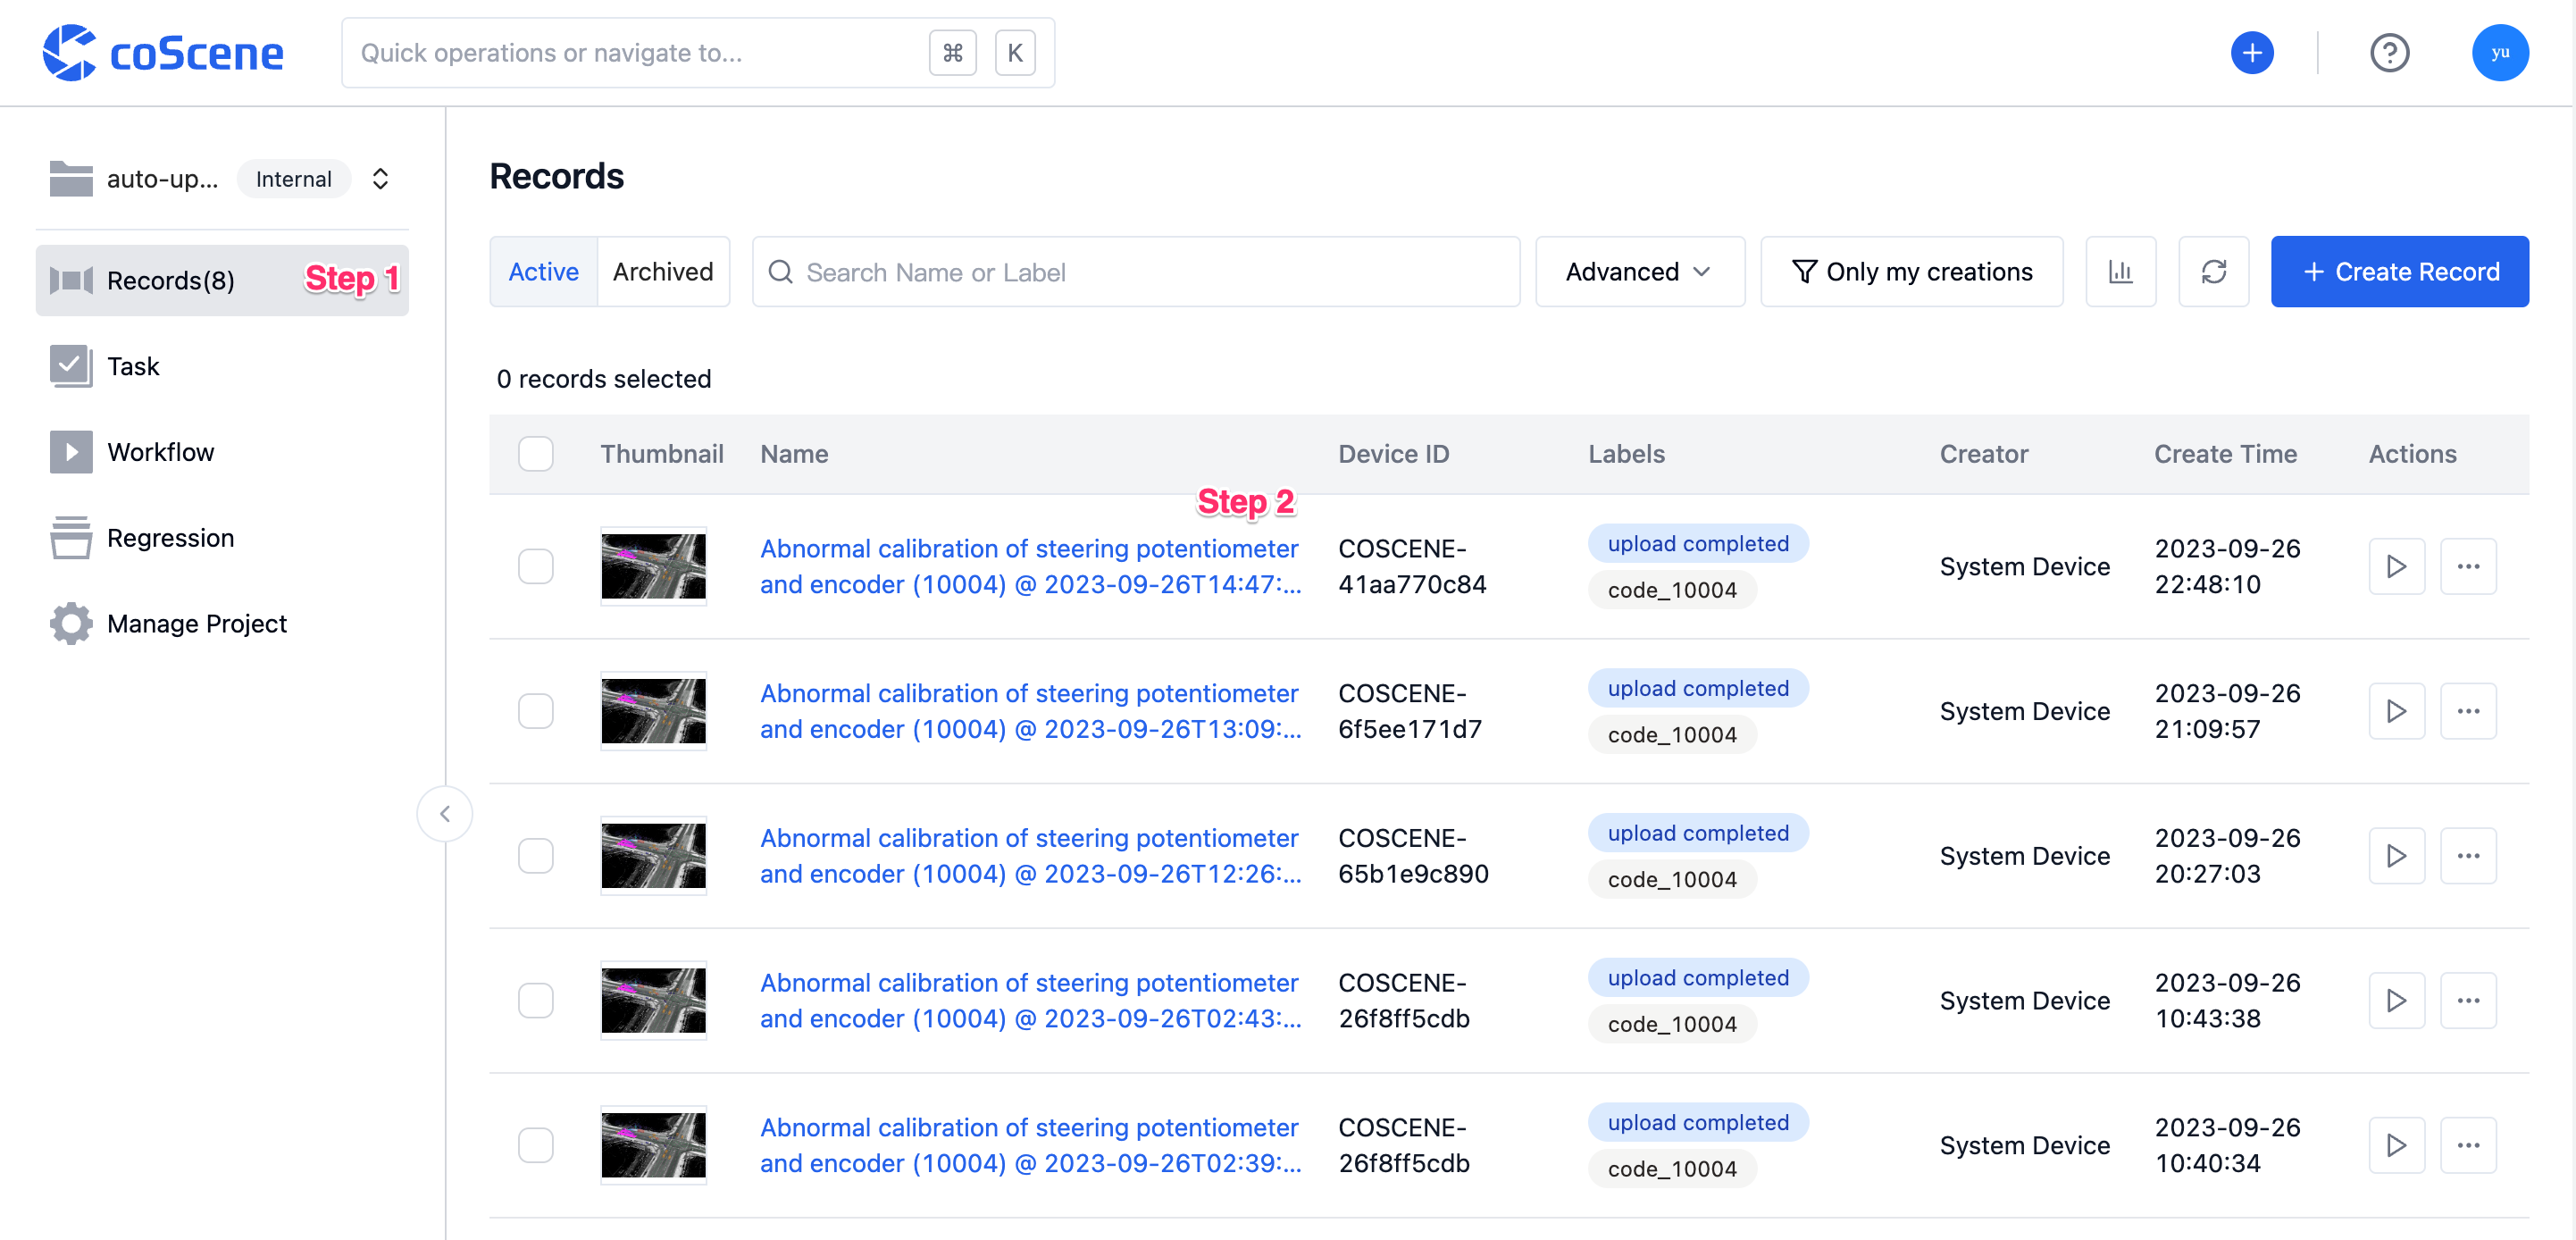
In the "Comments & Tasks" module, click the "Synchronize Task" button corresponding to the task:
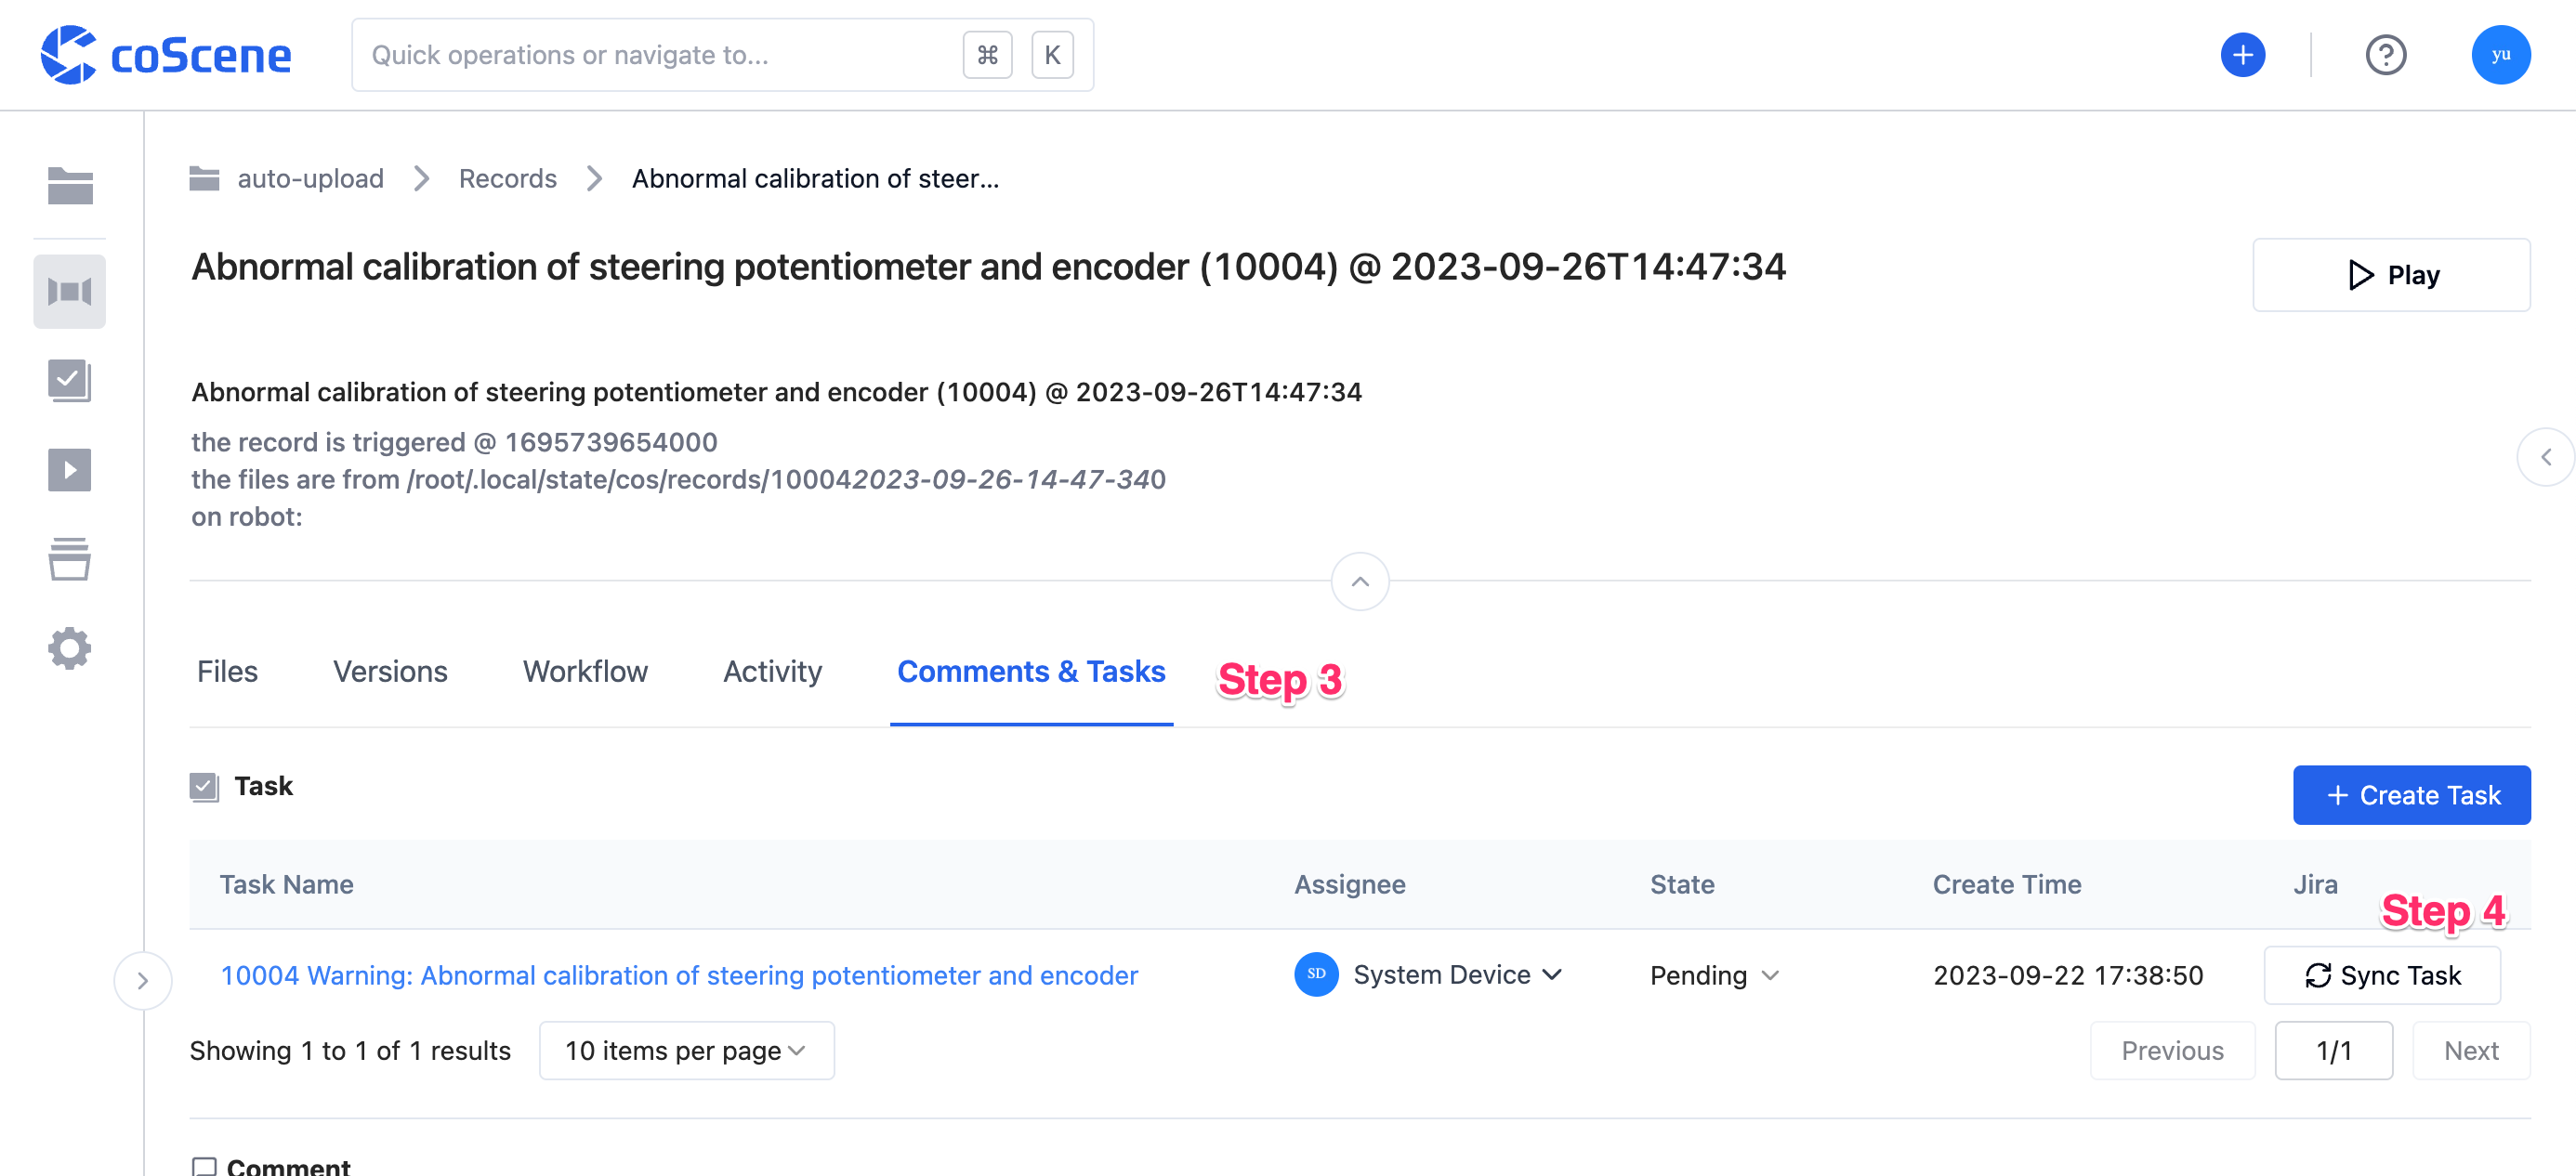
Once synchronized successfully, the created Jira link will be displayed.
Manage Jira Integration
Edit Integration
In the project, go to the "Manage Project - Service Integration" page and click "Edit Configuration".
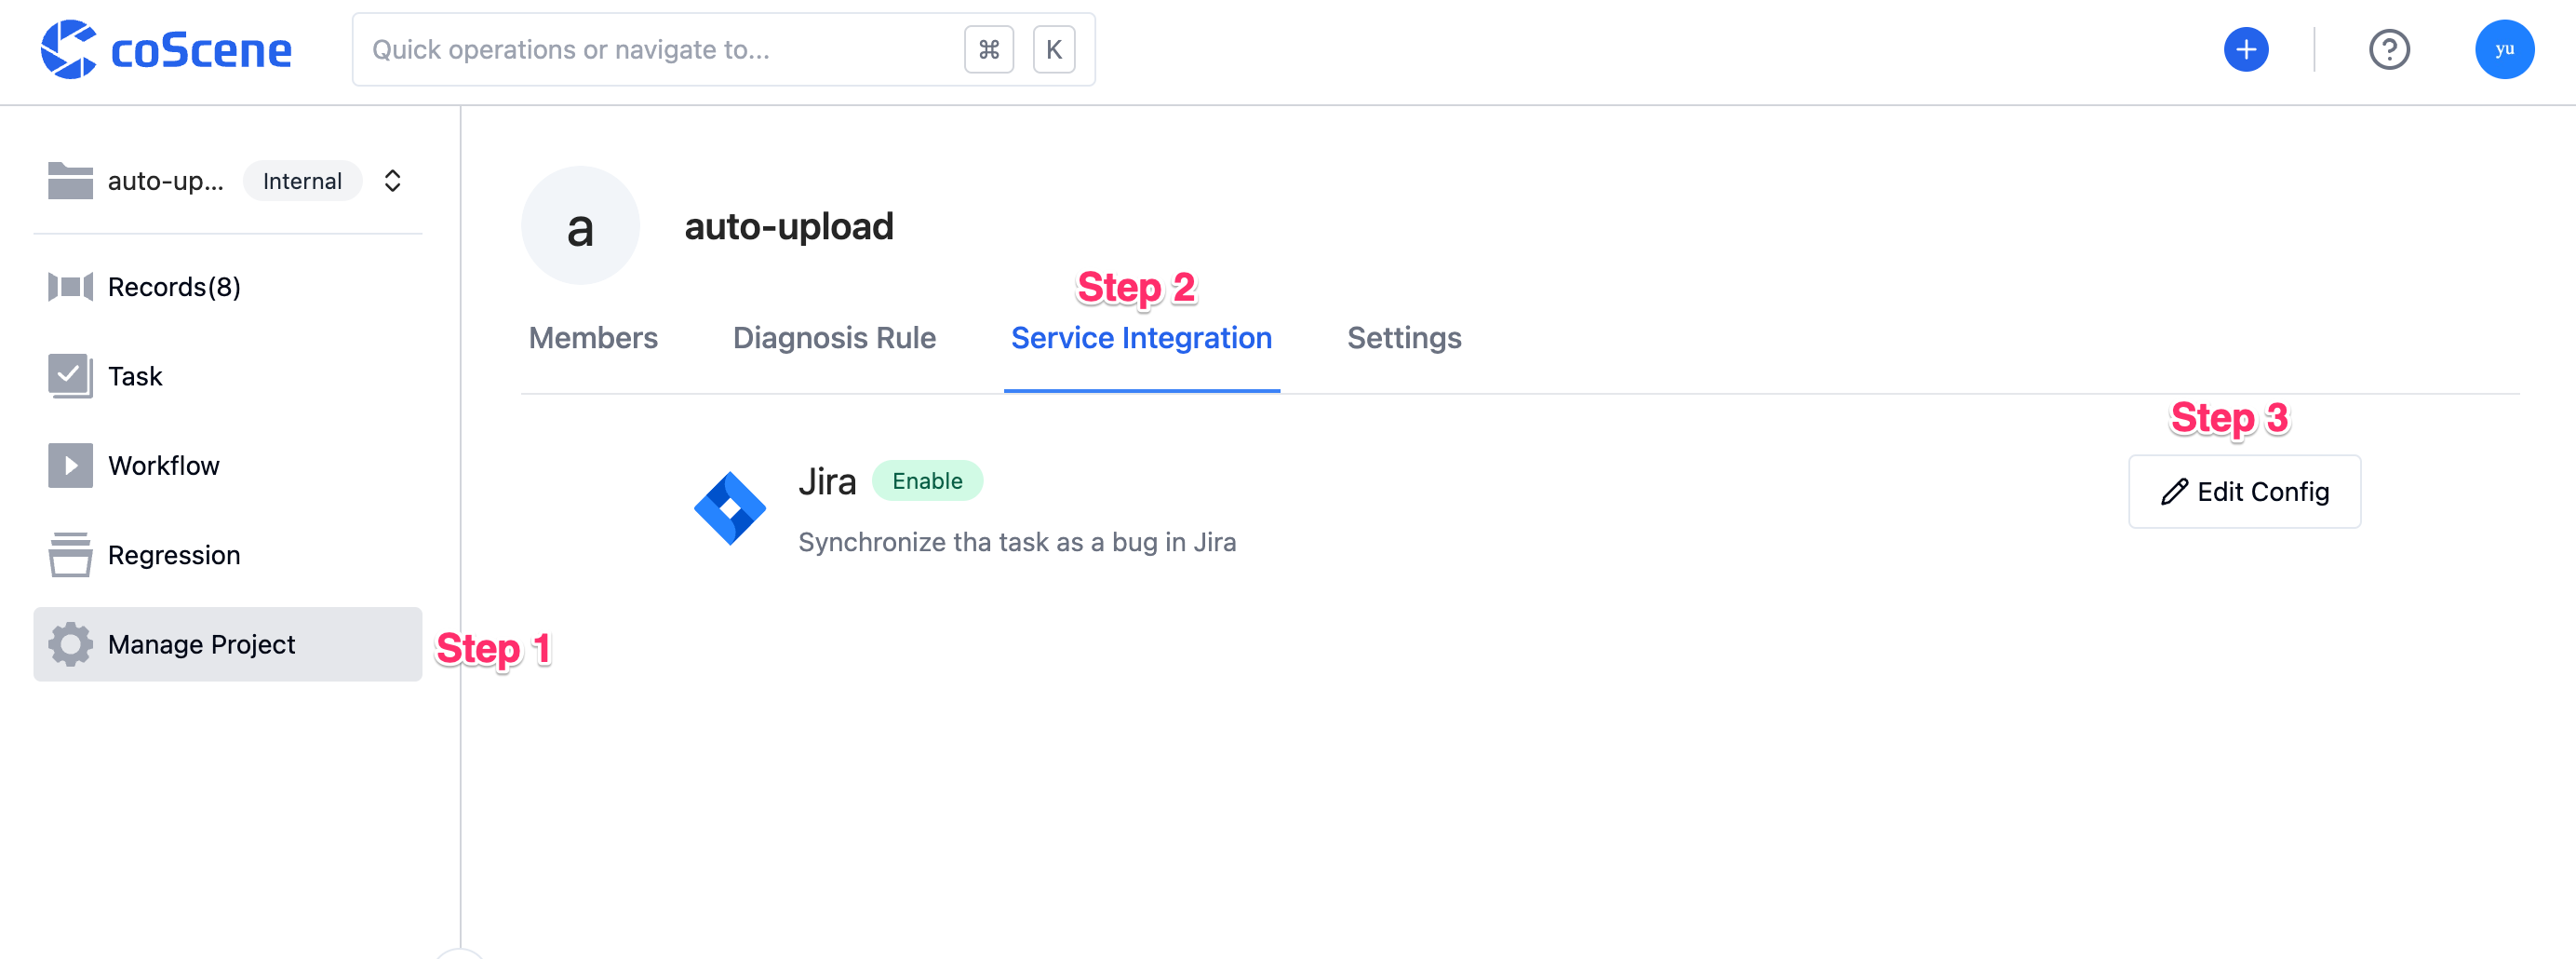
Edit the configuration online. Once done, click "Save".

Disable Integration
Follow the Edit Integration Step and change the enabled configuration to false and save.
Delete Integration
Follow the Edit Integration Step, delete all the configurations and save.