Set Up Your Data Collection
Using the following scenario as an example, let's setup your automatic data collection and diagnosis.
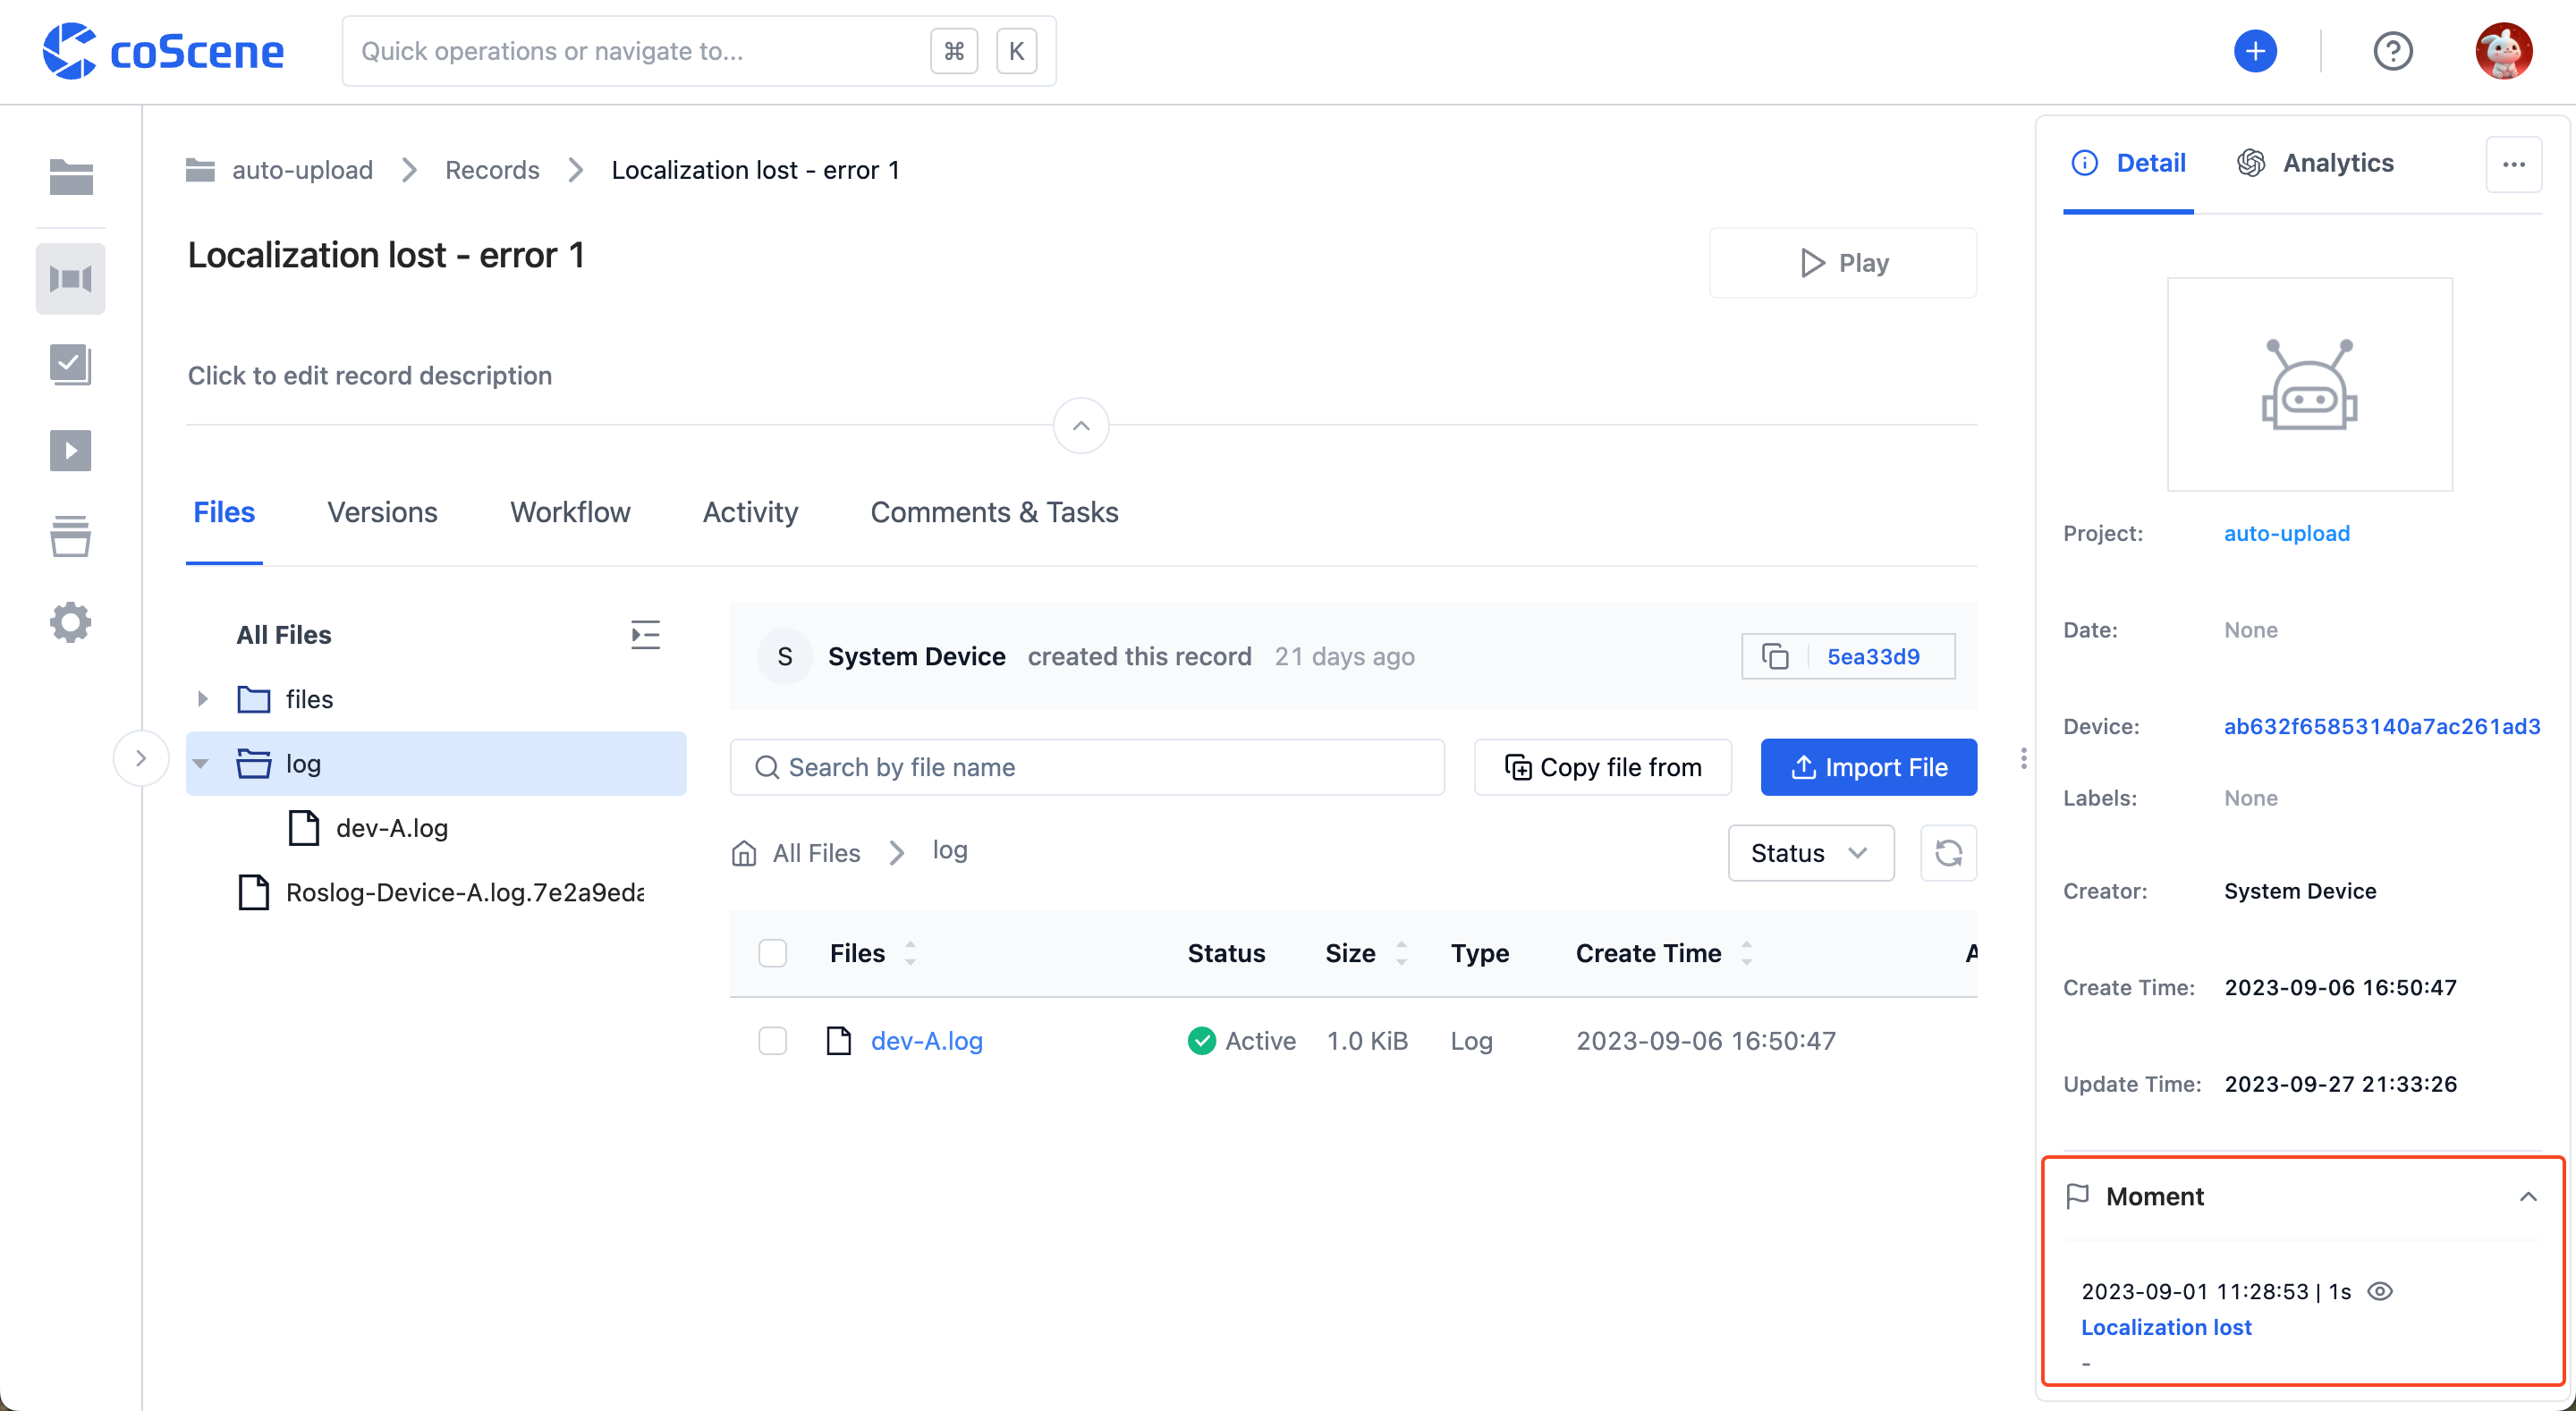
- When "error 1" phrase appears in the log of the device 'dev-A', the log file will be uploaded and create a record. Additionaly, a moment will be created at the exact time this phrase happened.
Prerequisites
- Have a device ready.
- Create a project named
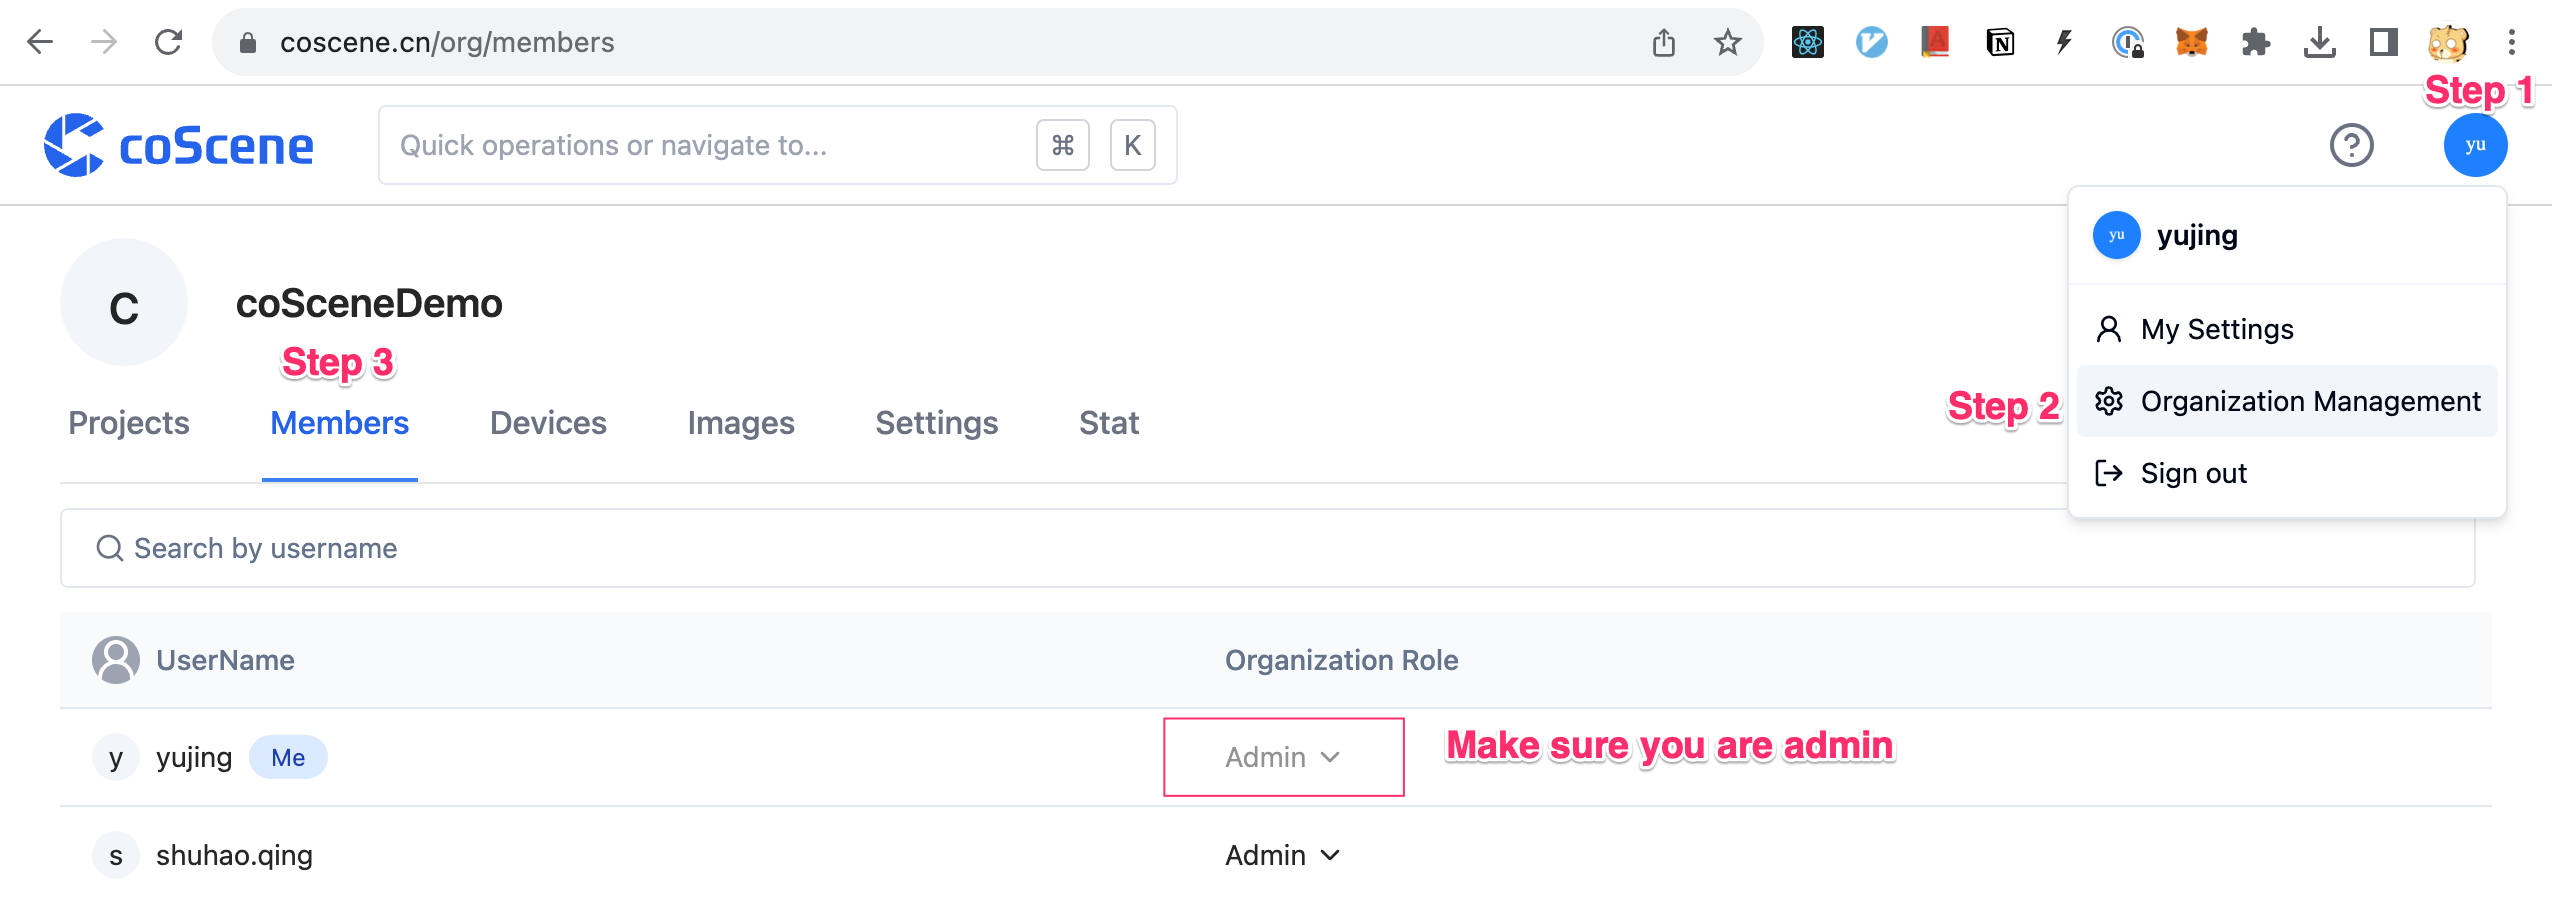
auto-upload. See Cerate New Project for details. - Make sure your role in the coScene organization is "Administrator". If you're not an administrator, contact your organizational admin to update your role.
Adding Rules to Your Project
-
Navigate to the
auto-uploadproject we just created.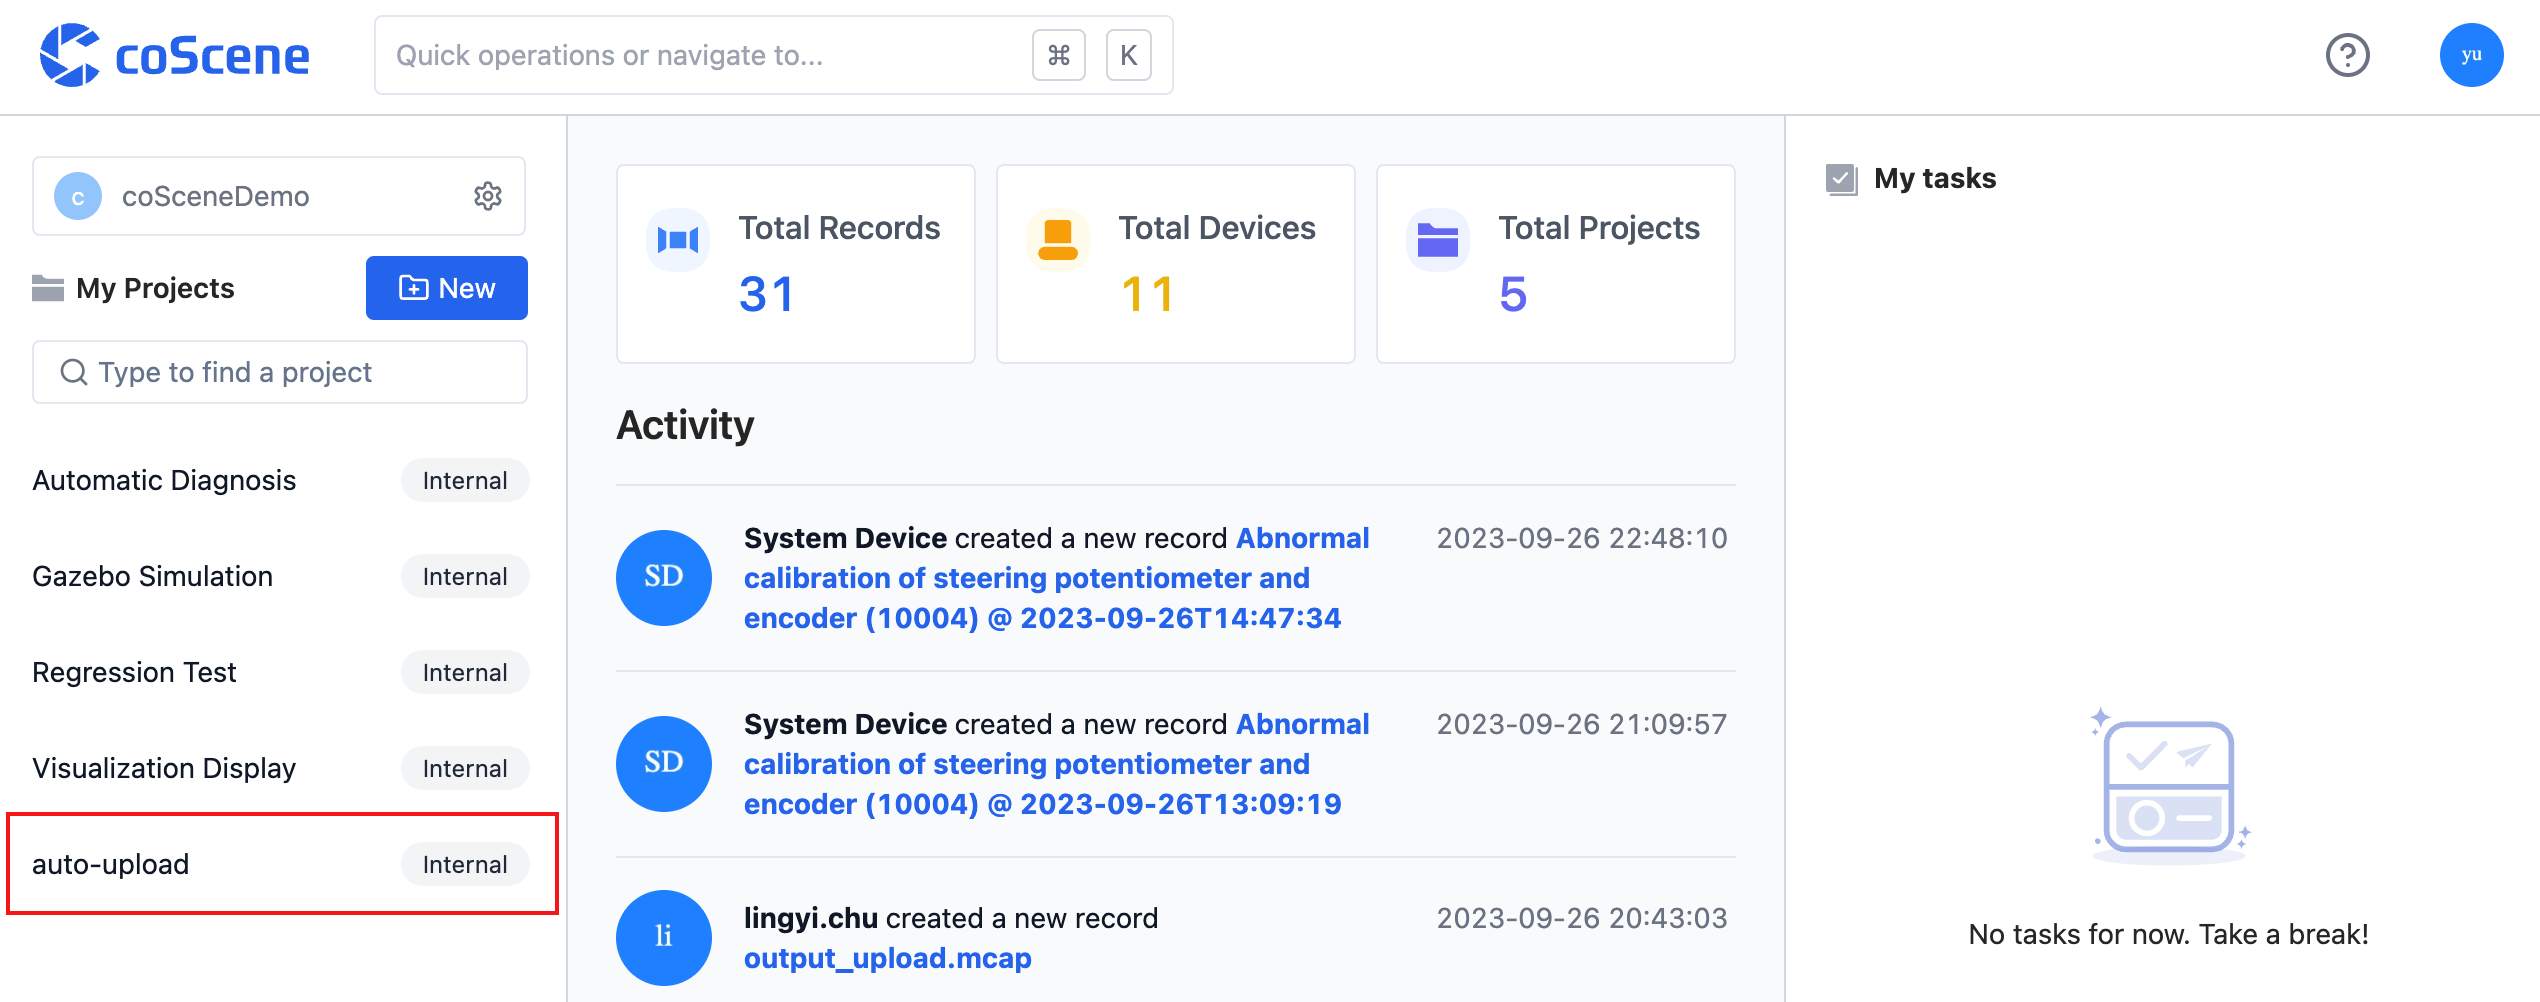
-
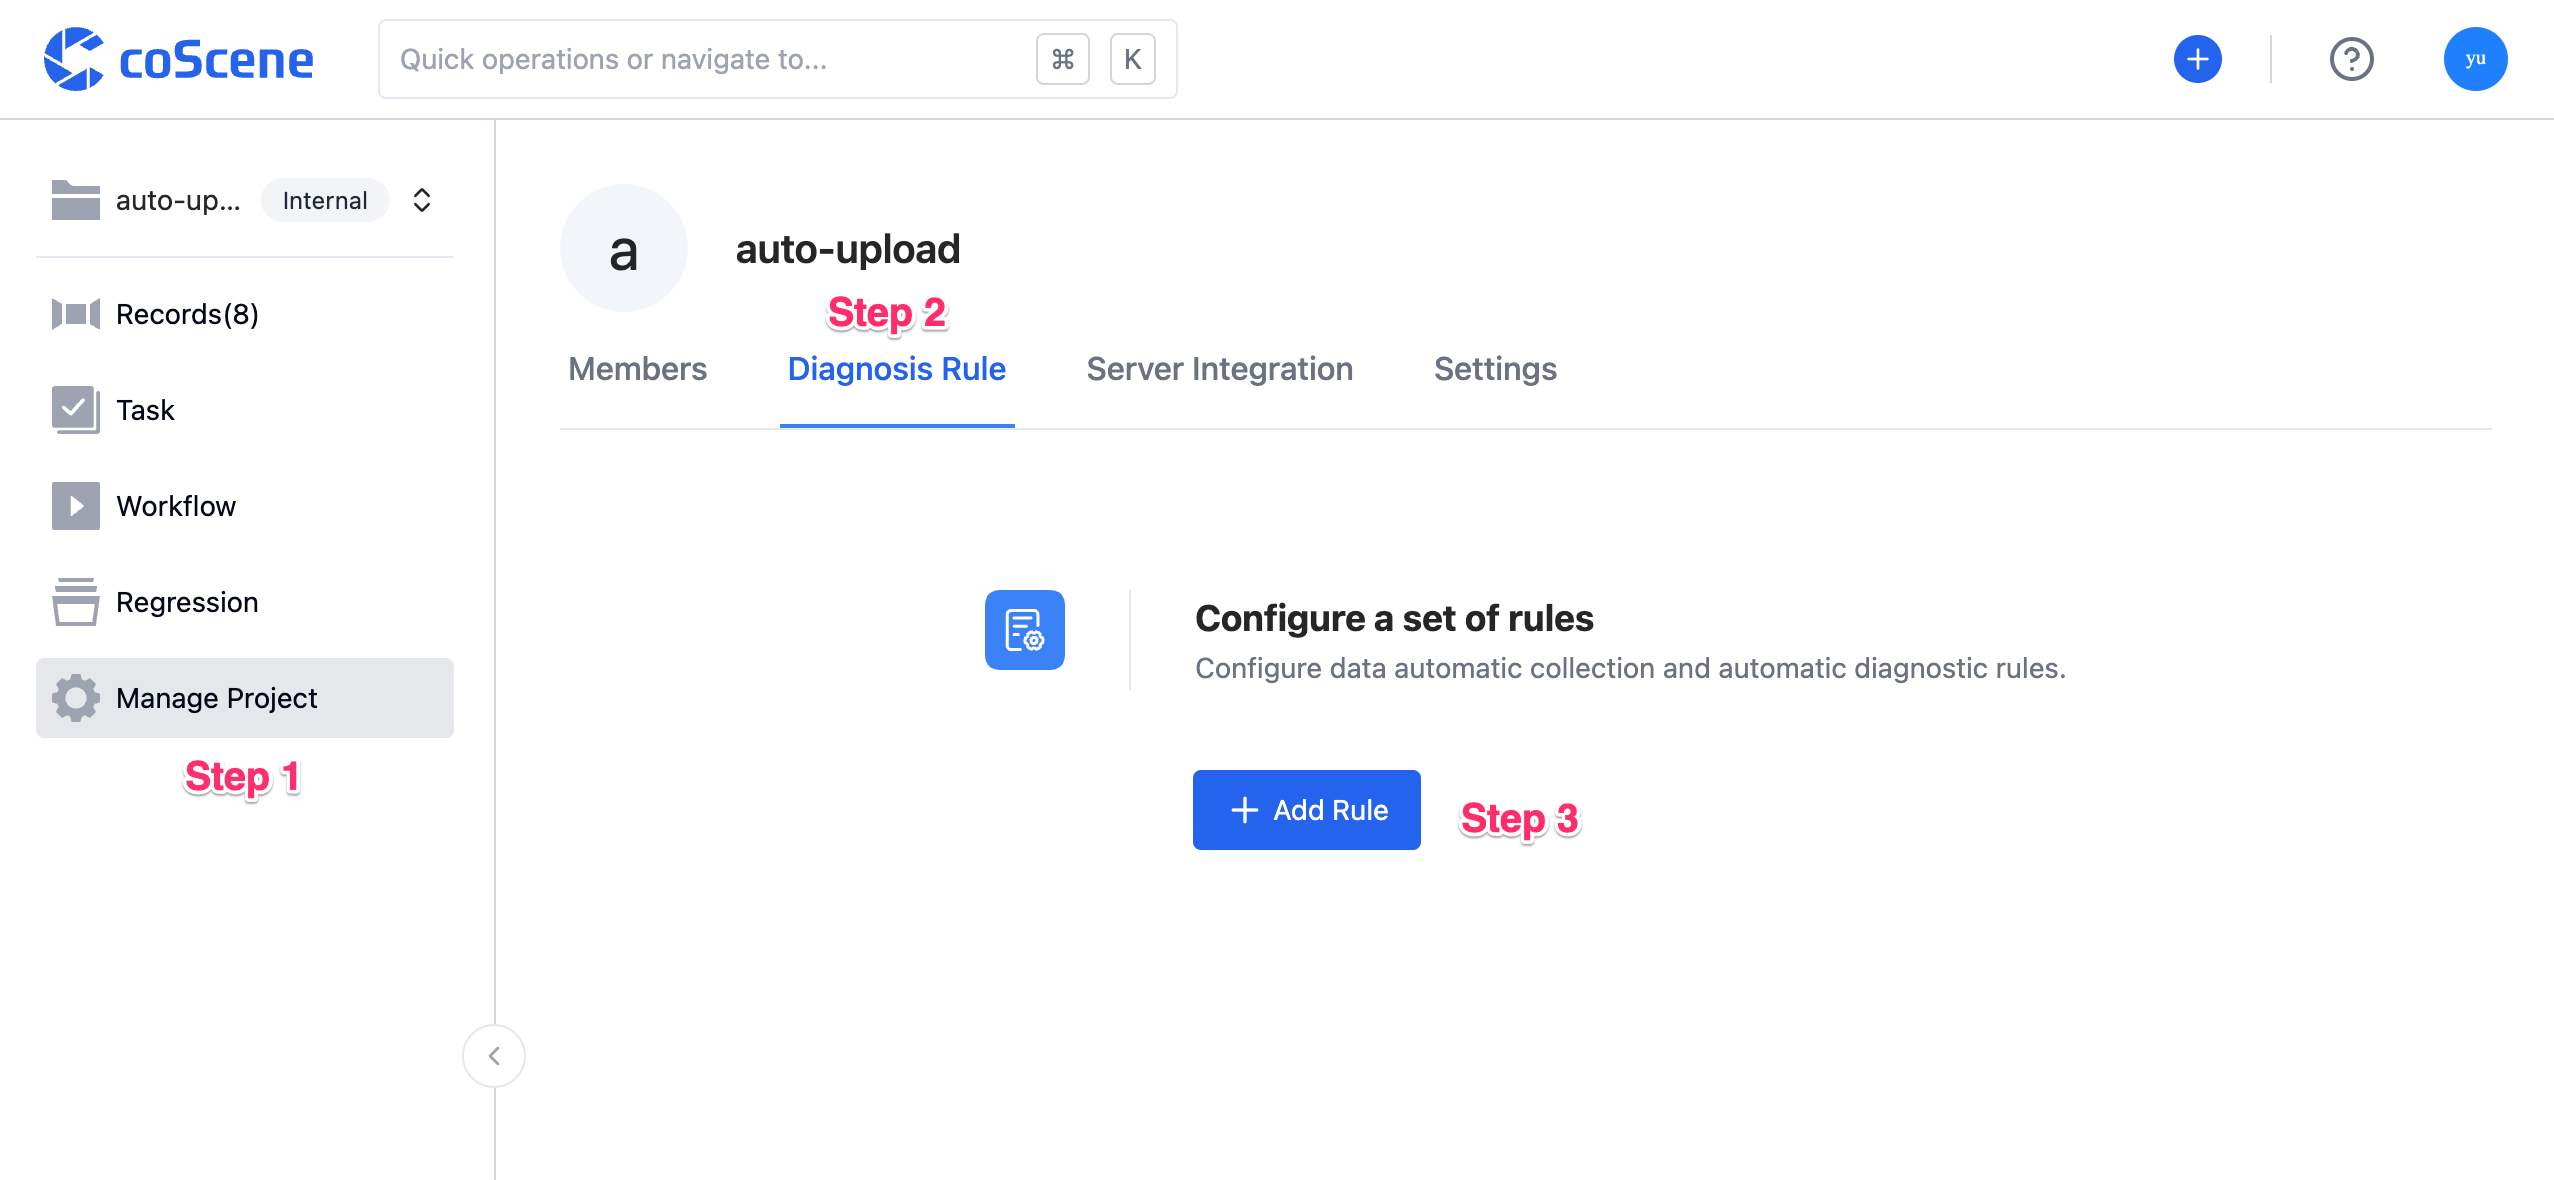
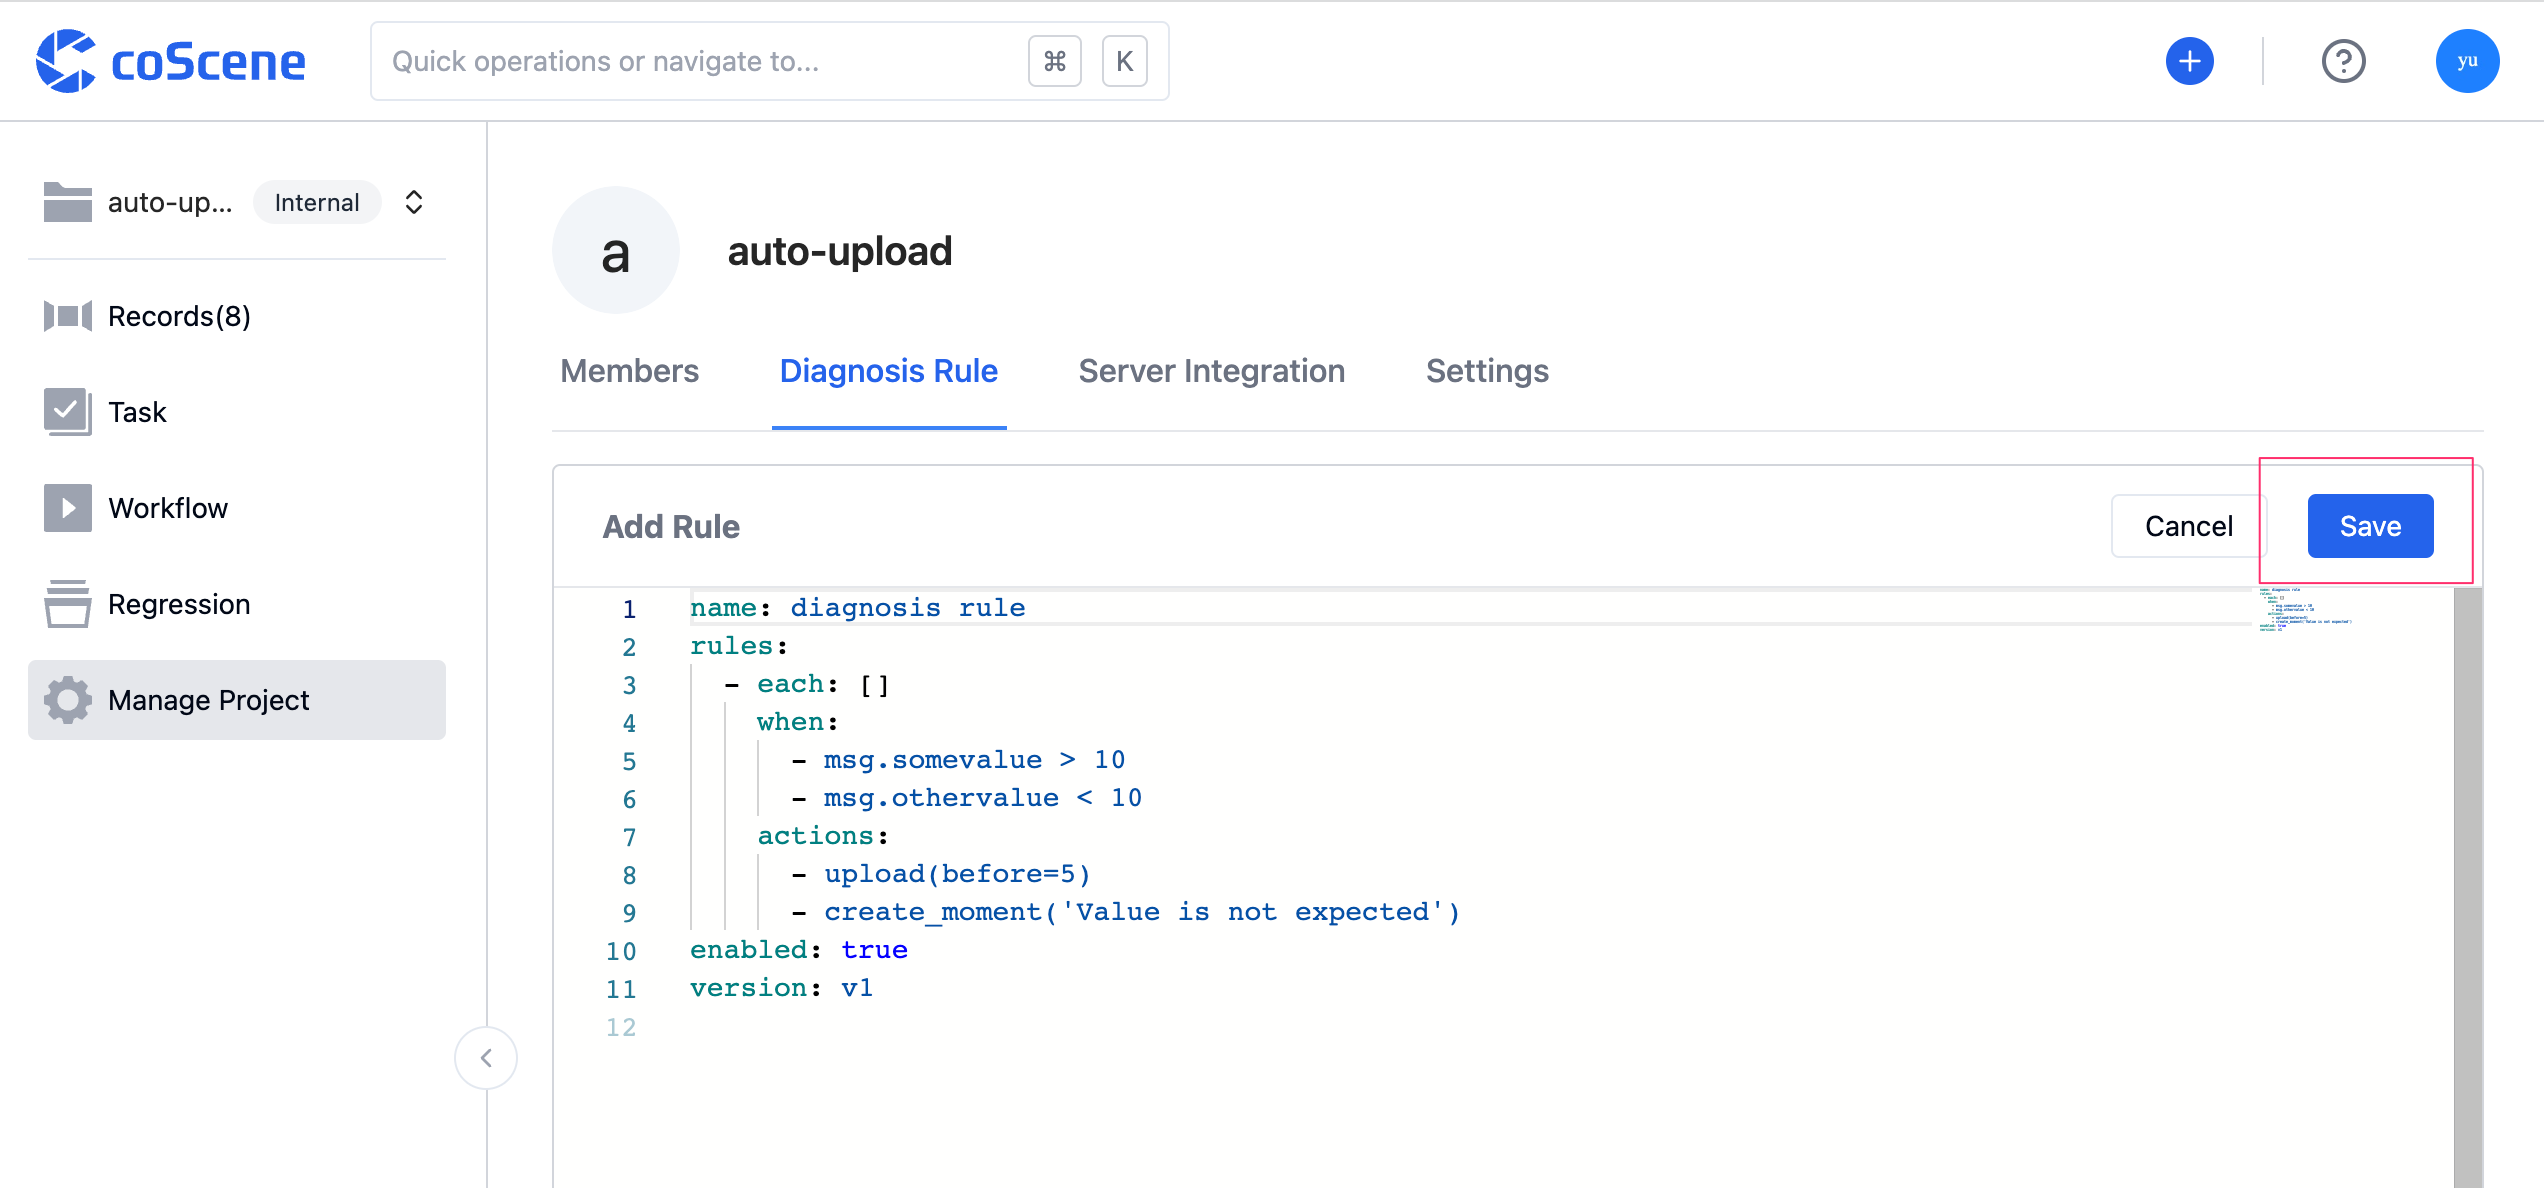
Within the project, go to the 'Manage Project - Data Collection and Diagnosis Rules' page and click on "Add Rule Group".
-
Clear any default content in the rules section. Copy the following rule and paste it into the editor:
name: error series # Rule group name

rules:
- when:
      - has(msg.message, "error 1") # Trigger condition: log contains the string "error 1"
   actions:
      - upload(title="Localization lost - error 1") # Create a record named "Localization lost - error 1" and upload the log file to this record
      - create_moment(title="Localization lost") # Create a moment named "Localization lost"

enabled: true # Rule group status: enabled

version: v1 # The current rule group version is only v1
*For more rule styles, see Structure and Examples of Rules.
-
Click the "Save" button.
Configure Data Collection Device Information
-
Go to the "Devices" tab on the organization management page, and click the "Edit Data Collection Rules" button.
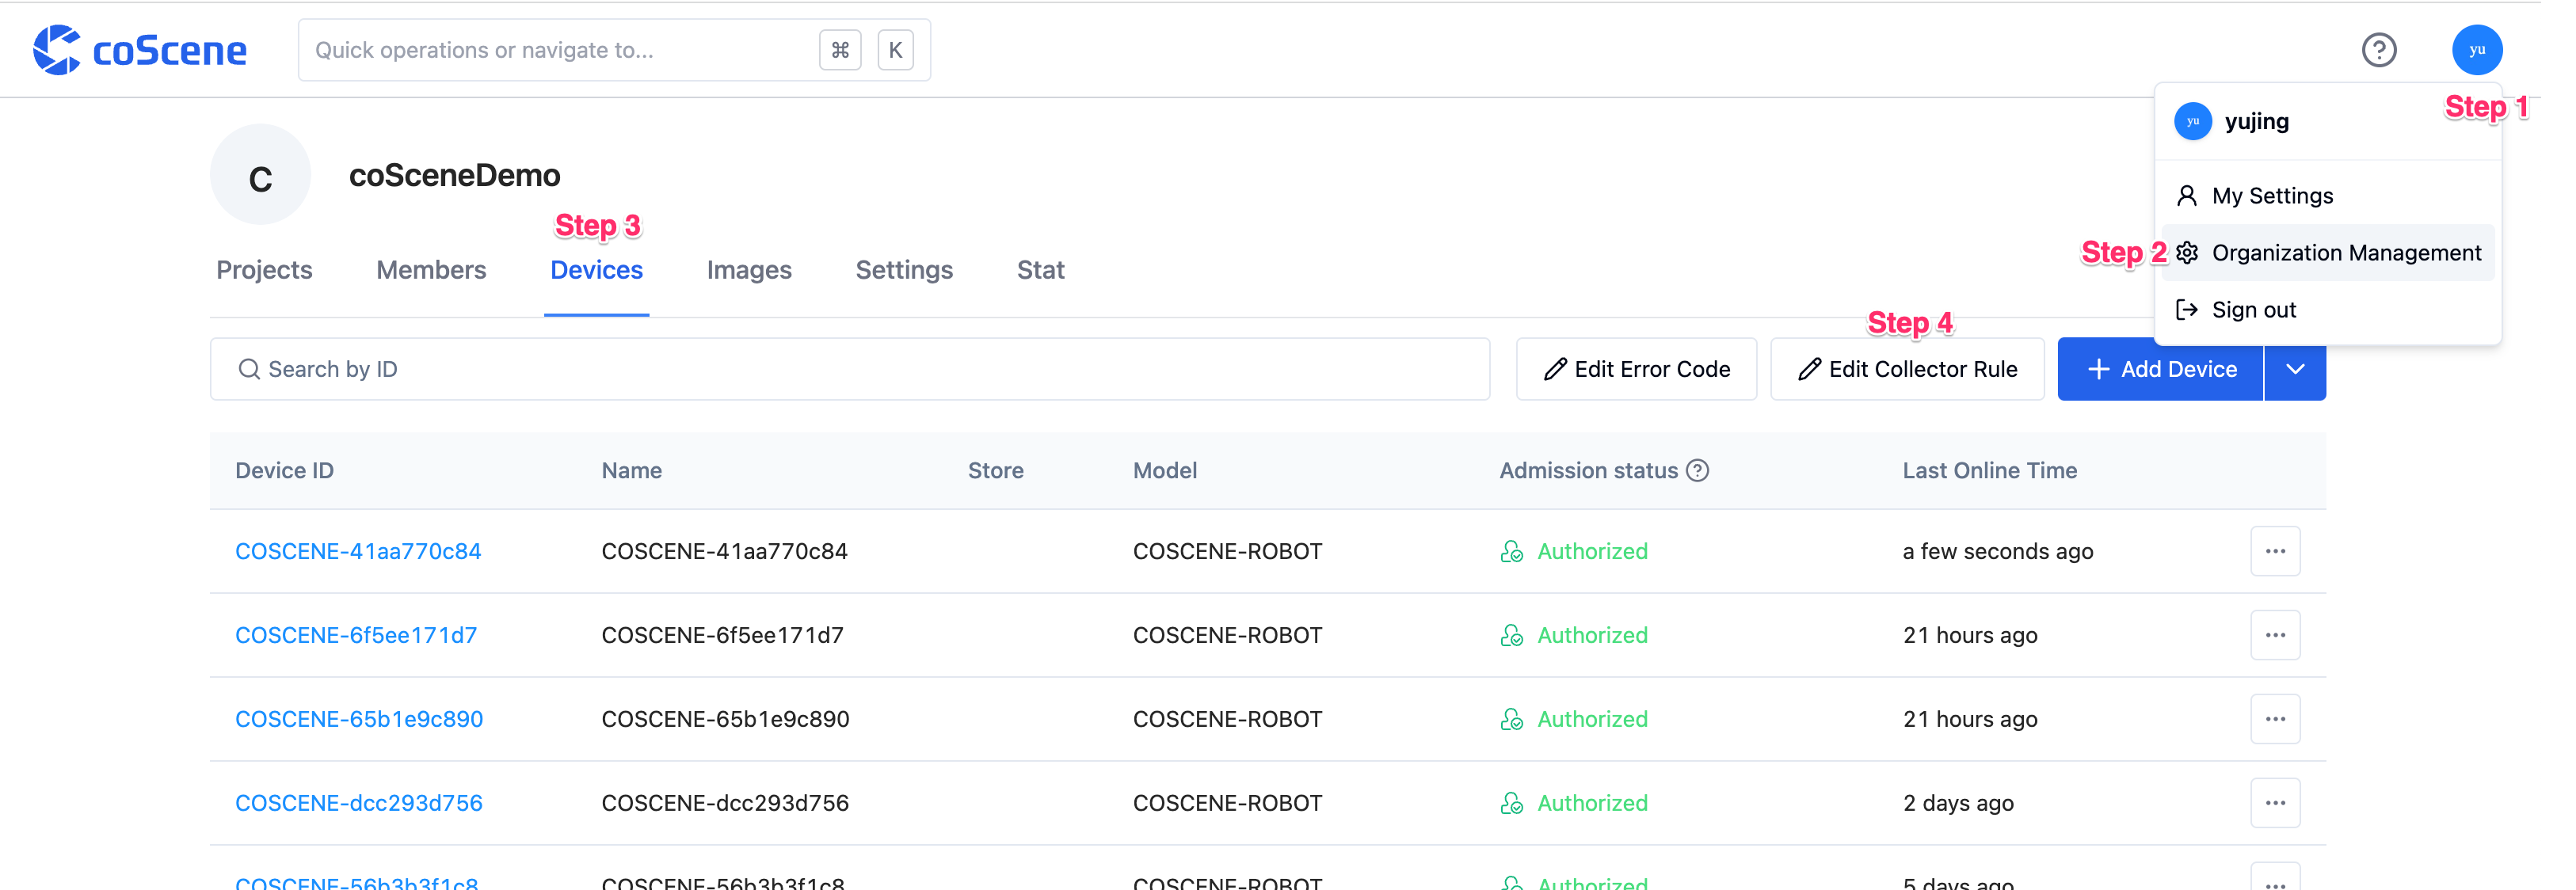
-
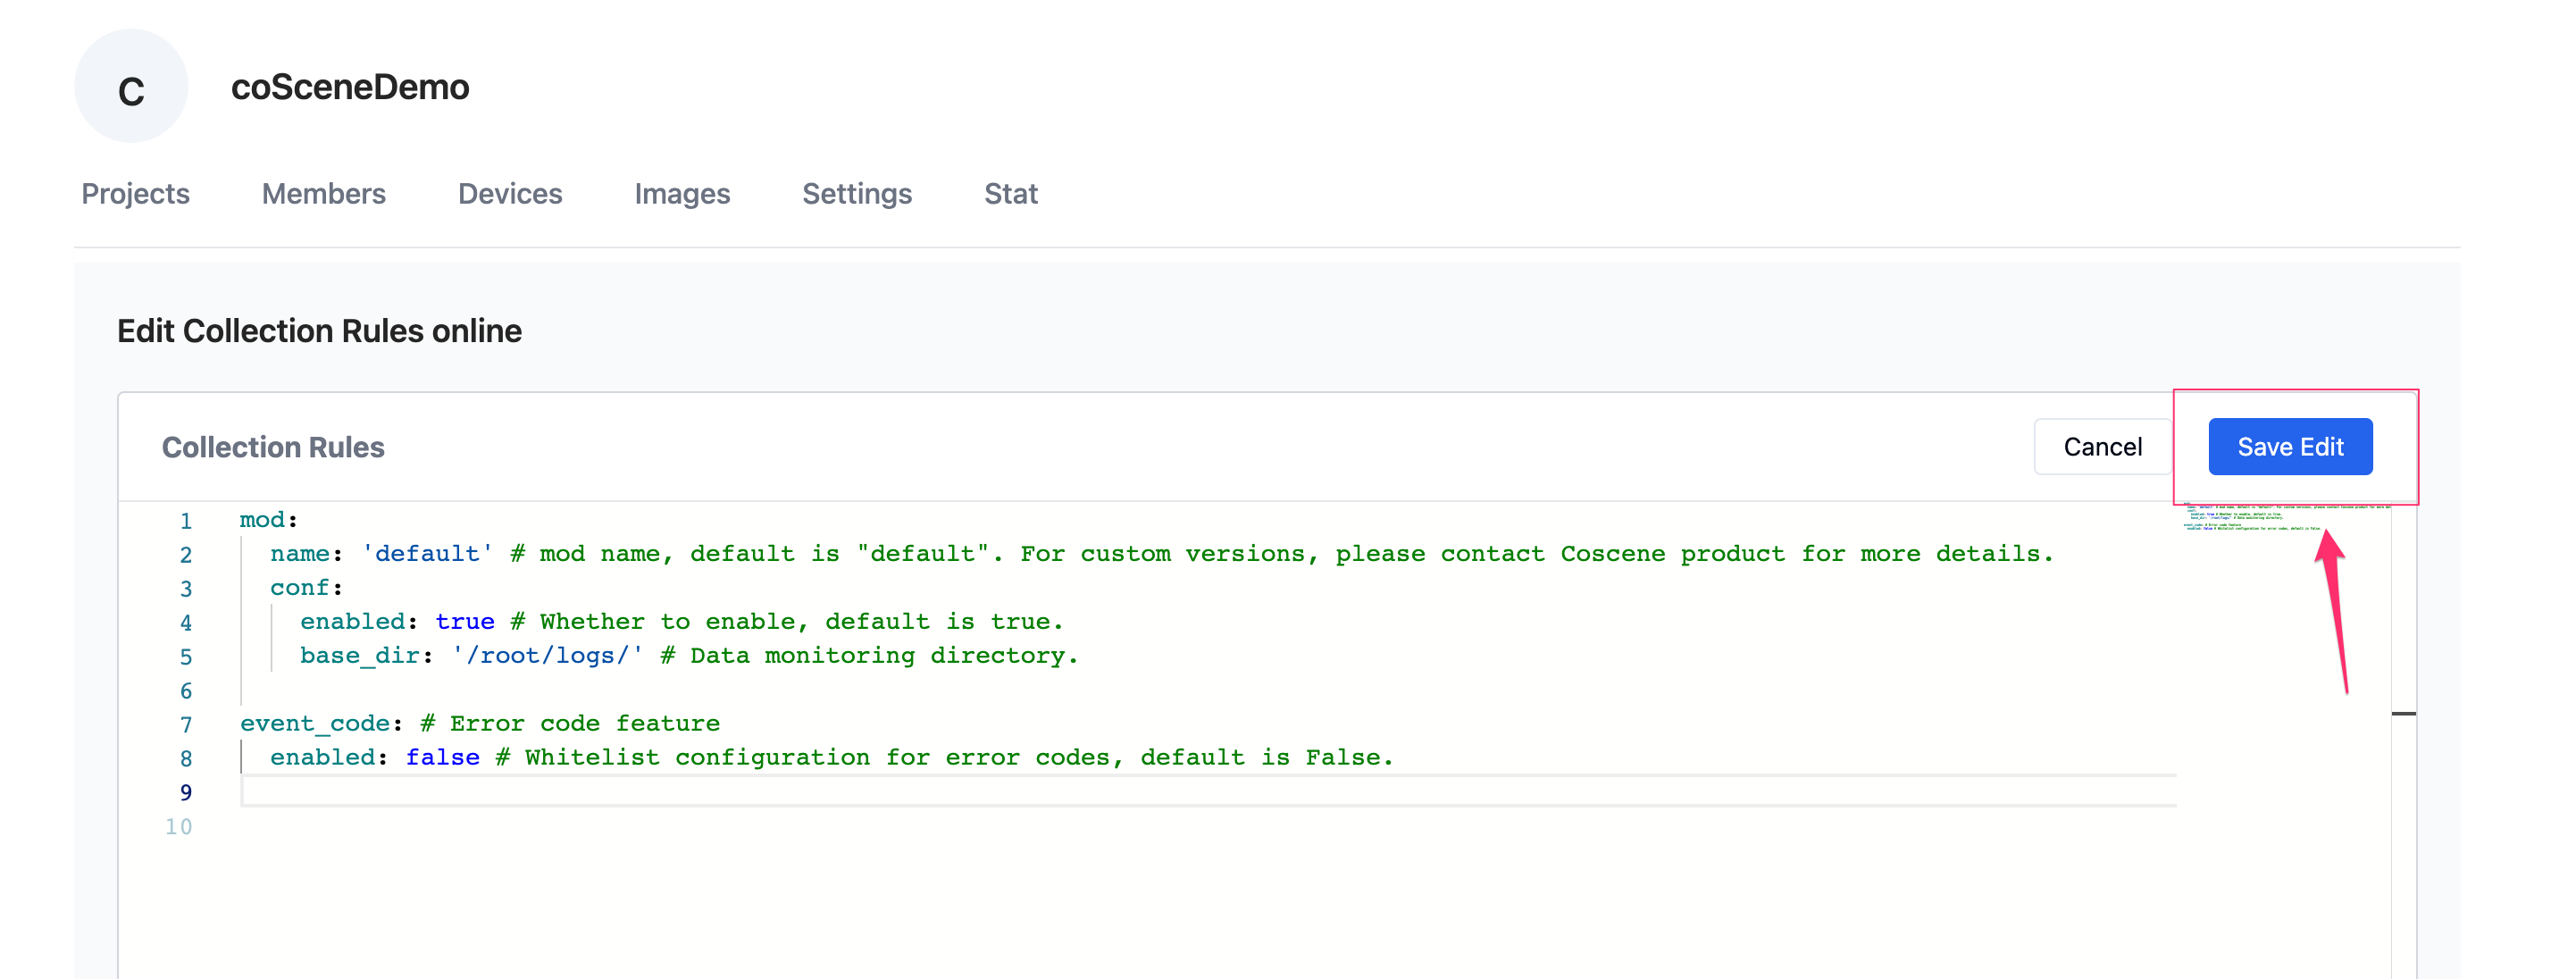
Clear the default content in the rules, then copy and paste the following rule into the editor:
mod:
  name: 'default' # mod name, default is "default". For custom versions, please contact coScene product for more details.
  conf:
    enabled: true # Whether to enable, default is true.

    # Monitored directories on the device, specified for data collection tasks and rule collection in the project
    base_dirs:
      - /home/bag/
      - /home/log/
*For more configurations, refer to Data Collection Rule Format
-
Click the "Save Changes" button.
Authorizing Device
Using a Linux device as an example, for other device registration methods refer to Device Registration
-
Open the device terminal, execute the following command, enter the password to switch to root.
sudo su -
In terminal, create folders to be monitored
/root/logsmkdir logs -
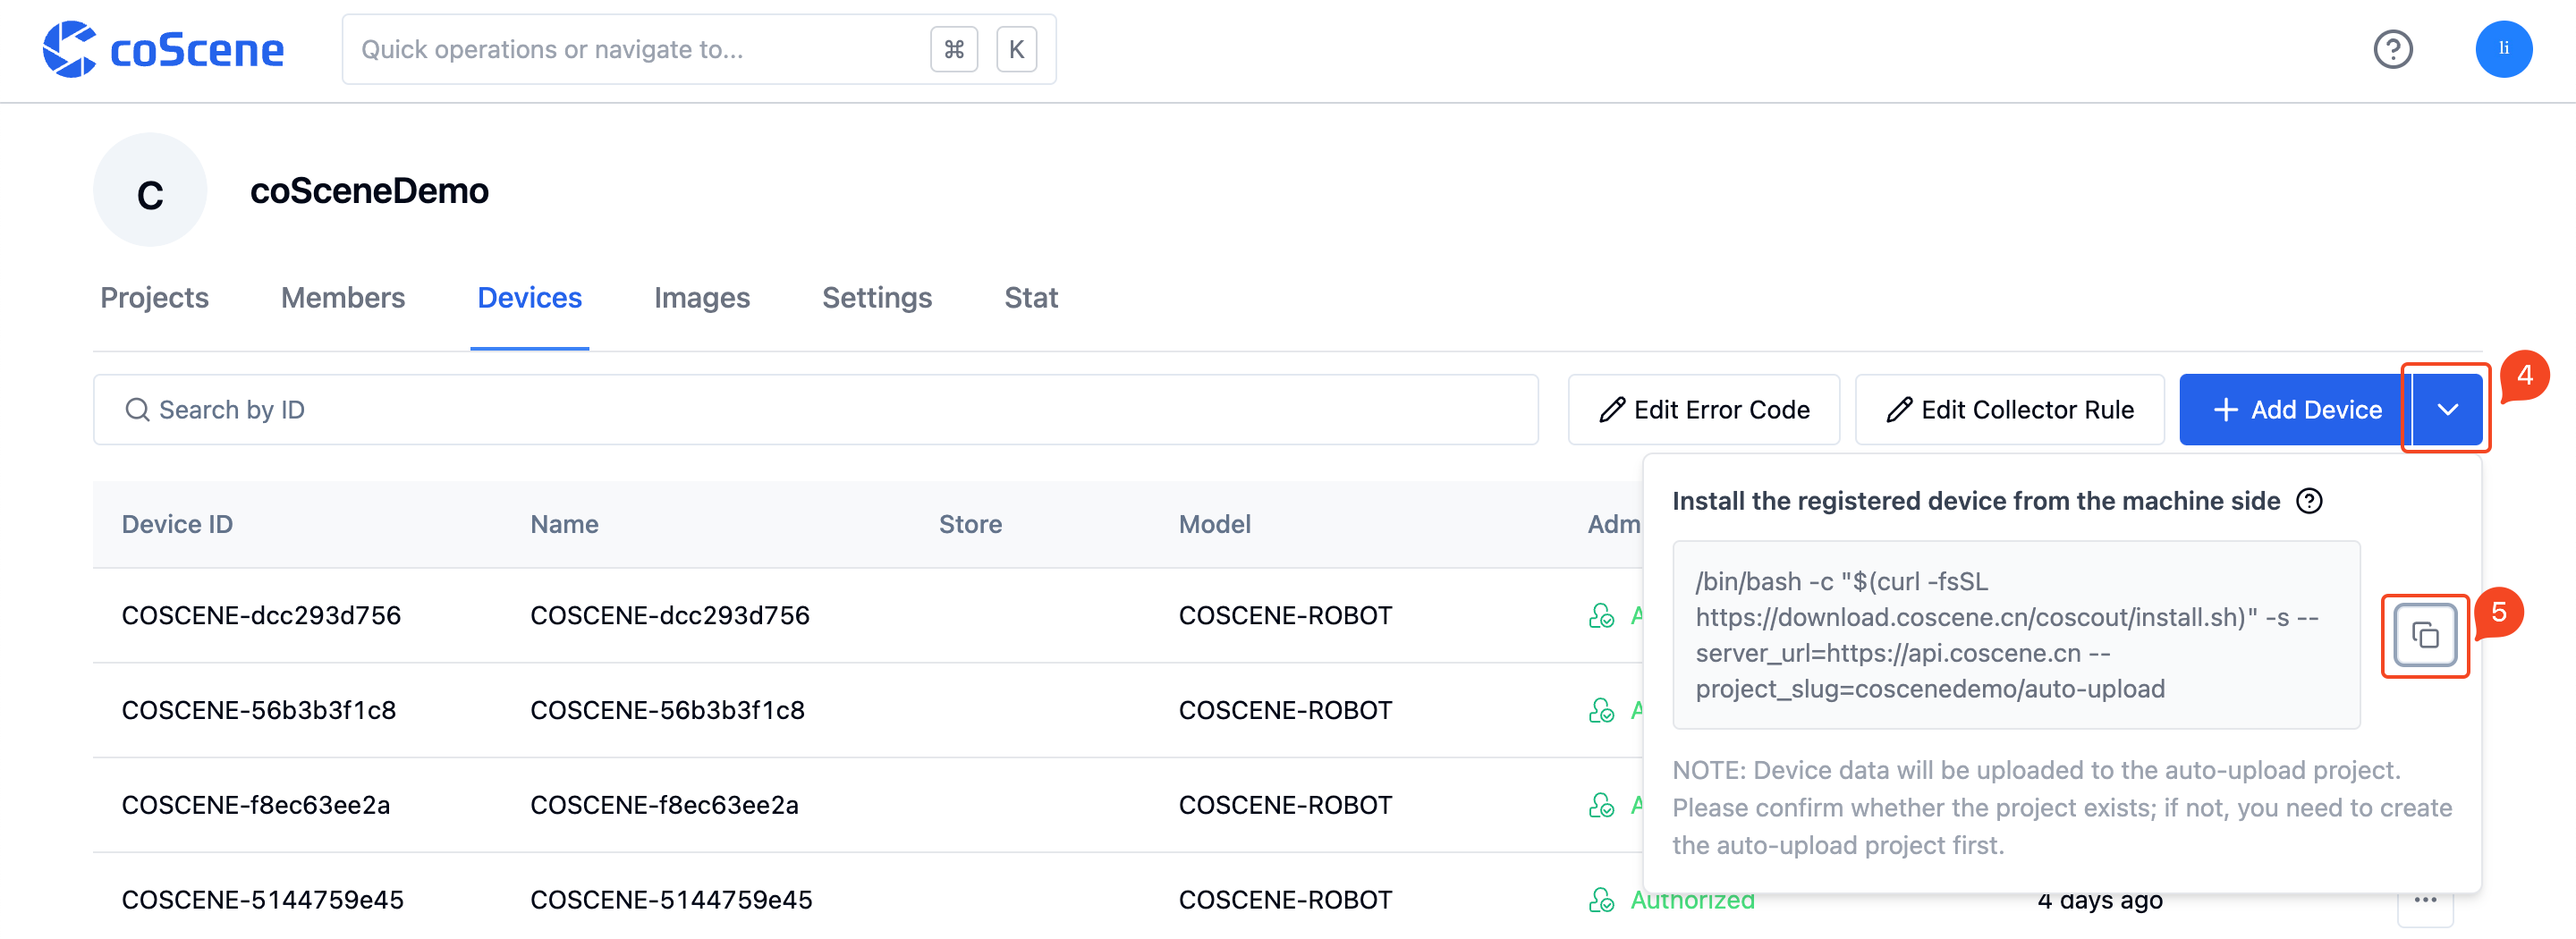
In coScene Web, enter the Device tab in the Org management page

-
Copy the installation command, and paste it to the terminal input as Root user
-
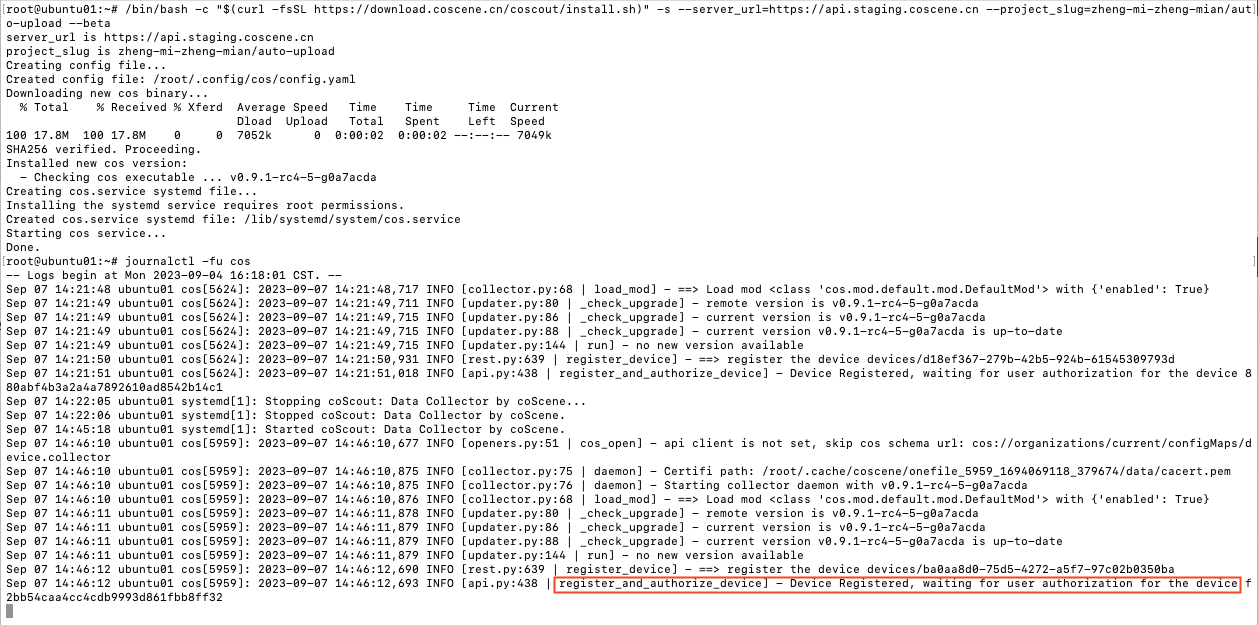
Run the script, and checkout the system logs
journalctl -fu cos-
when you see the following logs, the installation is completed and wait to be permitted by the admins
-
-
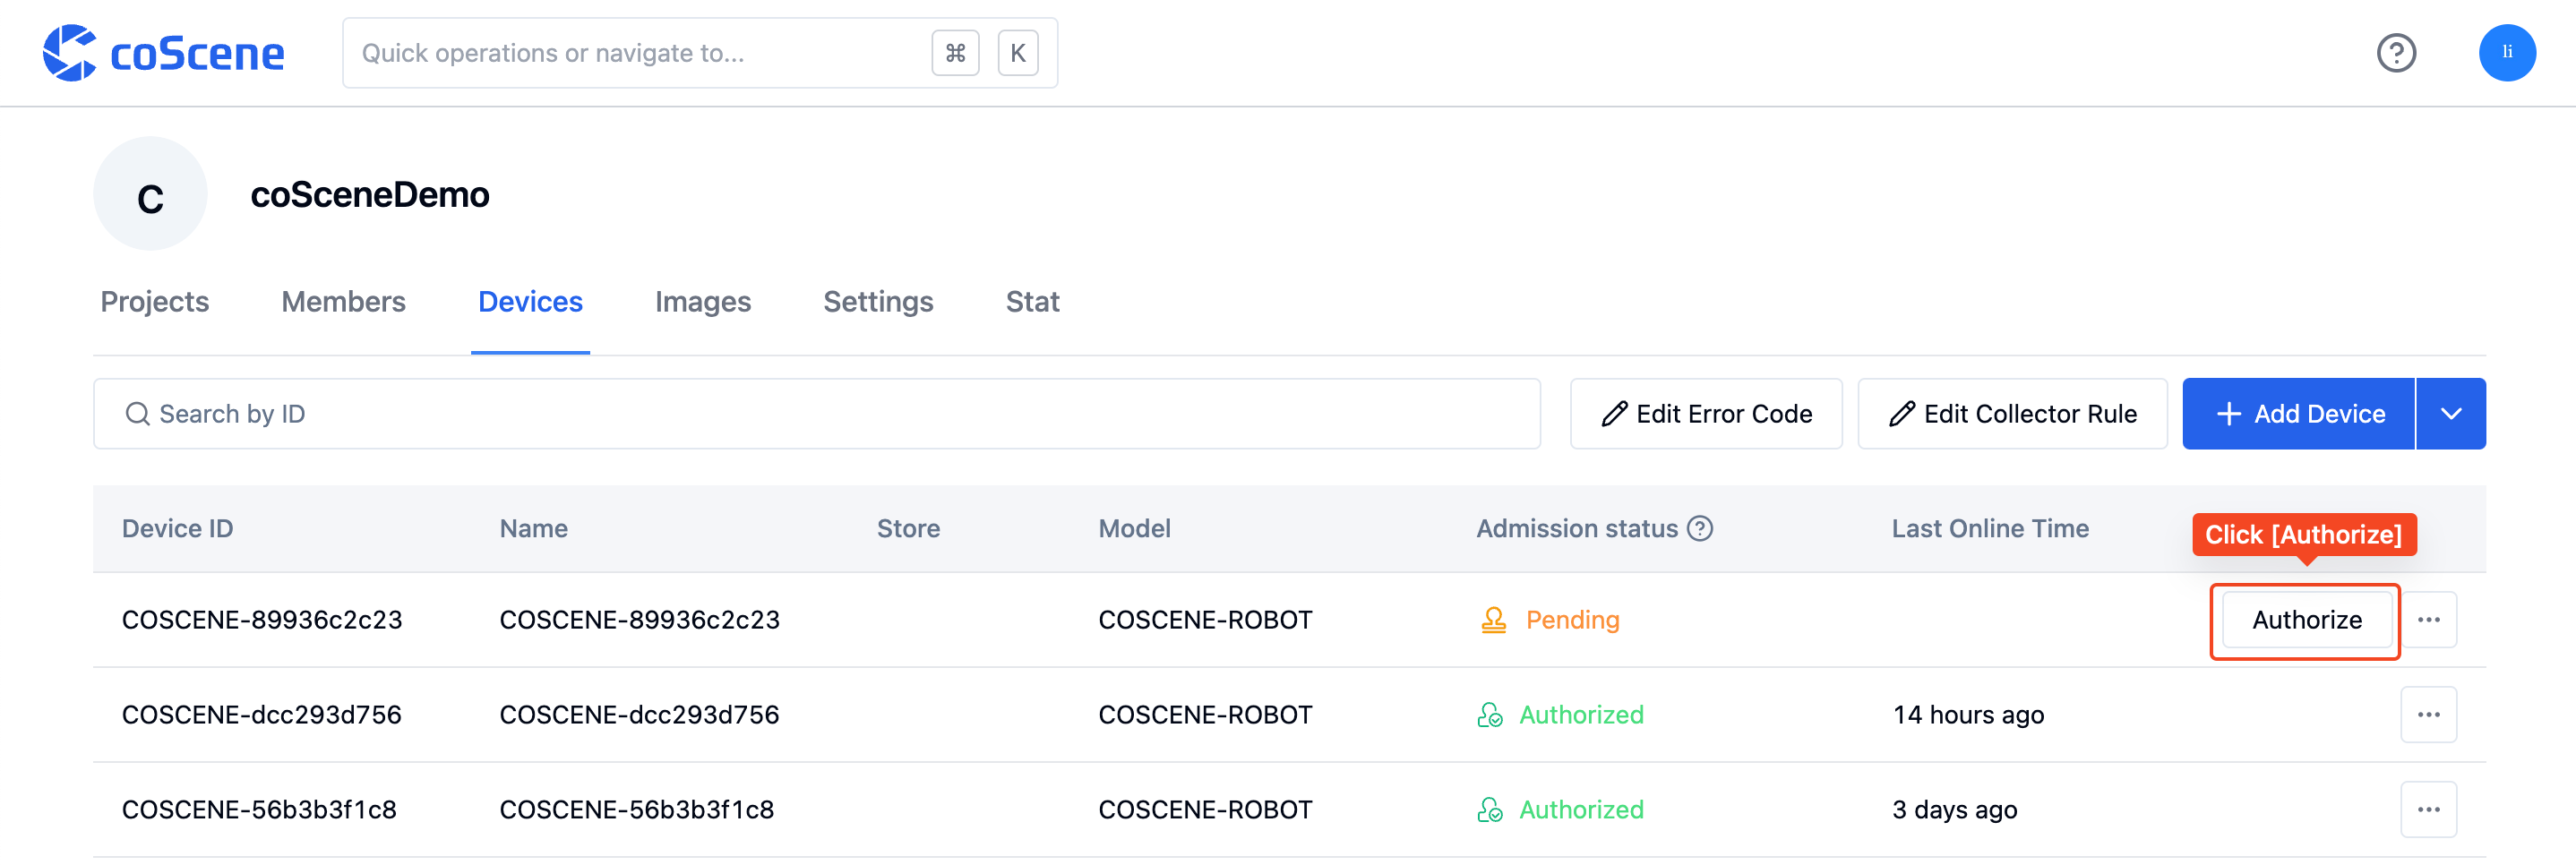
In the device page of the Org settings page, find the to be permitted device, and click "Permit"
Write Files in the Device Monitoring Directory
-
Ensure the device has received the data collection and diagnostic rules:
-
When the following entry appears in the logs, it indicates that the rules have been successfully acquired:

-
-
Click to download the
dev-A.loggenerated by device dev-A. Its contents are as follows:2023-09-01 11:28:47.000 INFO "Demo Log message 1"
2023-09-01 11:28:48.000 INFO "Demo Log message 2"
2023-09-01 11:28:49.000 INFO "Demo Log message 3"
2023-09-01 11:28:50.000 WARN "Demo Log message 4"
2023-09-01 11:28:51.000 INFO "Demo Log message 5"
2023-09-01 11:28:52.000 INFO "Demo Log message 6"
2023-09-01 11:28:53.000 INFO "Demo Log message 7"
2023-09-01 11:28:54.000 INFO "Demo Log message 8"
2023-09-01 11:28:55.000 INFO "Demo Log message 9"
2023-09-01 11:28:56.000 INFO "Demo Log message 10"
2023-09-01 11:28:57.000 WARN "Demo Log message 11"
2023-09-01 11:28:58.000 ERROR "Demo Log message 12 error 1"
2023-09-01 11:28:59.000 INFO "Demo Log message 13"
2023-09-01 11:29:00.000 INFO "Demo Log message 14"
2023-09-01 11:29:01.000 INFO "Demo Log message 15"
2023-09-01 11:29:02.000 INFO "Demo Log message 16"
2023-09-01 11:29:03.000 INFO "Demo Log message 17"
2023-09-01 11:29:04.000 INFO "Demo Log message 18"
2023-09-01 11:29:05.000 INFO "Demo Log message 19"
2023-09-01 11:29:06.000 INFO "Demo Log message 20" -
In your terminal, execute the command to copy the file dev-A.log to the /root/logs/ directory on the device.
scp Downloads/dev-A.log root@ubuntu:/root/logs

# Where Downloads/dev-A.log is the directory where the dev-A.log file is located on the local machine, and root@ubuntu is the device name. Both need to be modified accordingly. -
Log Data Upload
-
When the following entry appears in the logs, it indicates that the log data is being uploaded to the coScene platform.

-
View the Created Record
-
Enter the
auto-uploadproject.
-
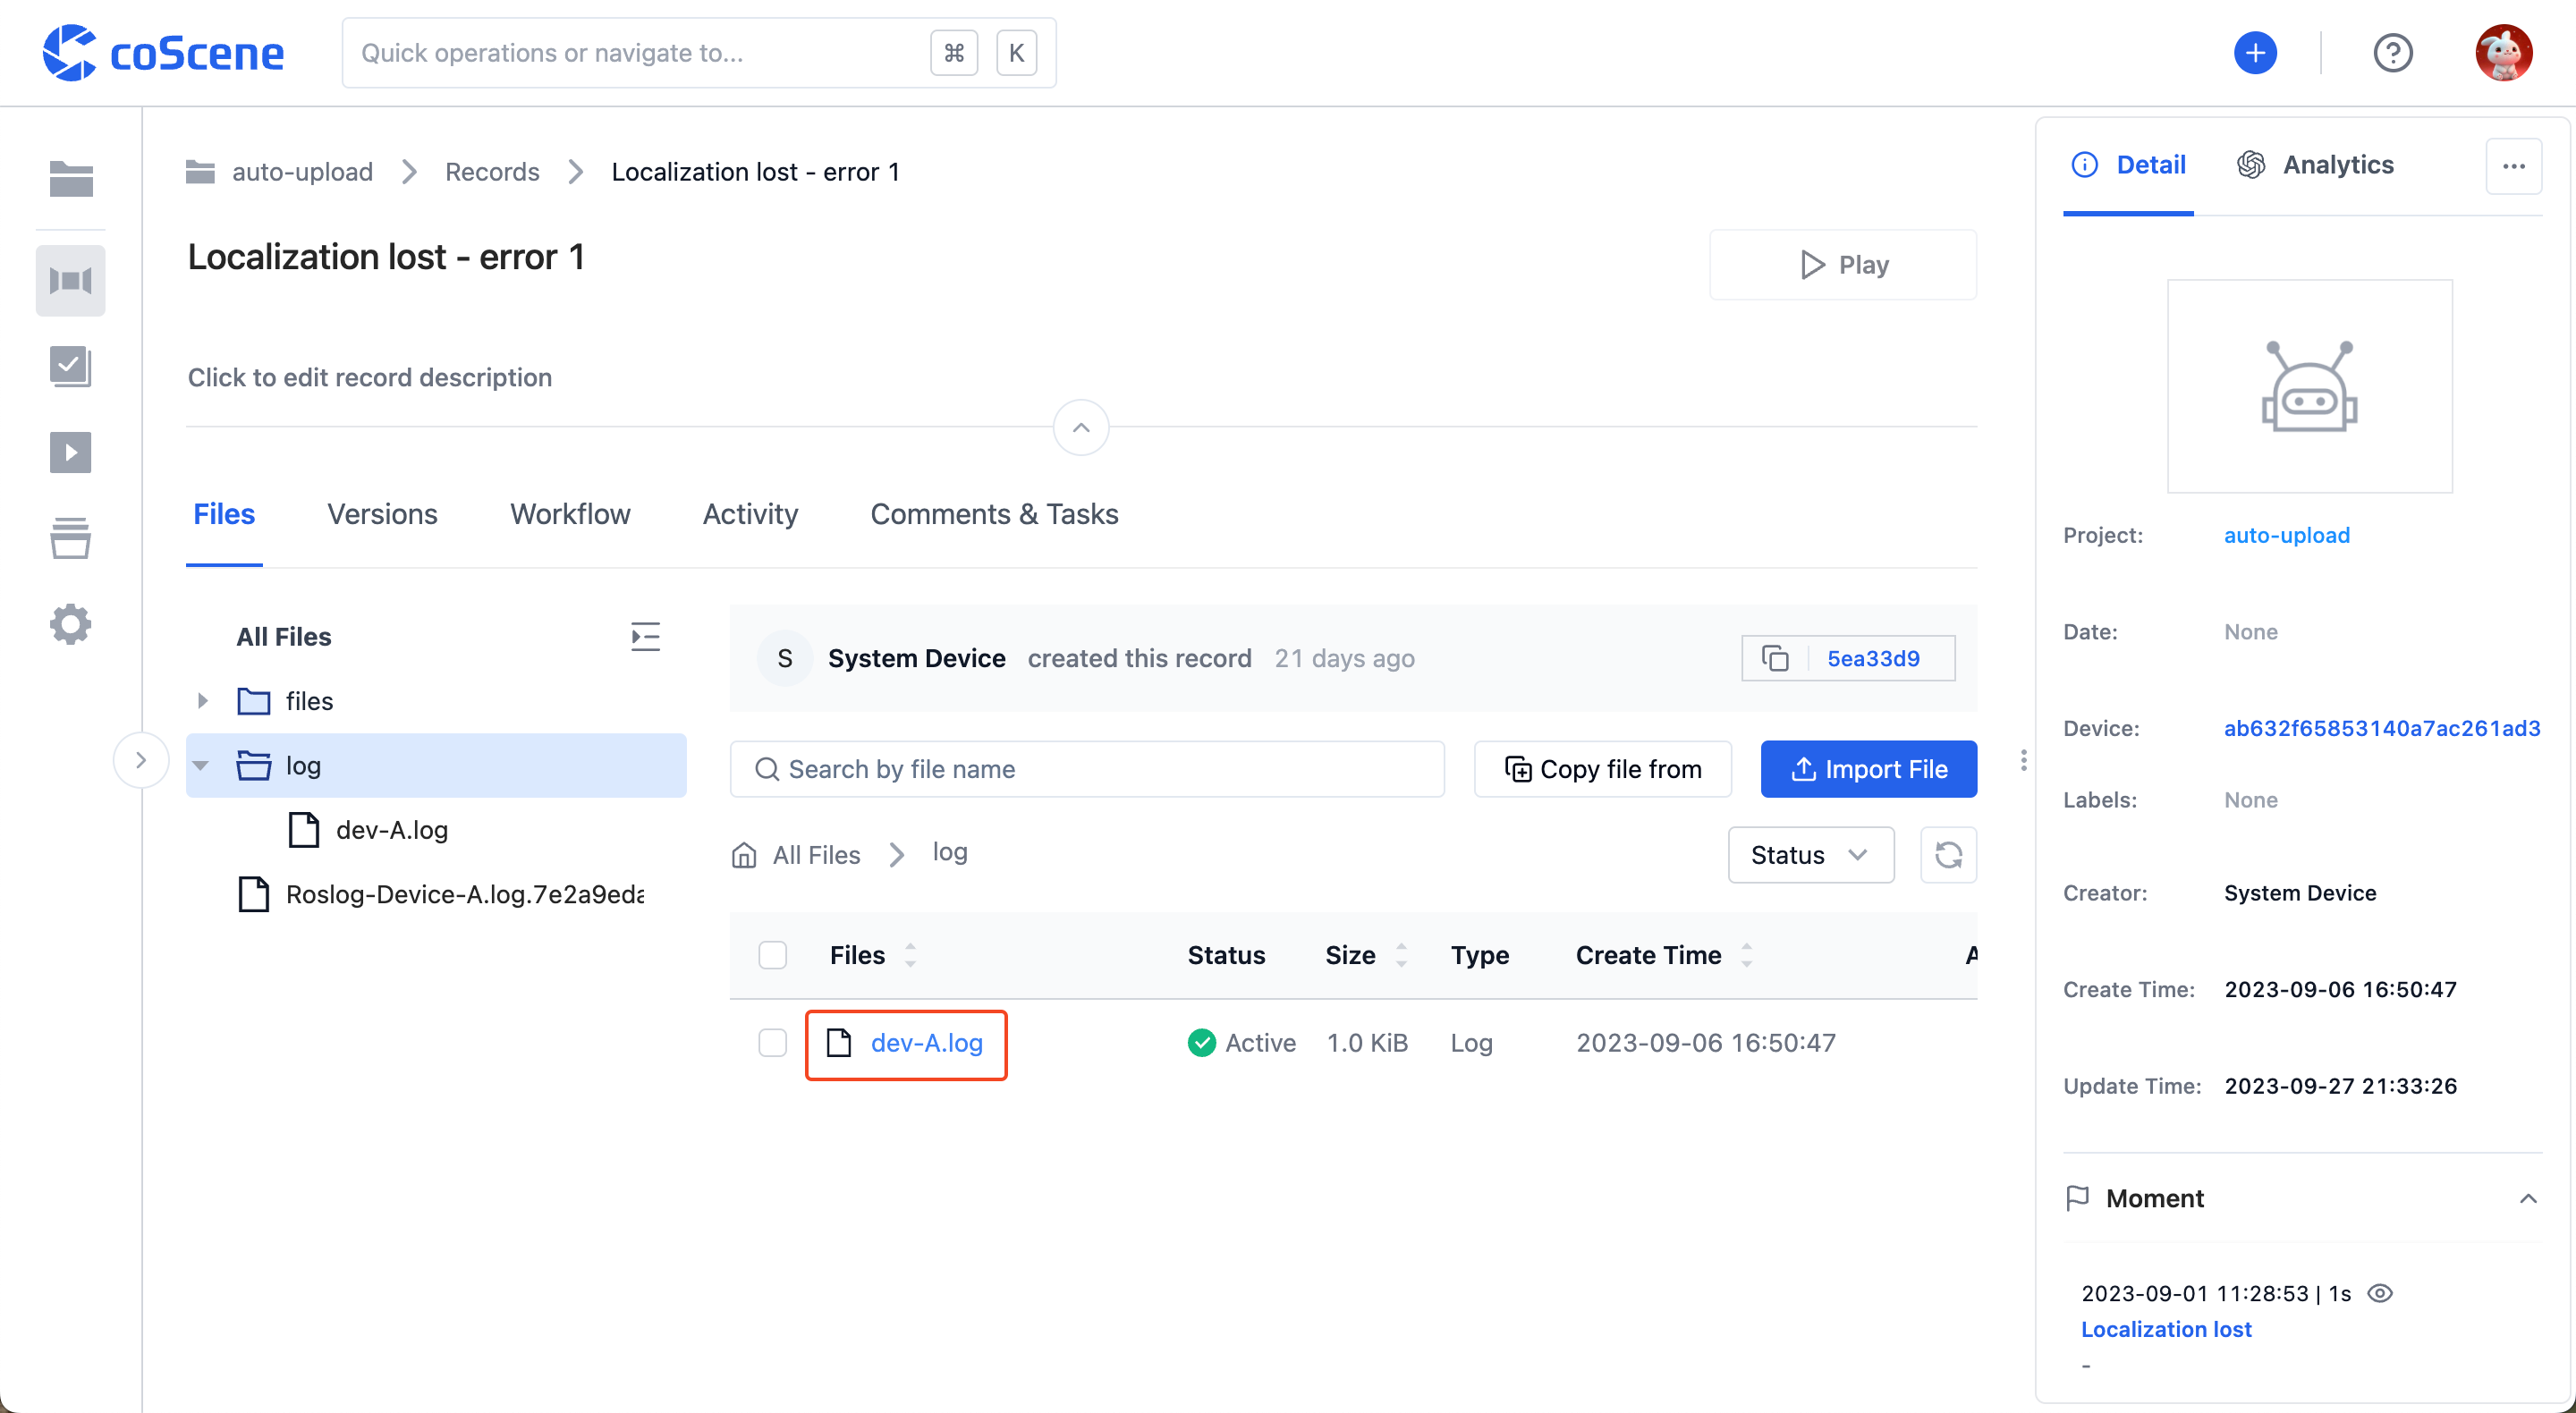
View the automatically created record.

-
Check the data uploaded in the record.
-
View the moment created at the trigger time.
