Create, Share, and View "Moments"
You can create, edit, and share keyframes called "Moments" within the visualization page. They can be tags, issues, accidents, mis-behaviors, or interesting scenes from the record.
Follow the pictorial explanations and video tutorials provided in this section to understand the operations related to "Moments" within the visualization interface.
1. Create a "Moment"
While playing a record in the visualization interface, you can click the "Create Moment" button above the progress bar or use the corresponding shortcut key to create a "Moment" starting from the current time point:
When creating a "Moment", you can choose to simultaneously create a related task:
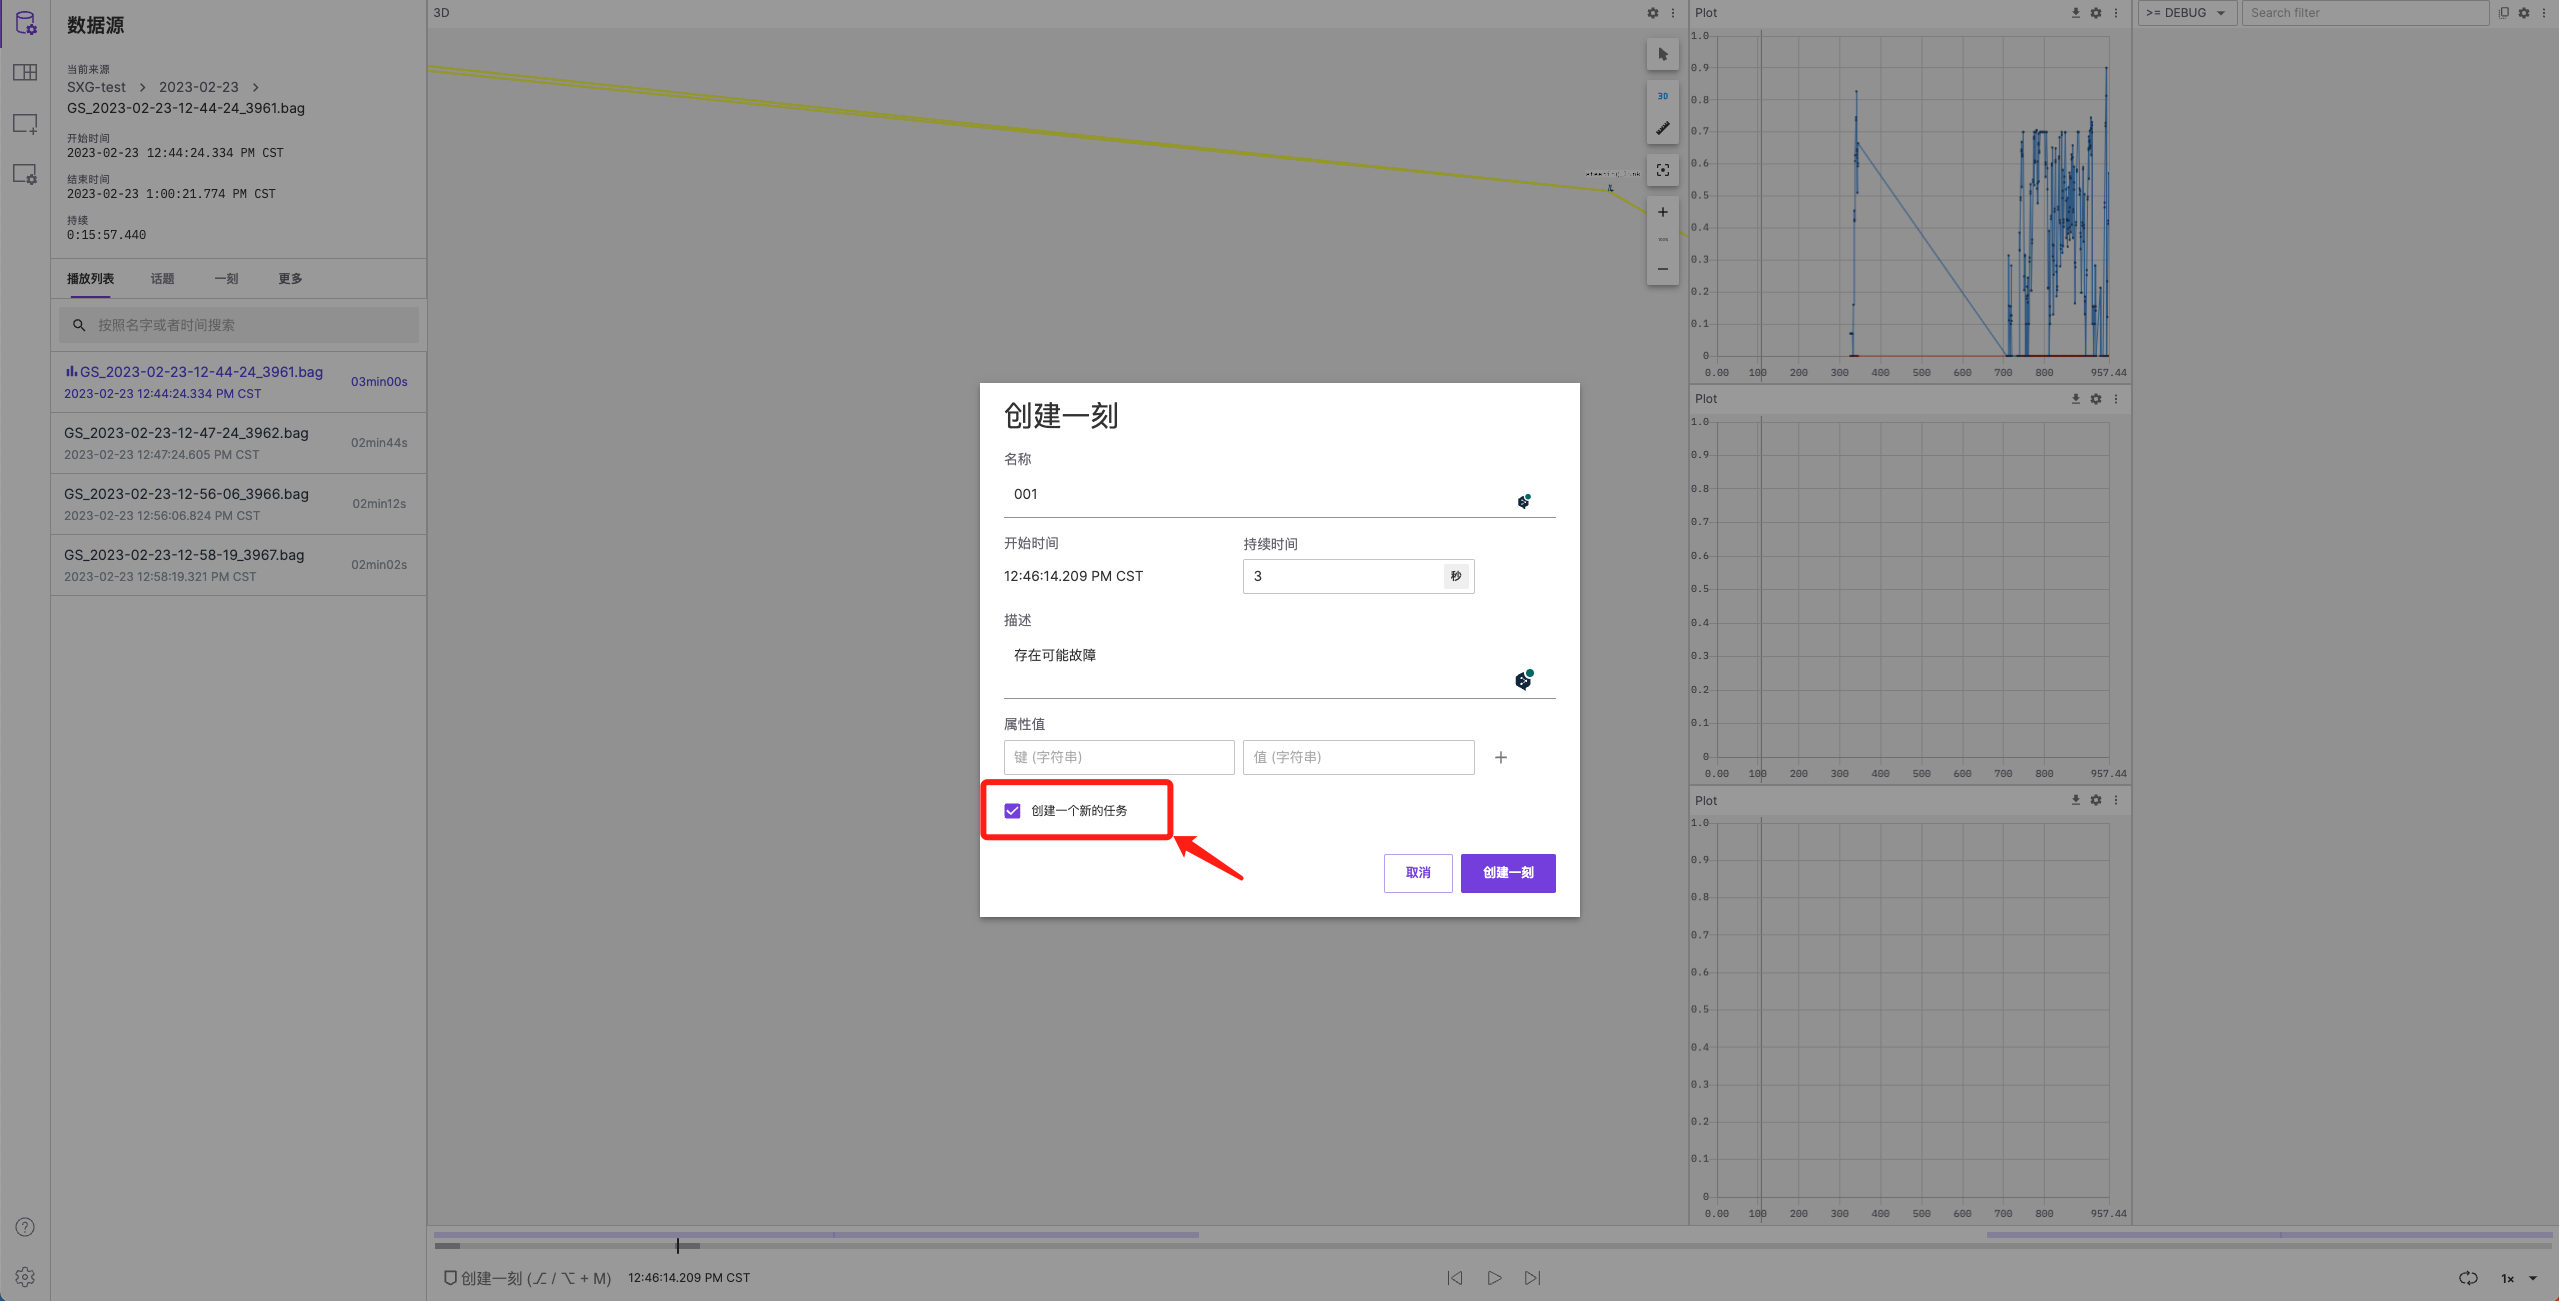
The link to this "Moment" will be automatically added to the task description.
2. View and Edit "Moments" in the Visualization Interface
On the timeline, you can see all "Moments" highlighted in blue.
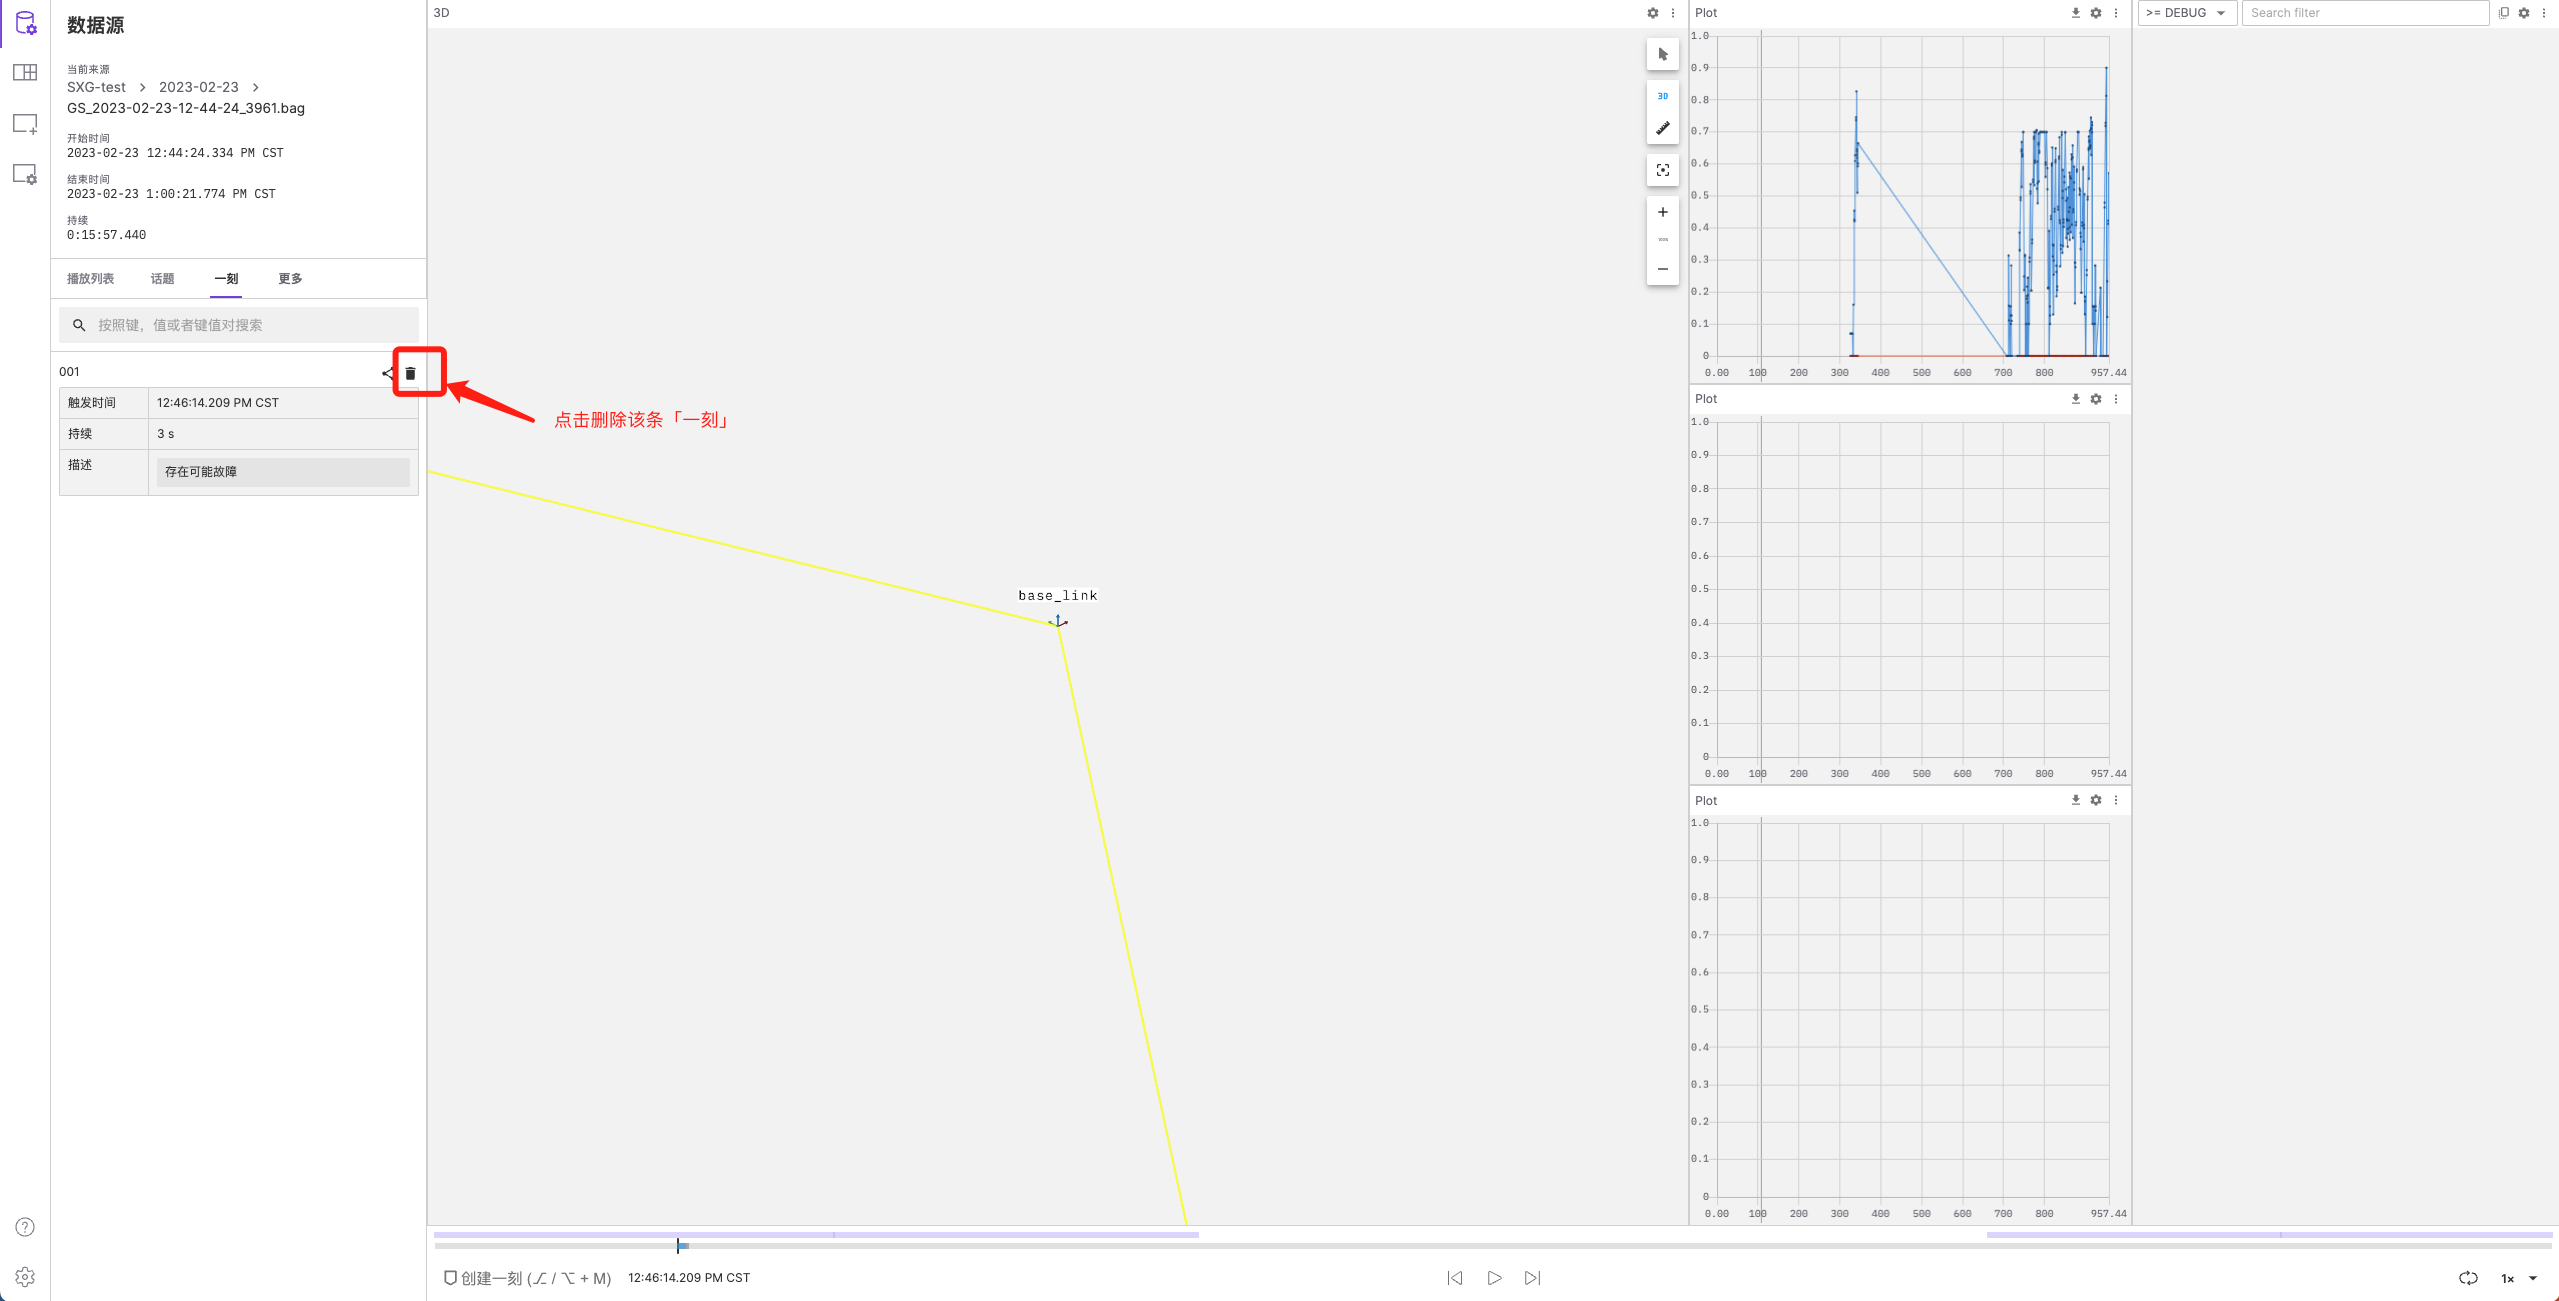
You can view the details of created "Moments" in the "Moments" list on the left side of the visualization interface. Clicking on a specific "Moment" will jump the playback to its starting time.
In the "Moments" list, you can click the delete icon on the top right of a "Moment" to delete it:
3. View All "Moments" in the Record
In the "Moments" list on the right side of the record details page, you can view all "Moments" in the record and click to jump to the corresponding "Moment" starting time in the visualization interface:

4. Share "Moment" Link
In the "Moments" list on the left side of the visualization interface, you can click the copy link icon on the top right of a "Moment" you wish to share. This allows you to copy the link for that "Moment" instantly.
By sharing the link with collaborators, users who possess the link and have viewing permissions for the corresponding record can directly access the visualization page at the starting time of that "Moment".